•A Playlist is a list based Playback Provider that is hosted into a Playback
•A Playlist contains a list of Clips, sorted on different Tracks into a list.
•Compared to a sequence, the Cue number of a Playlist is the same as the Track number
•A Playlist has a default Canvas, but every Clip could be assigned to a different Canvas or even output
Create a Playlist
•On Startup, VERTEX creates a timeline based Sequence for you.
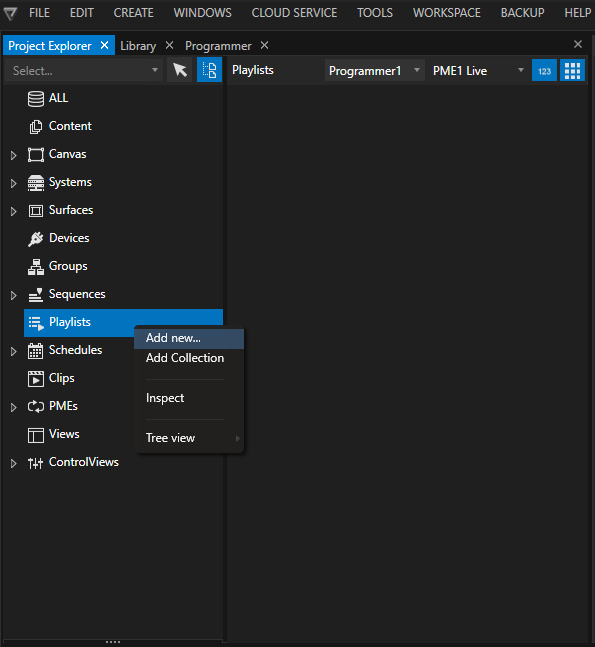
•To create a new Playlist, just navigate to the Playback section into Project Explorer, open context menu by a right click and select "Add New"
•Or just use "Create"in the main menu on the top bar
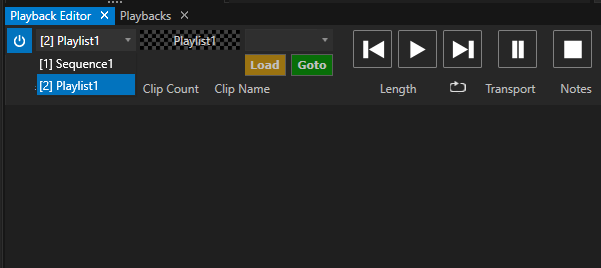
•Go to the Playback Editor and switch to the new Playback "Playlist 1"
User Interface and Workflow
The Playlist in VERTEX is ready for a quick start with its default settings.
For special needs, different options and settings gives you a powerful and flexible way to handle also more complex tasks with a Playlist.
•Drag Content from Project Explorer to the Playback Editor. For each Content item a new Playlist Track is created
 Sequence as Playlist Track
It is also possible to drag a whole Sequence as Content into a Playlist.
•To change the track order:
oSelect one or multiple Tracks, hold the left mouse button and drag it to a new position
oSelect a track, go to Inspector and change "Cue Id"

|
Playlist Cue Number |
Shows the Cue/Track number Green: Currently Playing |
|
Playback Time |
Shows the playback time of the Clip/of the Clips that is/are currently playing |
|
Clip Count |
Shows the amount of Clips on a Track |
|
Clip Name |
Shows Clip Name, and thumbnail of the first Clip of a Cue Shows Clip length of the first Clip of a Cue
Inspect Clips with the help of the context menu. Right-click with your mouse on Track. 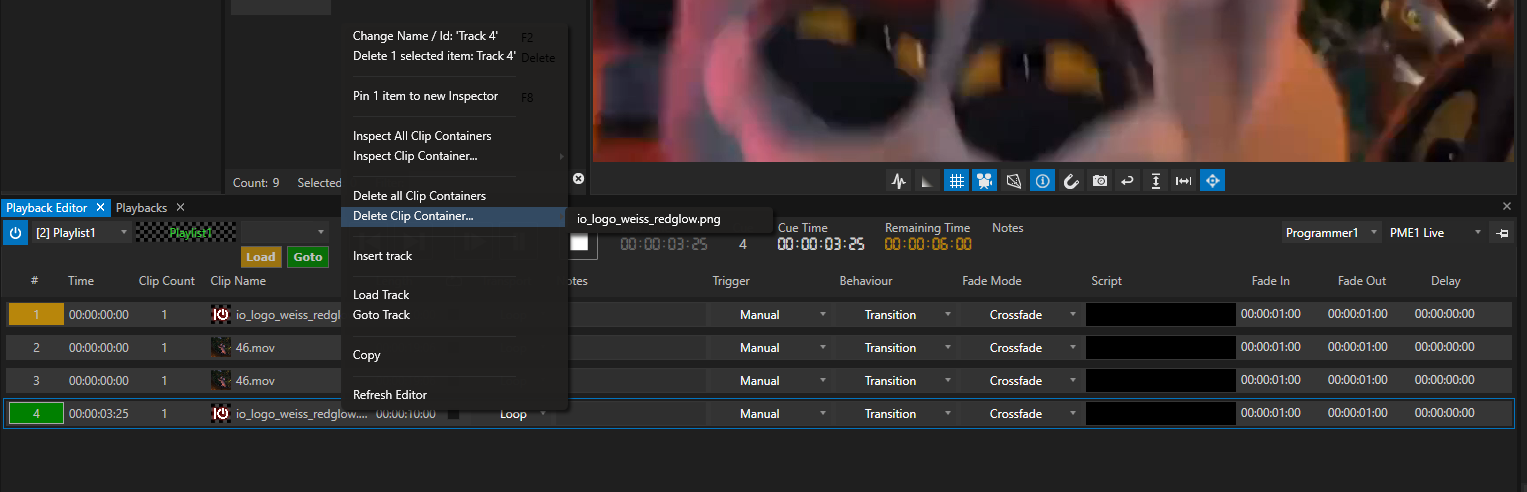 |
|
Freerun |
Sets Freerun on/off for a video Clip |
|
Transport Mode |
Sets Transport Mode for a Clip. Pause: Just pauses the Clip |
|
Notes |
Add a Note. |
|
Trigger |
Sets method how this Cue will be started /triggered |
|
Behaviour |
Defines the Cue behaviour at its end. |
|
Fade Mode |
Defines the type of transition to the next Cue |
|
Script |
Enter a Script Command that should be executed when Cue starts |
|
Time settings for Fade and Start |
Fade In |


Settings
For a Track
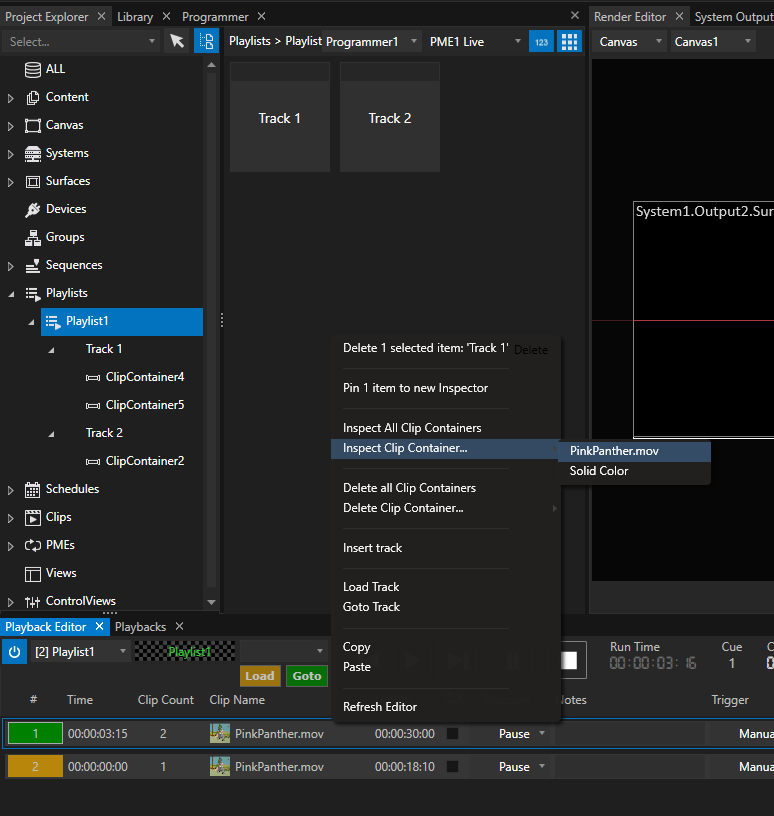
Select a Playlist Track to focus it into the Inspector and adjust its settings from there.
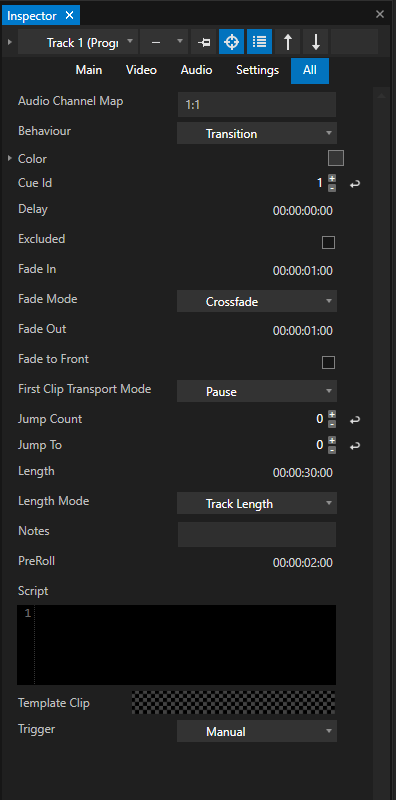
Please keep in mind that there is a difference between this Track settings with behaviour and transitions and the settings for a Clip into this Track
To select a Clip into Inspector and do settings like position in Canvas, corrections, etc, right-click on an Playlist entry, open the context menu and click to "Inspect Clip Containers...."
For a Playlist
Similar to a Sequence, there are also some settings for a Playlist.
Select a Playlist into Project Explorer and change the settings into the Inspector
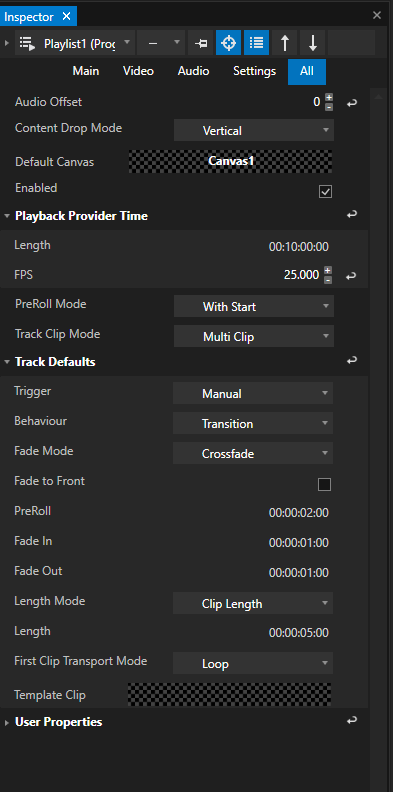
Default Canvas
Defines the default Canvas that is assigned to each Clip.
Drag with your mouse a Canvas from Project Explorer to this property field to change.
Audio Offset
Set an Audio offset for the Playback of the whole Playlist.
Values are in milliseconds.
Enter a negative value to play Audio earlier than video
Enter a positive value to delay Audio from video
Length and FPS
Changing FPS will affect the displayed Timecode for a Playlist.
Length will affect the length of the Playlist as Playback provider
Global Position Offset and Global Position Scale (Advanced Inspector Mode)
Sets a Global Offset for Position for all Content into a Playlist
or
Scales all Content into a Playlist globally
Track Clip Mode
Single Clip (default)
A Track/cue of a Playlist can host only 1 Clip
Multi Clip
A Track/cue of a Playlist can host multiple Clips.
Read Subchapter "Multi Clip Mode" for more information
Track Defaults
Set up default values and settings that are valid for every new Playlist entry you will create
Read more about this setting in the subchapter above
 Caution when using a Playlist with just 2 Tracks in Follow mode:
The default Pre-Roll Mode (With Start) in the Playlist settings might interfere with the transition between tracks.
Please set it to Before End so that the following clip will not be pre-loaded during the crossfade, if you are arranging a Playlist with only two Tracks.
Multi Clip Mode
•In "Multi Clip" Mode , VERTEX is able to host a number of Clips on the same Playlist Track
•With this feature you are allowed to handle more complex scenarios within a Playlist:
e.g. to play multiple Clips on different Canvases with one single Playlist Cue.
•To use this feature, you first have to change the Track Clip Mode of a Playlist. By default, this mode is set to Single
Working in Multi Clip Mode
•Create a Clip by first dragging just 1 content item from Project Explorer into the Playback Editor
•Then, drag one or more Content Items from Project Explorer to the same Track: the Clip Count of this Track increases
•Also in Project Explorer all Clips now are listed as subordinate elements of a Track
•Inspect a Clip Container with help of the Context Menu: Right-Click on a Track to open a list of Clip Containers or to Inspect All
•Delete a Clip Container with help of the Context Menu: Right-Click on a Track to open a list of Clip Containers or to Delete All