•There are different options to control VERTEX with incoming DMX-Data
•Just control Playbacks or Systems or make use of DMX-512 to make a more complex Surface modulation
•VERTEX additionally introduces the concept of a Console Layer that gives you the options to control VERTEX like a lighting fixture
•With a DMX-Input Device you are able to use DMX data into scripts or into e.g. the Trigger-Editor
 DMX Routing
To make use of all options below, you first have to create a DMX Routing. Use the DMX Routing Editor to set up your incoming DMX protocol (Art-Net™, sACN, MA-Net2 or DMX-512 with ioversals ioversal DMX IO)
You have to do this setup once.
Control a Playback with DMX-512
•Once a DMX Routing is created, a Playback can be controlled by incoming DMX-Data
•8 DMX-Channels allow controlling e.g. opacity, play/pause or jump to a cue
•DMX-512 settings for playback control are located in the PME (Playback Mixing Engine).
Settings
•Go to Project Explorer > PMEs
•Select PME1 (live)
•Select the Playback to be controlled by DMX
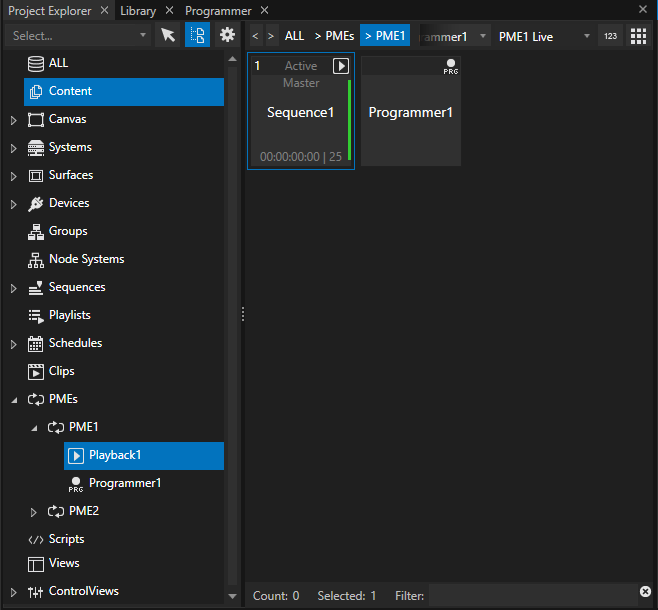
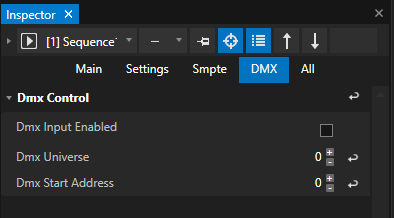
•Go to Inspector > DMX and set the start address and universe
•Don't forget to enable the DMX Input for this Playback
DMX Channel Map
DMX Address |
Parameter Name |
Type |
Default Values |
Values |
||||
1 |
Opacity |
16bit |
65535 |
0-65535 |
||||
3 |
On/Off |
8bit |
255 |
0-127 Off |
128-255 On |
|||
4 |
Play Pause Stop |
8bit |
45 |
0-10 Idle/None |
11-20 Play Once |
21-30 Play Loop |
31-40 Pause |
41-50 Stop |
5 |
Speed Factor |
8bit |
128 |
0-124 0x - 1x |
125-130 1x |
131-255 1x - 4x |
||
6 |
Cue Selection |
16bit |
0 |
0-65535 |
||||
8 |
Frame Selection |
16bit |
0 |
0-65535 |
||||
Control a System with DMX-512
•Once a DMX Routing is created, VERTEX can be controlled by incoming DMX-Data
•6 DMX-Channels allow controlling various elements in your project: i.e opacity, system volume, triggering Scripts by ID and many more functions.
Settings
•Select your System and go to Inspector
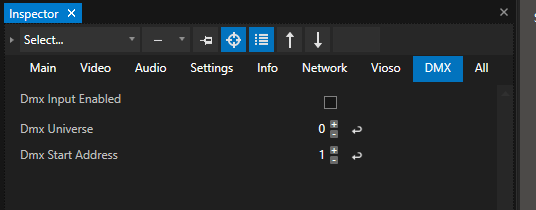
•Select the DMX Tab into Inspector and do your settings for start address and universe
•Don't forget to activate the DMX Input for this System
DMX Channel Map
DMX Addresss |
Parameter Name |
Type |
Default Value |
Note |
1 |
Live Master |
16bit |
0 |
16bit opacity 1 mode for crossfade wipe modetexture |
2 |
fine |
|||
3 |
Live Volume |
16bit |
0 |
|
4 |
fine |
|||
5 |
Script Control |
8Bit |
0 |
0=idle 1-254 Script Id 255 Take after 1sec |
6 |
Function Control |
8Bit |
0 |
0=idle 255 Take after 1sec values: 1 Enter Fullscreen, 2 Leave Fullscreen, 3 Take Over master, 4 Init Ndi, 5 init Video Inputs, 6 Reset Video Inputs, 7 Reset RenderEngines |
Control a Surface with DMX-512
•Once a DMX Routing is created, VERTEX offers you the option to control a Surface by incoming DMX-Data
•With 104 DMX-Channels your are able to control most parameters of a Surface
Settings
•Select your Surface and go to Inspector
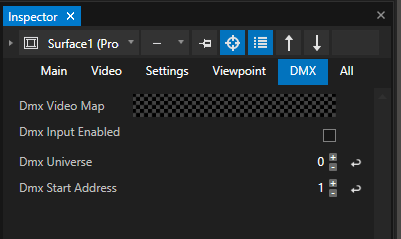
•Select the DMX Tab into Inspector and do your settings for start address and universe
•Don't forget to activate the DMX Input for this System
DMX Address |
Category |
Parameter Name |
Type |
Default Value |
Note |
|
|---|---|---|---|---|---|---|
1 |
opacity coarse |
1 |
16bit |
0 |
16bit opacity 1 mode for crossfade wipe modetexture |
|
2 |
opacity fine |
1 |
||||
3 |
Position |
xpos coarse |
2 |
16bit |
32768 |
32768 = 0 65535 = + 16.000 pixel 0 = -16.000 pixel |
4 |
xpos fine |
|||||
5 |
ypos coarse |
2 |
16bit |
32768 |
32768 = 0 65535 = + 16.000 pixel 0 = -16.000 pixel |
|
6 |
ypos fine |
|||||
7 |
zpos coarse |
2 |
16bit |
32768 |
32768 = 0 65535 = + 16.000 pixel 0 = -16.000 pixel |
|
8 |
zpos fine |
|||||
9 |
Rotation |
xrot coarse |
2 |
16bit |
32768 |
mode crosse fade from absolut to continous value |
10 |
xrot fine |
128 = no motion 255=fastForward 0= fastReverse |
||||
11 |
yrot coarse |
2 |
16bit |
32768 |
||
12 |
yrot fine |
|||||
13 |
zrot coarse |
2 |
16bit |
32768 |
||
14 |
zrot fine |
|||||
15 |
Scale |
xscale |
2 |
16bit |
32768 |
|
16 |
xscale fine |
|||||
17 |
yscale |
2 |
16bit |
32768 |
||
18 |
yscale fine |
|||||
19 |
zscale |
2 |
16bit |
32768 |
||
20 |
zscalefine |
|||||
21 |
Geometry Folder |
1 |
0 |
|||
22 |
Geometry File |
1 |
0 |
|||
23 |
Blend Folder |
1 |
||||
24 |
Blend File |
1 |
||||
25 |
Col Temp Intensity |
2 |
16bit |
0 |
||
26 |
fine |
|||||
27 |
Col Temp Value |
2 |
16bit |
32768 |
||
28 |
fine |
|||||
29 |
Color Correction |
Hue |
2 |
16bit |
32768 |
|
30 |
fine |
|||||
31 |
Saturation |
2 |
16bit |
32768 |
||
32 |
fine |
|||||
33 |
Contrast |
2 |
16bit |
32768 |
||
34 |
fine |
|||||
35 |
Brightness |
2 |
16bit |
32768 |
||
36 |
fine |
|||||
37 |
Red Balance |
2 |
16bit |
32768 |
||
38 |
fine |
|||||
39 |
Green Balance |
2 |
16bit |
32768 |
||
40 |
fine |
|||||
41 |
Blue Blanace |
2 |
16bit |
32768 |
||
42 |
fine |
|||||
43 |
Levels Min |
2 |
16bit |
0 |
||
44 |
fine |
|||||
45 |
Levels Value |
2 |
16bit |
32768 |
||
46 |
fine |
|||||
47 |
Levels Max |
2 |
16bit |
65535 |
||
48 |
fine |
|||||
49 |
ViewPoint OffsetX |
2 |
16bit |
32768 |
||
50 |
fine |
|||||
51 |
ViewPoint OffsetY |
2 |
16bit |
32768 |
||
52 |
fine |
|||||
53 |
ViewPoint OriginX |
2 |
16bit |
32768 |
||
54 |
fine |
|||||
55 |
ViewPoint OriginY |
2 |
16bit |
32768 |
||
56 |
fine |
|||||
57 |
ViewPoint OriginZ |
2 |
16bit |
30161 |
||
58 |
fine |
|||||
59 |
ViewPoint TargetX |
2 |
16bit |
32768 |
||
60 |
fine |
|||||
61 |
ViewPoint TargetY |
2 |
16bit |
32768 |
||
62 |
fine |
|||||
63 |
ViewPoint TargetZ |
2 |
16bit |
32768 |
||
64 |
fine |
|||||
65 |
Field Of View |
2 |
16bit |
0 |
Default 45° 0_65535 = 0 - 180 |
|
66 |
fine |
|||||
67 |
Roll |
2 |
16bit |
32768 |
||
68 |
fine |
|||||
69 |
Aspect Ratio |
2 |
16bit |
65535 |
||
70 |
fine |
|||||
71 |
ViewPoint Mode |
1 |
||||
72 |
ViewPoint Ctrl |
1 |
||||
73 |
Edge Blending |
Left |
2 |
16bit |
0 |
|
74 |
fine |
|||||
75 |
Left Start |
2 |
16bit |
0 |
||
76 |
fine |
|||||
77 |
Left Gamma |
2 |
16bit |
0 |
||
78 |
fine |
|||||
79 |
Left Luminance |
2 |
16bit |
32768 |
||
80 |
fine |
|||||
81 |
Right |
2 |
16bit |
0 |
||
82 |
fine |
|||||
83 |
Right Start |
2 |
16bit |
0 |
||
84 |
fine |
|||||
85 |
Right Gamma |
2 |
16bit |
0 |
||
86 |
fine |
|||||
87 |
Right Luminance |
2 |
16bit |
32768 |
||
88 |
fine |
|||||
89 |
Top |
2 |
16bit |
0 |
||
90 |
fine |
|||||
91 |
Top Start |
2 |
16bit |
0 |
||
92 |
fine |
|||||
93 |
Top Gamma |
2 |
16bit |
0 |
||
94 |
fine |
|||||
95 |
Top Luminance |
2 |
16bit |
32768 |
||
96 |
fine |
|||||
97 |
Bottom |
2 |
16bit |
0 |
||
98 |
fine |
|||||
99 |
Bottom Start |
2 |
16bit |
0 |
||
100 |
fine |
|||||
101 |
Bottom Gamma |
2 |
16bit |
0 |
||
102 |
fine |
|||||
103 |
Bottom Luminance |
2 |
16bit |
32768 |
||
104 |
fine |
|||||