•ControlView is a fully customizable graphical user interfaces programmed by the user.
•Design and build your own graphical user interface. No programming skills needed.
•ControlViews can run in fullscreen mode on any VERTEX System
•VERTEX' Web View feature makes a ControlView accessible in any web browser connected to your local network.
Basics
•VERTEX is shipped with extensive library of various control elements - find them at Library > Controls and drag them into the Control View Editor window.
•Detailled layout parameters allow you to build a ControlView fitting e.g. a client's cooperate design
•Control Views can be run in either the ControlView Editor as part of VERTEX' UI or in fullscreen mode. The fullscreen display is called Control Viewer.
•Fullscreen touch interfaces can also be used as transparent overlay on a desktop or even on top of a Fullscreen Renderer.
•Every control element can be accessed by a script command or API.
ControlView Workflow
•When you create a New Project, Vertex automatically adds a first ControlView by default.
•You can create further ControlViews from the Main Menu > Create or context menu by right clicking on Control View Manager in the Project Explorer.
•ControlView Editor has got two different modes: Edit (interface design) or Run (interface use).
Open ControlView Editor
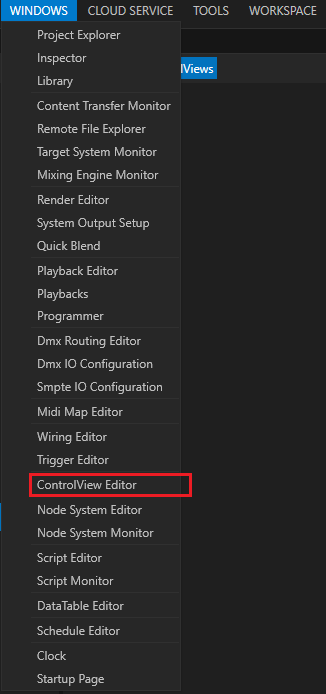
1.Either go to Main Menu > Windows > ControlView Editor
2.or open the ControlView Editor from the context menu (right-click) of the particular ControlView in the ProjectExplorer.
Edit Mode
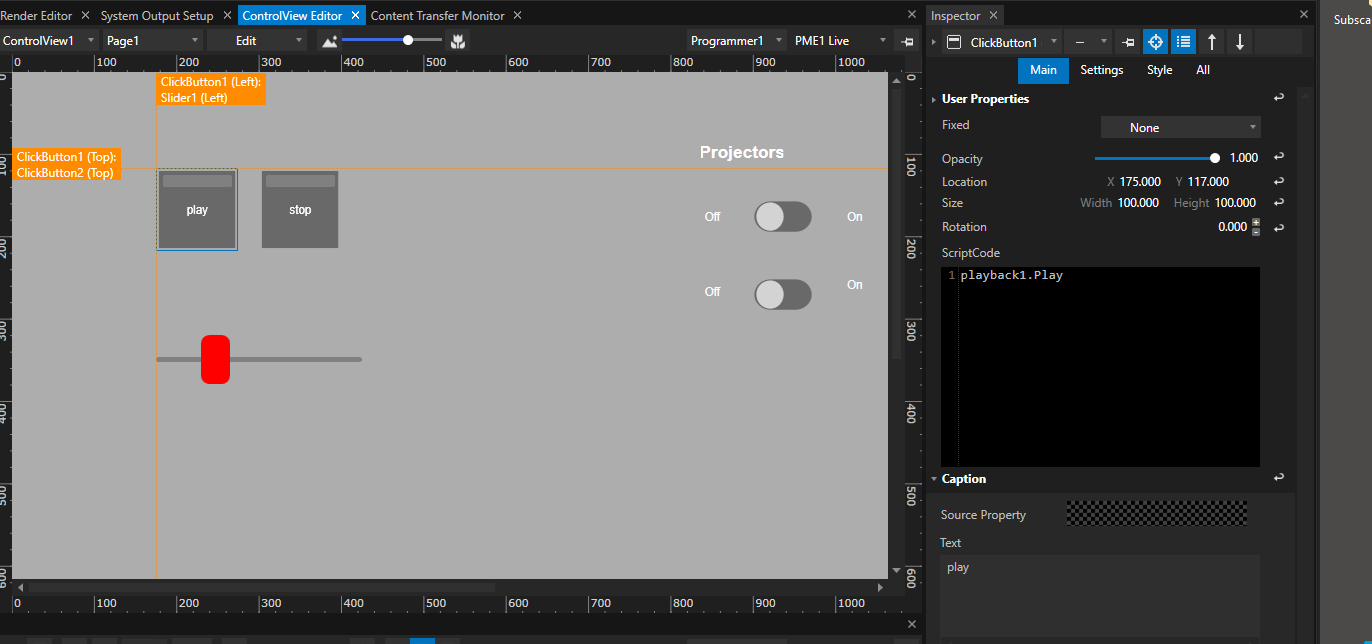
1.Add controls such as buttons or sliders by dragging them from the library and dropping the onto the desired location. In edit mode Controls can be moved around by click and drag.
2.Selection ControlViews and Pages for your current edit from the drop-downs. Add more with the + Button, because your VERTEX project may contain multiple ControlViews which may contain multiple Pages.
3.Use this drop-down to switch between Edit and Run mode - alternatively you can run ControlViewer in fullscreen.
4.Options for zooming in and out or to individual controls.
5.Show/ hide the ruler grid. Snapping is enabled by default and other layout helpers can be accessed from the context menu.
6.Buttons for enabling WebView and opening it in a browser.
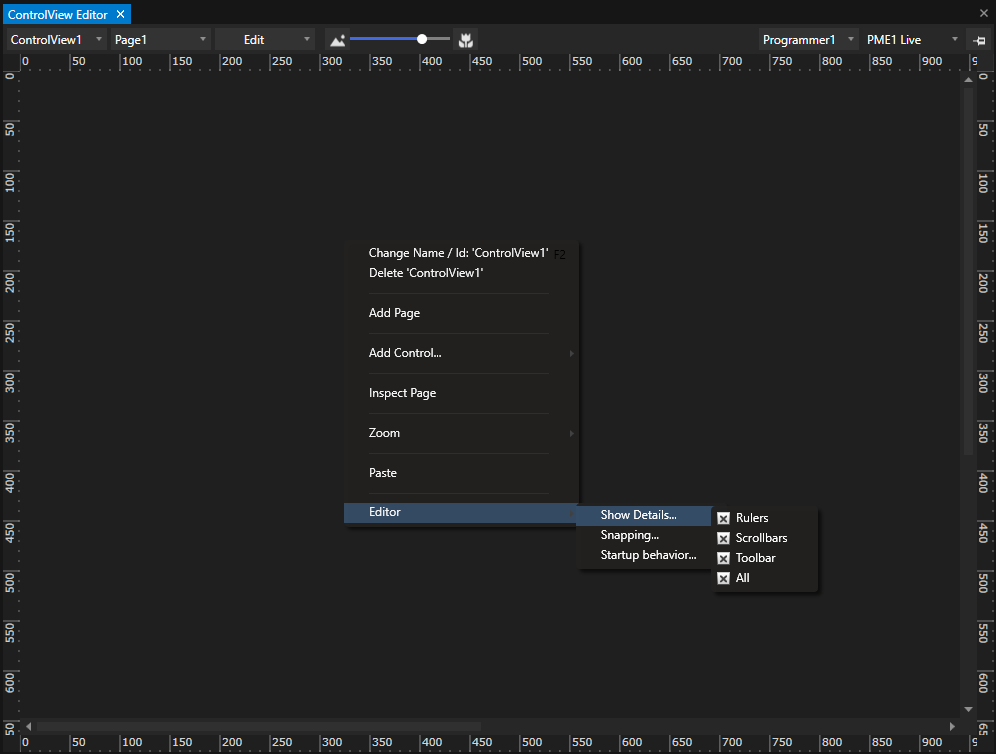
7.Add ControlViews or Pages from the editor's context menu.
8.Adjust style and settings for ControlView or individual Controls in the inspector - select to inspect.
Editor Settings
•Open the context menu with a right click in edit mode and go to Editor to set the ControlView Editor's layout helpers, snapping or the startup behavior.
Pages
•The use of multiple ControlView Pages allow a creative design with submenus thematically sorted in order to keep your ControlView neat and clean.
Run Mode
•all objects are locked
•all rulers and context menus are deactivated
•Controls cannot be selected to inspect
ControlViewer
•Each VERTEX System can display ControlViews in fullscreen - this fullscreen window is called Control Viewer.
•Depending on your VERTEX license, it is possible to run both on the same system: a Control Viewer and a video rendering fullscreen window for your System Output.
•It is also possible to have a transparent ControlView layer on top of your fullscreen video rendering window or on your Windows desktop.
Settings
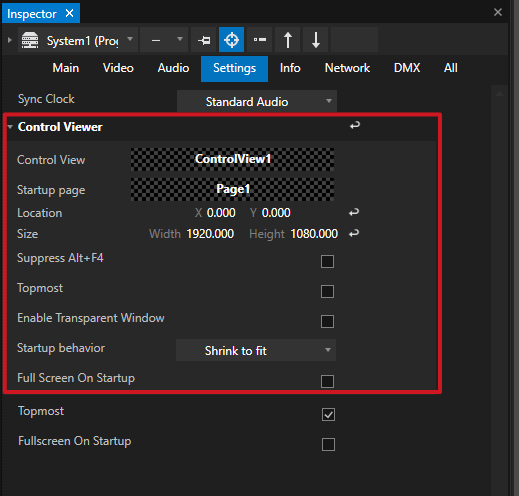
Go to System > Settings > Control Viewer
Location |
positions the fullscreen ControlViewer on your virtual Windows desktop in top-left start coordinates. |
|
Size |
sets the Control Viewer's size. |
|
Enable Transparent Window |
allows for the Control Viewer to act as a transparent layer. Prerequisite for this transparency, however, is a transparent background color. Access the ControlView's Style tab in the Inspector and set the Background Color alpha channel to transparent. |
|
Full Screen On Startup |
ControlViewer goes to fullscreen immediately when the project is loaded |
|
Suppress ALT+F4 |
disables this shortcut to prevent the accidental closing of ControlViewer in FS |
|
Topmost |
enables FS Control Viewer to remain topmost window - this setting is essential, if you would like to keep using a transparent ControlViewer window on top of other applications. |
|
Startup Behavior |
options for scaling & focusing of the FS Control Viewer on startup |
|
Control View |
select the particular ControlView for startup behavior |
|
Startup Page |
select the particular ControlView Page for startup behavior |
Open Control Viewer In Fullscreen With These Options:
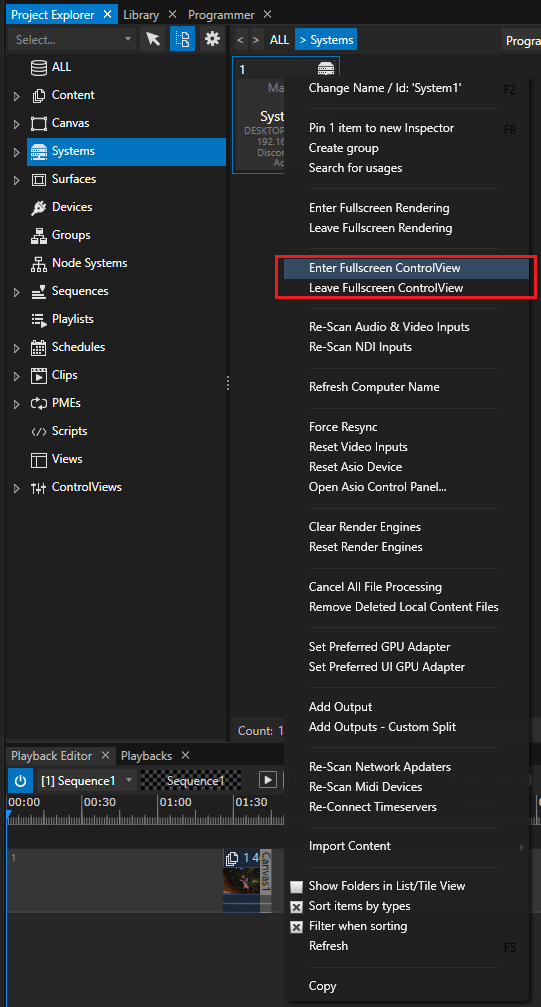
• Project Explorer > System > context menu
Right-click on any system and select "Enter Fullscreen ControlView"
If working with multiple Systems in a session, you can remotely set another System's Control Viewer to fullscreen mode.
Also, there is a menu entry in the same location for leaving fullscreen mode.
•The shortcut CTRL + F5 opens the Control Viewer on your local System.
Press the same shortcut on your local System to close.
•Control Viewer Button in Status Bar
opens the Control Viewer on your local System in Full Screen.
Use the shortcut CTRL+ F5 to close.
• Script Commands to open and close the Control Viewer on any system in your session:
System1.ControlViewer.Open
System1.ControlViewer.Close
or just for your local system:
ControlViewer.Open
ControlViewer.Close
Access a ControlView with a Script
Like most things into VERTEX also ControlViews are accessible with a Script Command.
 Please note the difference between:
- a ControlView that contains pages with controls (buttons, sliders, labels etc.) and is accessed via the ControlView Editor window
- and the ControlViewer, that is the full screen window hosting the current ControlView.
It is crucial to keep this detail in mind when using VERTEX script commands with ControlView.
Difference between ControlView and ControlViewer
To access a ControlView's layout elements and settings, start your Script with the VERTEX Object ControlView ( i.e. "ControlView1")
ControlView1.Pages.Page1.Label1.Delete
Change the current page that is being displayed in the full screen ControlViewer with the GoToPage script command.
In this case you will need to start your Script with the ControlViewer object like so:
ControlViewer.GotoPage Page2
Some controls like a ClickButton have a GoToPage property in their Inspector's Settings tab, which can be used in addition to the control's main function.
Using a script to set the GoToPage-target requires to call the page's name by its full path - as in this example of a ClickButton:
ControlView1.Controls.ClickButton1.GotoPage.Value = ControlView1.Pages.Page2
Script examples
Change the label text of Label 1 in ControlView1
ControlView1.Controls.Label1.Settings.Caption.Text.Value = "this is a new label text"
Perform a Click on Button 1 of ControlView1
ControlView1.Controls.ClickButton1.Click
Return the current Page that is displayed by ControlViewer1
ControlViewer.GetPage
Set ControlViewer to display Page 2 of the ControlView currently in use. This also works as a script for controls like a ClickButton.
ControlViewer.GotoPage Page2
Delete Label 1 on Page 1 of ControlView1
ControlView1.Pages.Page1.Label1.Delete
