•VERTEX comes with a unique version management that allows you to handle different content versions with ease.
•Import a new version into project explorer and switch between the different versions of your content back and forth.
•The version of every content file that is used in your sequences and playbacks can be changed with only one click in the inspector or by script.
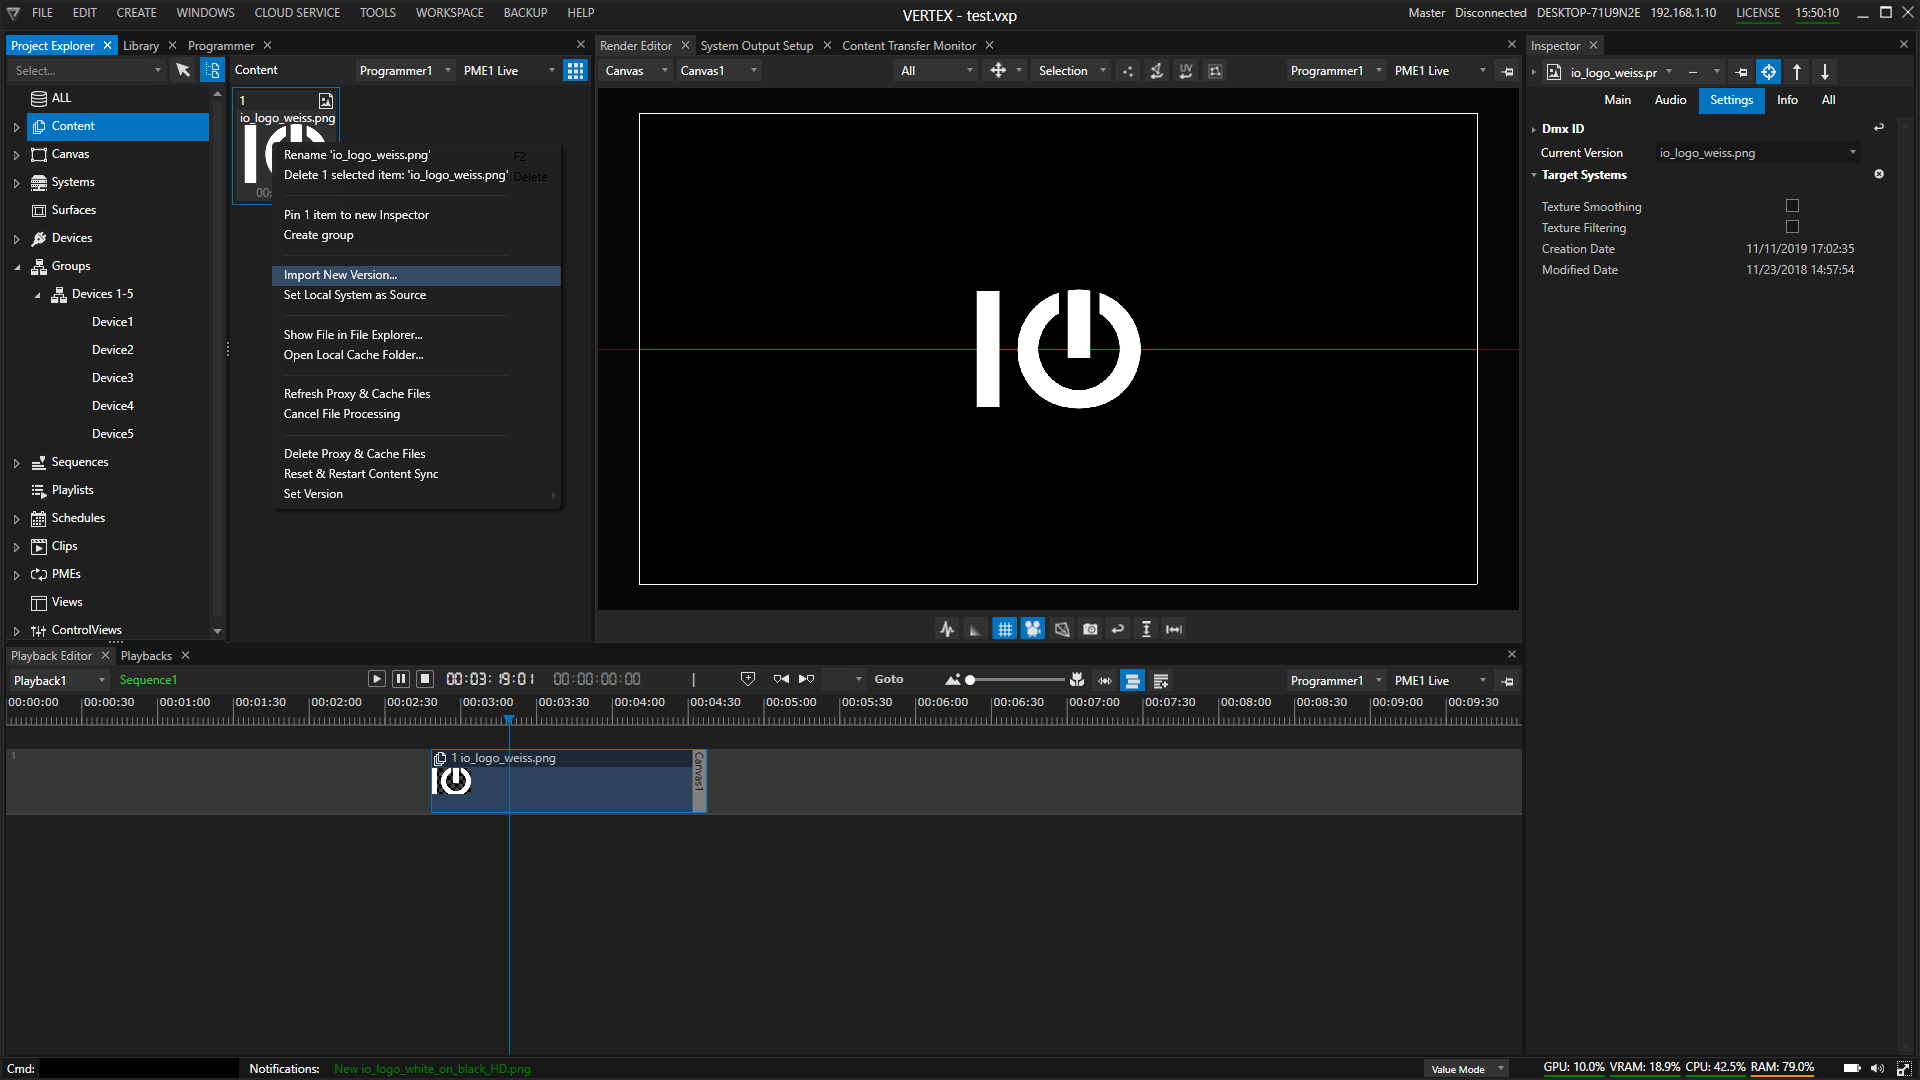
Import a new Version
The import of a new content version differs from the workflow how regular content is imported into VERTEX
The command Import New Version is always related to an already existing content item in your project explorer.
Therefore you will find the version import dialog only in the context menu of the content item in regard.
1.select a content item in your project explorer
2.open the context menu by a right click with your mouse on this item
3.select "import new version"
4.a file explorer window pops up - select your new content there and confirm
5.proxy and audio files are generated for this content -
6.the thumbnail in the project explorer is switched to the new content
7.all clip containers or playback clips are changed to the new content.
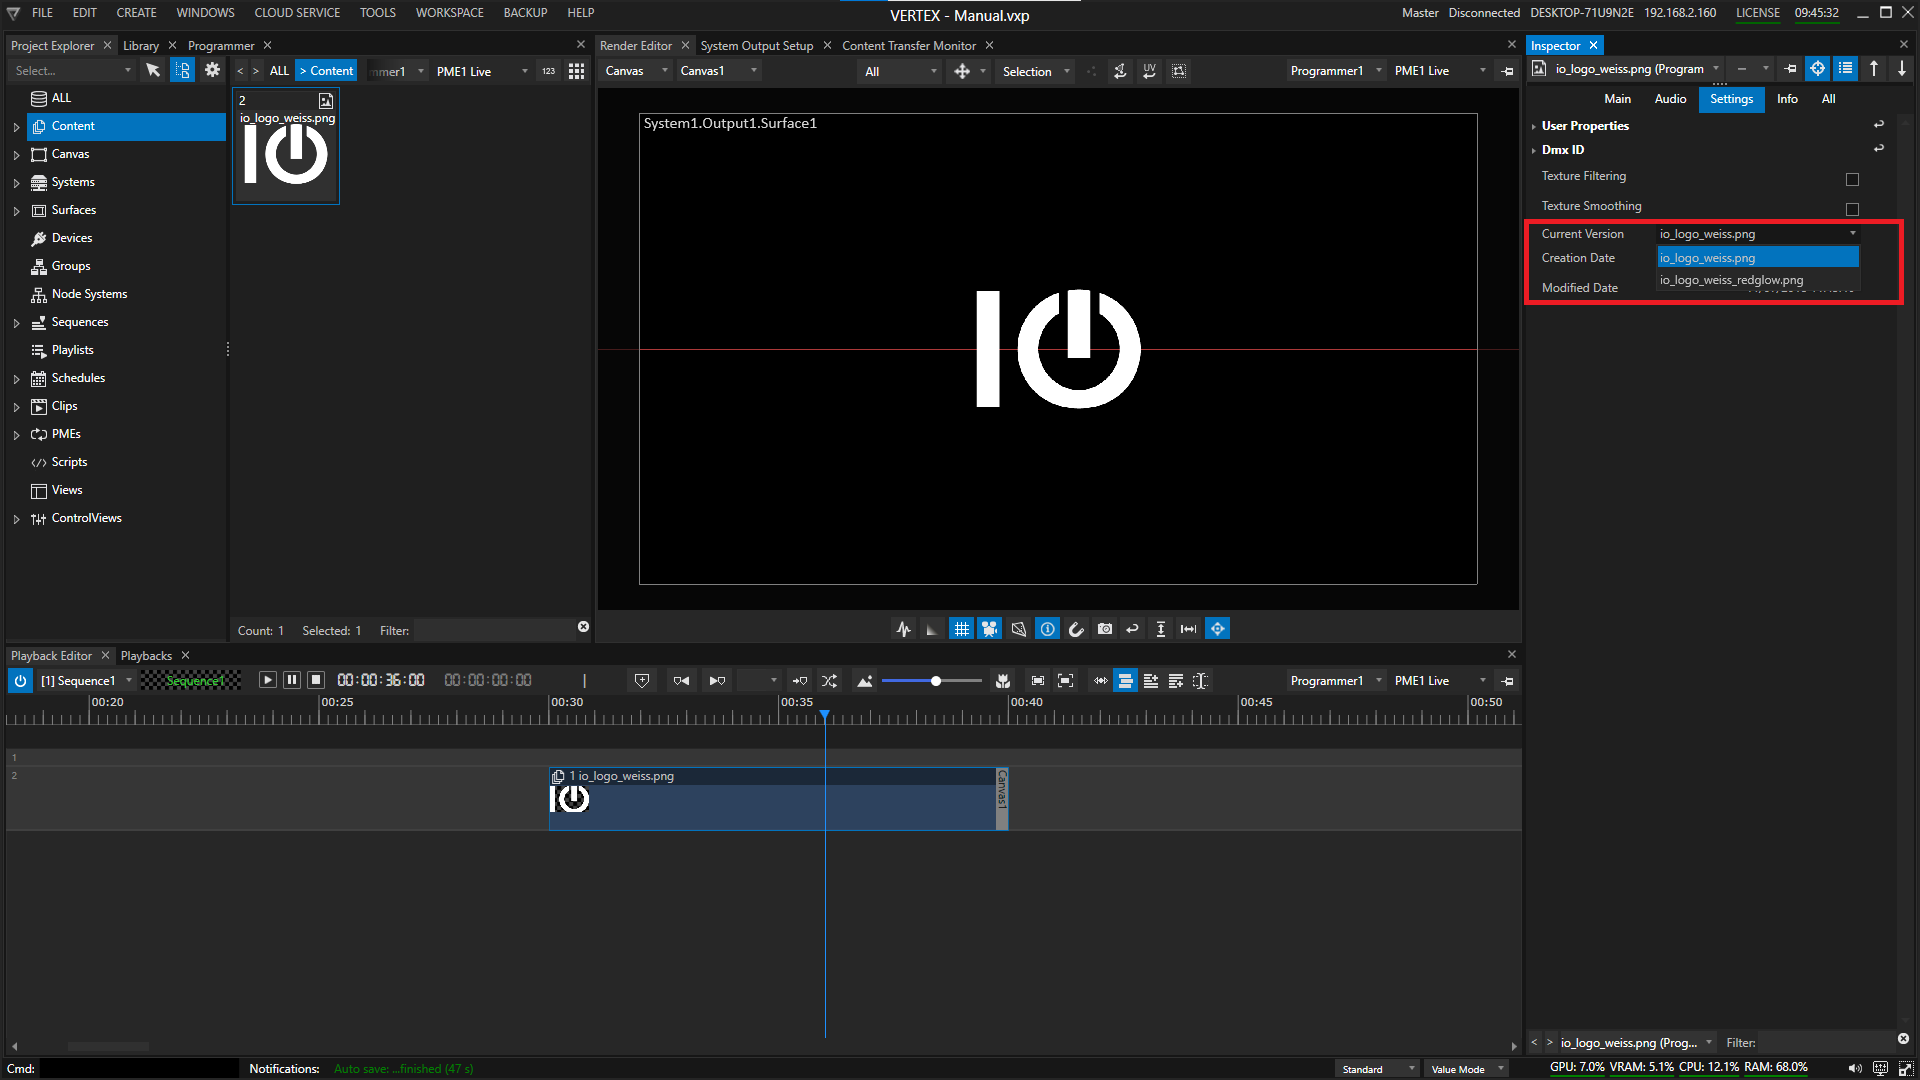
Switch back and forth between content versions
1.select the content item in the project explorer
2.the item should be shown in the inspector
3.go to the settings tab in the inspector
4.select your preferred versions in the content-version drop menu
5.the content has now been changed in all places of your project to the version you have selected.
Version switching also is possible with Script Commands

