•Tracks host all Clip Containers within your Sequence aiding to structure your arrangement and sort the compositing / redendering hierarchy.
•Move Clip Containers freely between different tracks
•Configuring a track’s default settings applies those properties—such as Clip Targets—to all Clip Containers created on that track.
Add Track
There are 2 ways to add a track:
Add Track Icon into Playback Editor UI
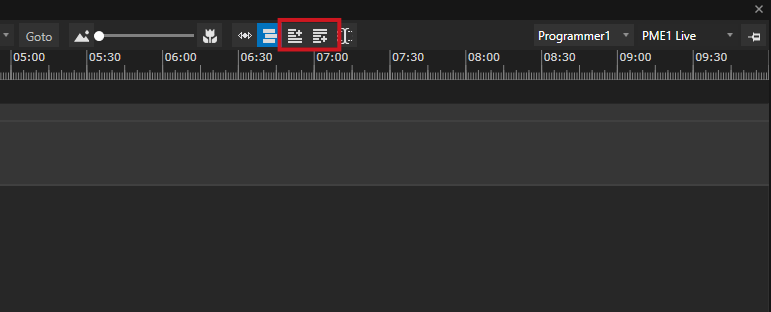
•The first of the two +-buttons adds a new track on the top
•The second + button adds a new track at the bottom below all other tracks
 Unlike layers in other media servers, Tracks impose no restrictions: they simply organize Clip Containers and can hold track-level settings; both Tracks and Clip Containers remain flexible, similar to objects in video editing or compositing software.
Add Tracks via Context Menu

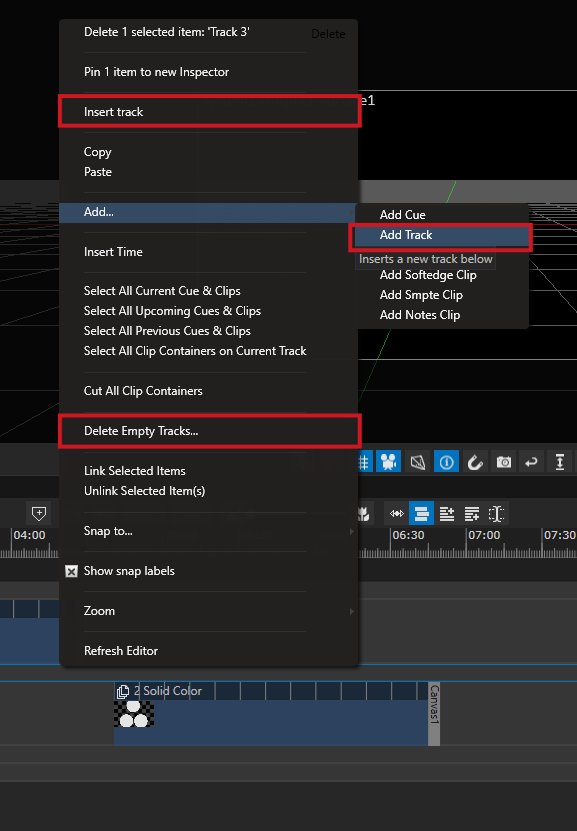
•right-click in the Playback Editor to open the Context Menu
•go to "Add..." and select "Add Track" - a new track is added below all pre-existing tracks
•if you right-click onto a pre-existing Track, the context menu shows the option "Insert Track" which will add a track above the one you've right-clicked
•furthermore, the option "Delete Empty Tracks" will clean up your current Sequence
 Scroll and Zoom
Use your mouse wheel to scroll up and down, hold down CTRL-Shift while using the mouse wheel to scroll the timeline horizontally.
To adjust the Playback Editor's zoom level, use + and - keys or hold down CTRL while using the mouse wheel.
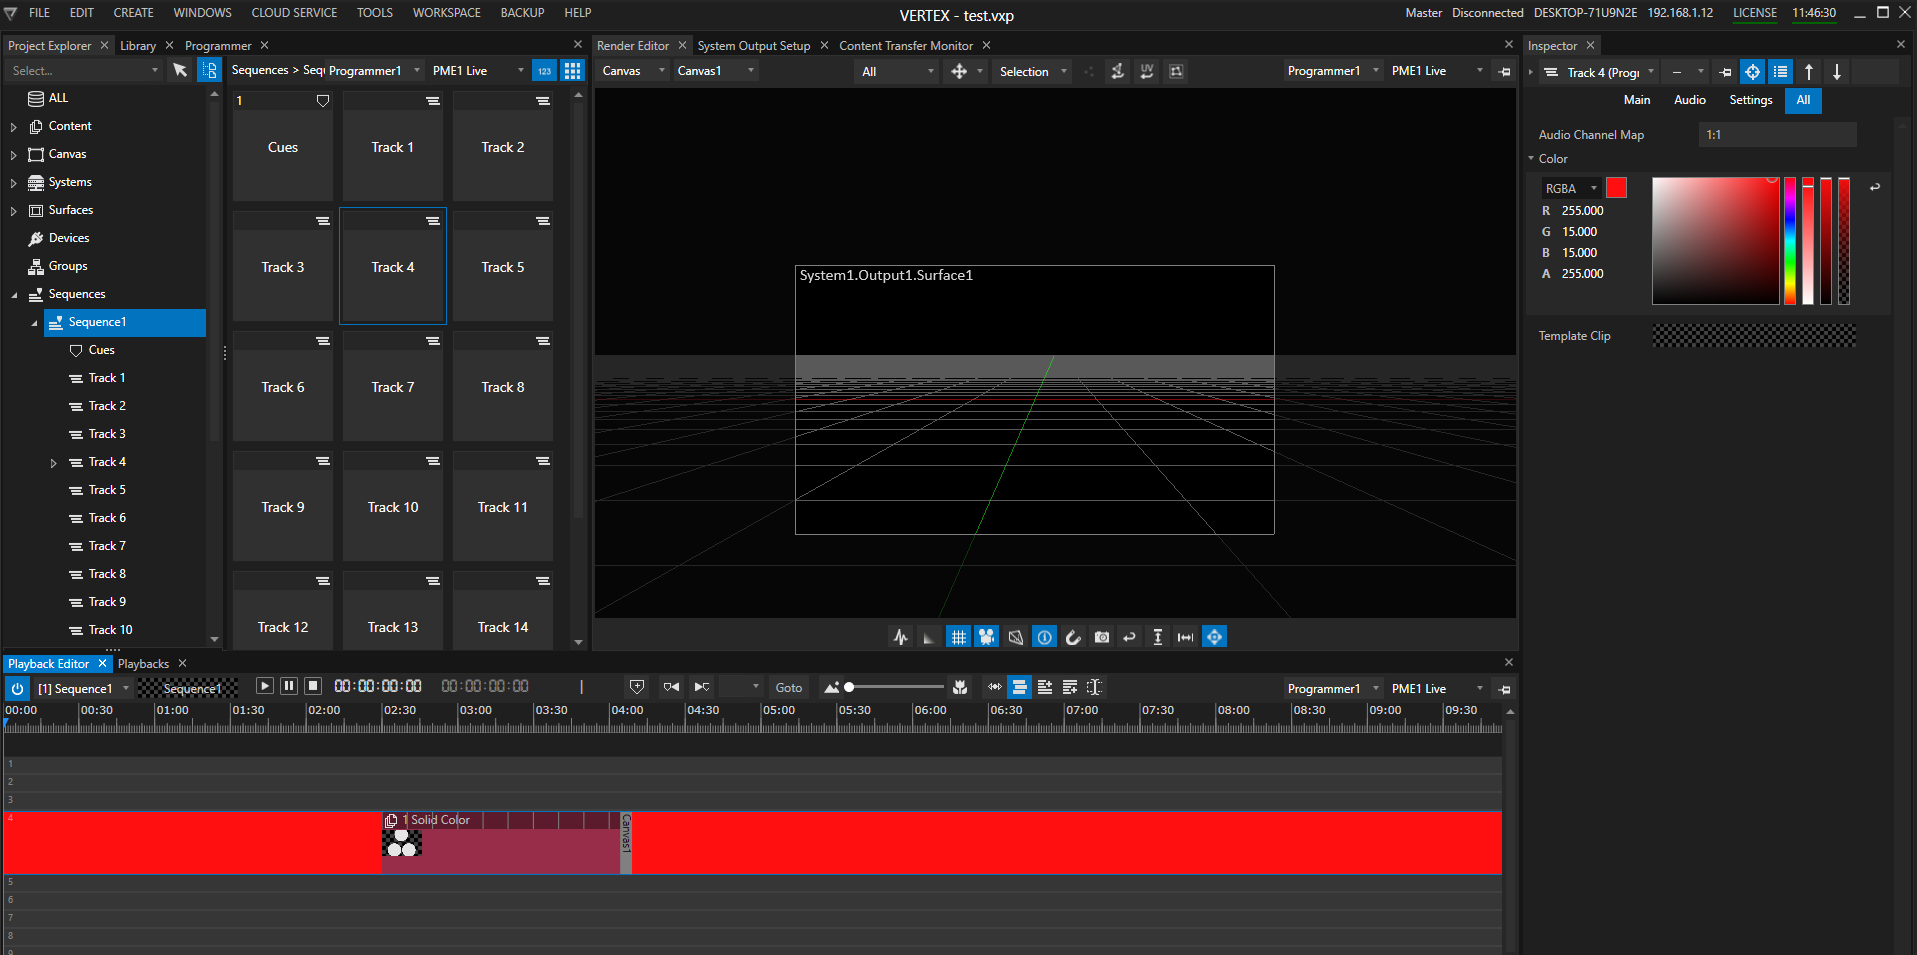
Accessing a Track's Settings
Option 1 Playback Editor
•Left-Click with your mouse on a free space of a track - avoid accidentally selecting a Clip Container
Option 2 Project Explorer
•double-click on the project item of your current Sequence
•or expand the Sequences Manager in the Project Explorer's tree view
•select a Track
•your Track is shown in the Inspector
Audio Channel Map |
Sets a default routing matrix for audio channels per Track. Source channels are located on Y axis, output channels on X axis. |
Auto-Fit |
Defines a default Auto-Fit setting, ensuring any content will be fitted to the defined target resolution; adjusting UV Mode and Default Plane Resolution properties accordingly for each clip. |
Color |
Sets a user specific Track Color as shown in the screenshot above - ideal to stay organized. |
Default Clip Target |
Sets a new default target for each Clip Container created on that Track. The original default it is set to Canvas1. Alternative targets can be selected from the drop-down menu or by drag & drop from Project Explorer, including: Canvases, Destinations, System Outputs. Note: a Surface is not a valid target and the Clip will not be rendered. |
Default Composition |
Bundle multiple Destinations into one Composition. Any content item dragged onto a Track with a Default Composition will fill the first slot of the set Composition, instead of creating a Clip Container. |
Default Geometry |
Sets a default Geometry file for each Clip Container added to this Track. |
Default Preset |
Sets a default Preset file for each Clip Container added to this Track. |
Default Template Clip |
If this property has got a Template Clip assigned, each Clip Container added to the Track therafter will use that Template. A Default Template Clip on Track level will override the Sequence's default Template Clip. |
Enabled |
Enables/ disables the Track. |
Label |
Label your tracks to stay organized. Labels will appear in the Playback Editor side bar. |
Mute Audio |
Mutes all audio per Track. |
Mute Video |
Mutes all video per Track. |
Override Clip Channel Map |
Enforces the Track's Audio Channel Map onto the channel routing of all Clip Containers on this Track. |
Visible |
Shows / hides the Track in the Playback Editor. |
 Setting New Defaults:
Pre-existing Clip Containers on a Track will not be affected by changing the Track's defaults (Clip Target, Template Clip, Presets, etc).
Only Clip Containers created thereafter will inherit the track's new default settings.