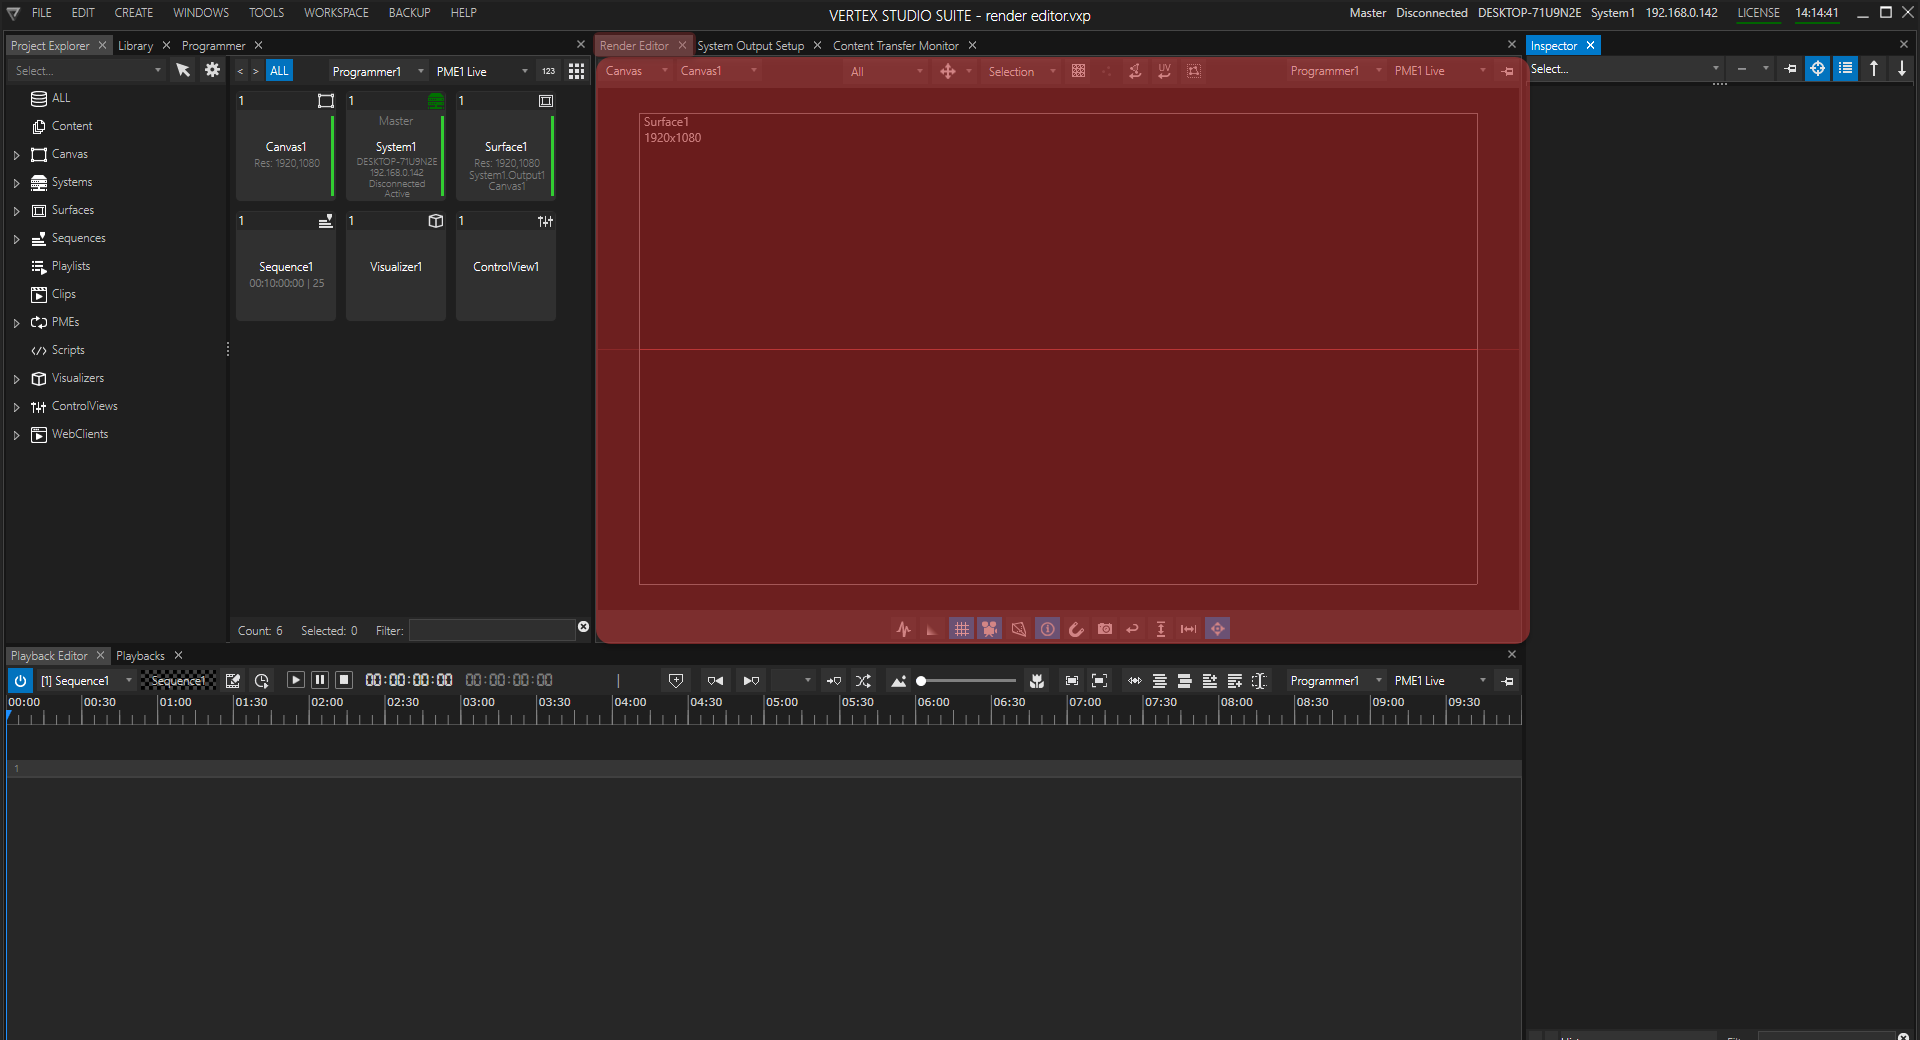
•The Render Editor window at the center of the UI is the visual preview of VERTEX: arrange, select and manipulate the contents of your show.
•Select from am drop-down menu different views to work with - focus on your Canvas, monitor your System Outputs, or create a stage mock-up with Visualizer.
•Open multiple Render Editors and work with them in parallel - the performance limit depends on your hardware
Navigation
There are different options to navigate through the 3D/2D space of VERTEX's Render Editor. Depending on your personal preferences, you can use
1. Left Mouse Button and Keys 1,2,3
Left Mouse Button + 1: Pan/Move left/right/up/down
Left Mouse Button + 2 : Zoom/Dolly in and out
Left Mouse Button + 3 : tilt
2. Middle Mouse Button/Wheel ( and Alt-Key)
Middle Mouse Button/Wheel pressed: Pan/Move left/right/up/down
Mouse Wheel: Zoom/Dolly in and out
Alt+ Middle Mouse Button/Wheel pressed tilt
OR
3. WASD - Keys (or Arrow Keys)
W or S Key: Zoom/Dolly in and out
A or D Key: Pan/Move left/right
Q or E Key: Tilt left/right
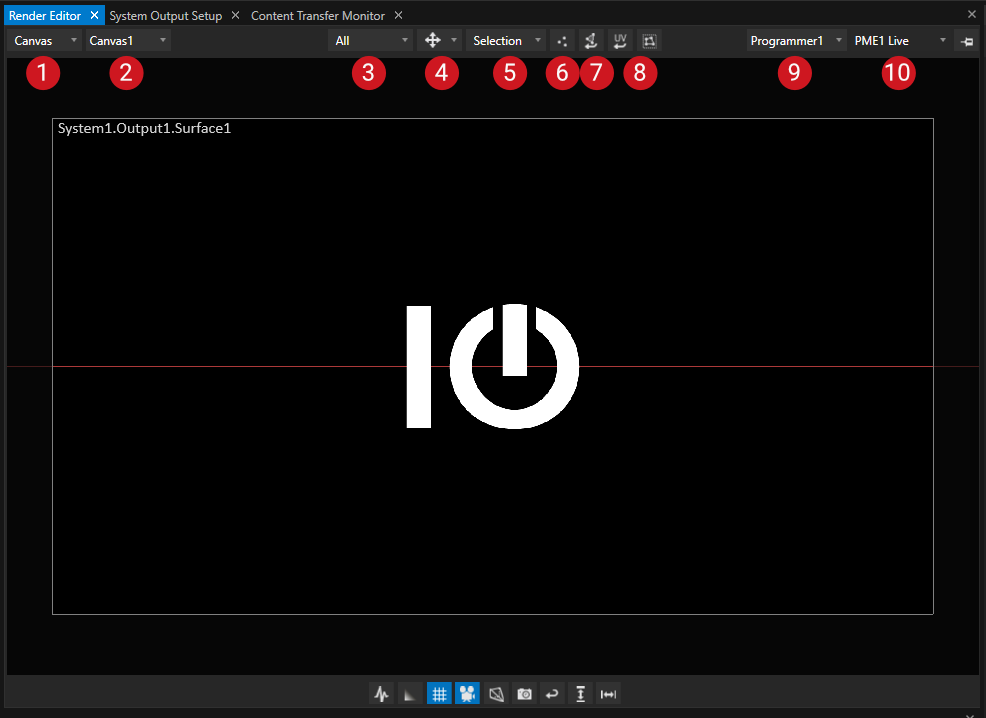
User Interface
|
View Mode |
Default: Canvas view Good for controlling the final signal of each output or to make some visual modifications on output/Surface level |
||||||||||
|
Select specific view |
For View Mode Canvas:
System: Output # - shows you one specific output for preview or further modifying (also see. Canvas, Surface, Output) |
||||||||||
|
Element Selection Filter |
Options: All(default), Surface and Content |
||||||||||
|
Mouse Mode |
Select the functionality/mode your mouse courser should have when working into the Render Editor
|
||||||||||
|
Select whole element, vertices or Modifiers |
Options: Select Modifiers ( c.f. Geometry Modifiers) |
||||||||||
|
Select covered vertices |
Default: off |
||||||||||
|
Reset VERTEX Offsets |
Resets all modified Vertice offset to default value |
||||||||||
|
UV Modifiers |
Resets all UV Offsets to default value |
||||||||||
|
Programmer selection |
When working in programmer mode: |
||||||||||
|
PME (Playback Mixing Engine) Selection |
Select PME (Playback Mixing Engine) you want to display in the Render Editor |


Bottom bar

|
Show Statistics |
Default: off •the current render performance of this specific Render Editor in Frames per Second (FPS) •The global sync clocks uptime •a flashing white square for optical sync test This overlayed information is not visible in the Fullscreen Renderer and can be set for every Render Editor separately |
|
Switch between Full Resolution or Proxy Mode with lower resolution |
Default: on - Full Resolution Mode is enabled. Option:- off - Proxy Mode with lower resolution |
|
Show Grid |
Default: on Option: off - disables base grid into Render Editor |
|
Toggle between free and local camera |
Default: on - local the camera of your Render Editors workspace works locally in this window |
|
Show Surface Frustum |
Default: off |
|
save snapshot |
Save the current view into your Render Editor as png file and use this to send previews out to clients or add them into a stroryboard |
|
reset view |
resets the current workspace view to the default values |
|
Vertical fit local view |
Adapts local camera view that it fits to Canvas height |
|
Horizontal fit local view |
Adapts local camera view that it fits to Canvas width |
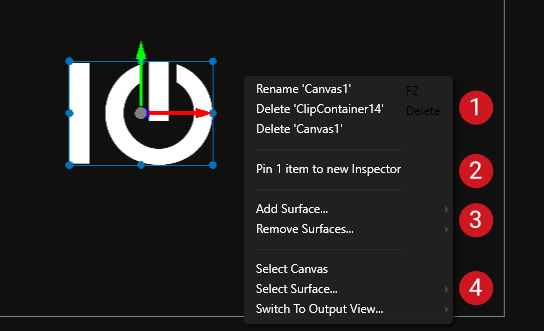
Context Menu
|
Context related options |
Depending on your selection - e.g. Delete object or rename object |
|
Pin selection to new Inspector |
Pins the selected item to a new Inspector window |
|
Add or Remove Surface(s) |
Add or remove surfaces to your Canvas. Remove: shows all surfaces which have already been added to your current Canvas |
|
Quick Selection |
Quick selection options Switch to output view: fast switch to show an output without using the Render Editors dropdown lists |