Synchronize VERTEX with Timecode In Chase Lock
•This feature enables VERTEX to continuously chase external SMPTE LTC or MTC and lock to it.
•No need to synchronize your system clock to external SMPTE IO - your system can still sync to your favorite clock while the playback is resolving to external timecode.
•Super efficient and fast when running in session mode - session members will be able to re-synchronize to timecode changes in <1sec.
 Important notice when running in session mode:
the SMPTE IO USB interface receiving external timecode needs to be connected to (and configured for) the master system.
Let's walk you through the settings for Timecode In Chase Lock in 3 little steps:
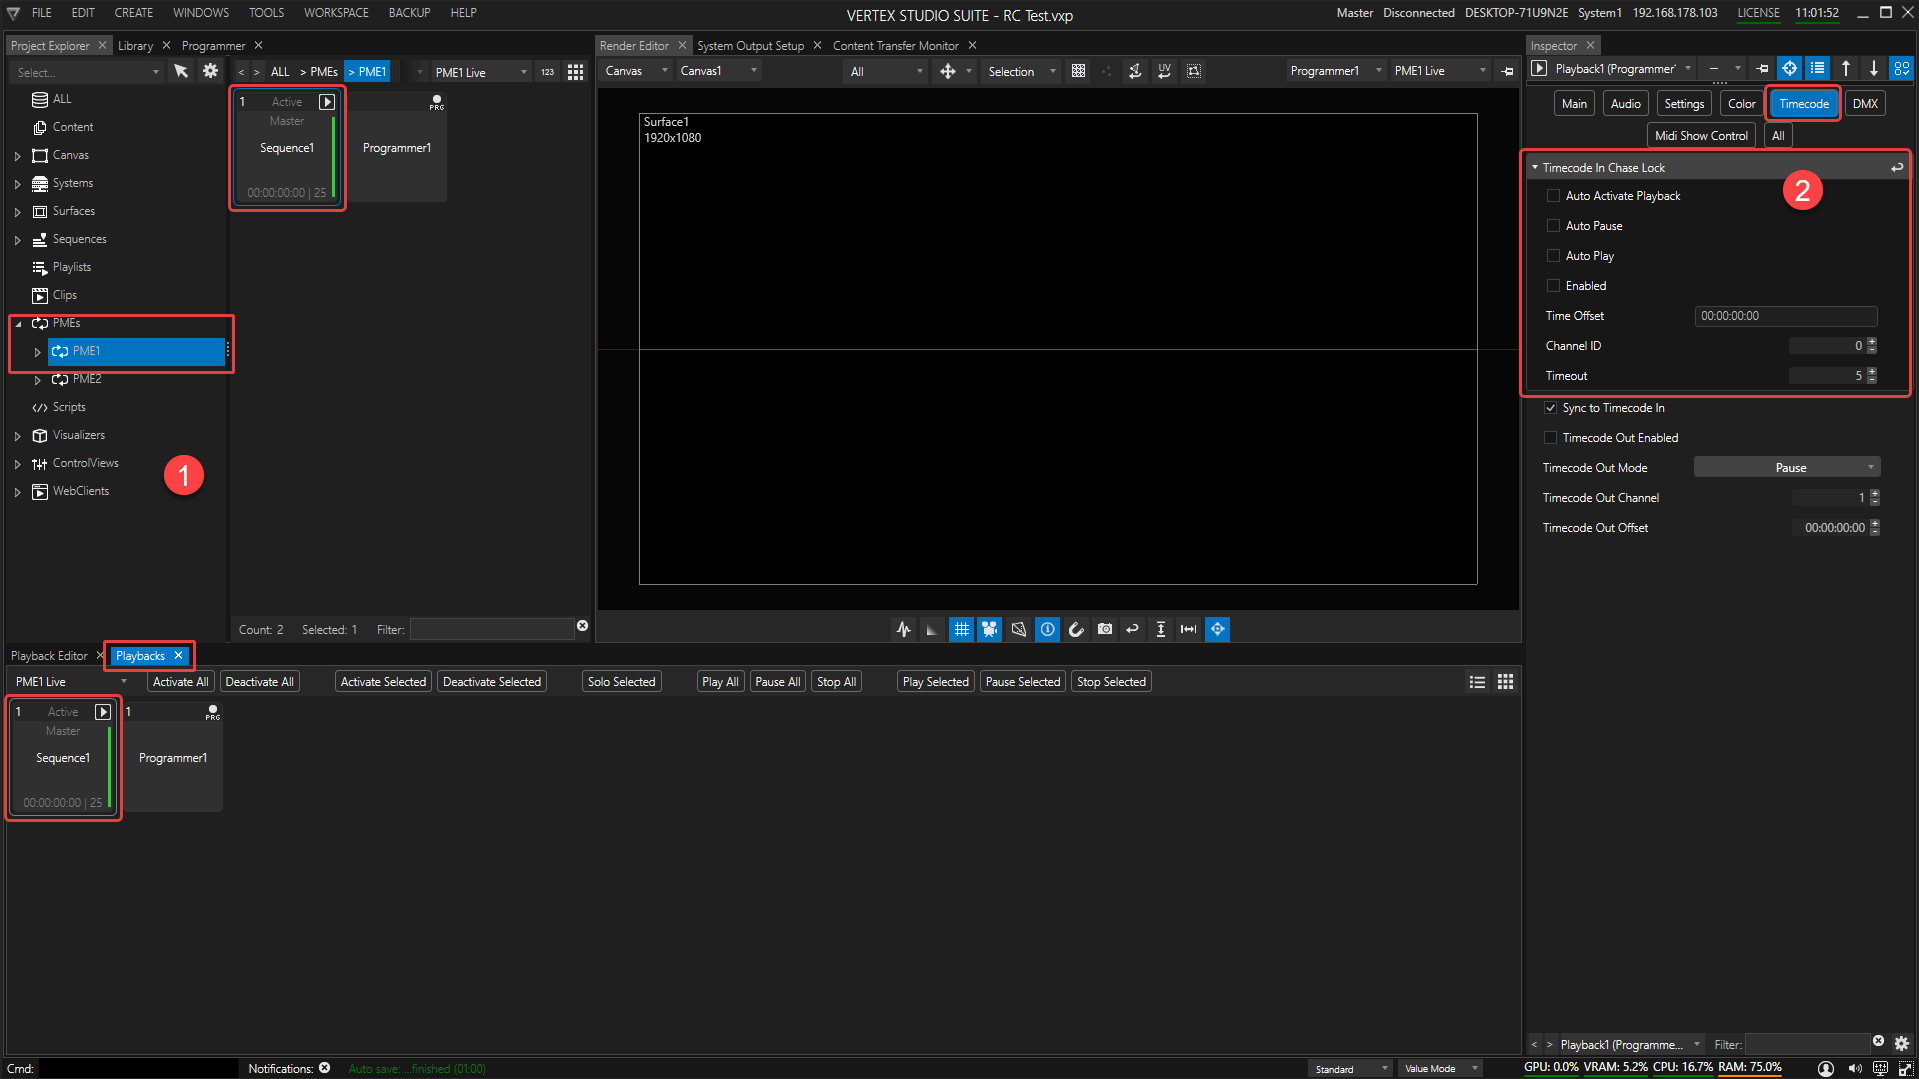
1)select your active playback either from Project Explorer -> PMEs or Playback tab next to the playback/ sequence editor
2)go to its Inspector and select the Timecode settings tab, where you open the parent item Timecode In Chase Lock. Here you can adjust the following settings:
•Auto Activate Playback - when enabled, a de-activated playback will respond to incoming timecode and automatically activate.enable / disable this feature
•enable automatic play & pause to ensure continuous playback after a jump in the timecode
•set a timecode offset
•select a Timecode channel ID corresponding to your interface.
•set a timeout delay (in milliseconds)
Synchronize your playback to external MIDI timecode (MTC):
Outside of VERTEX, make sure that your external MTC signal is being routed to a MIDI interface connected to your system.
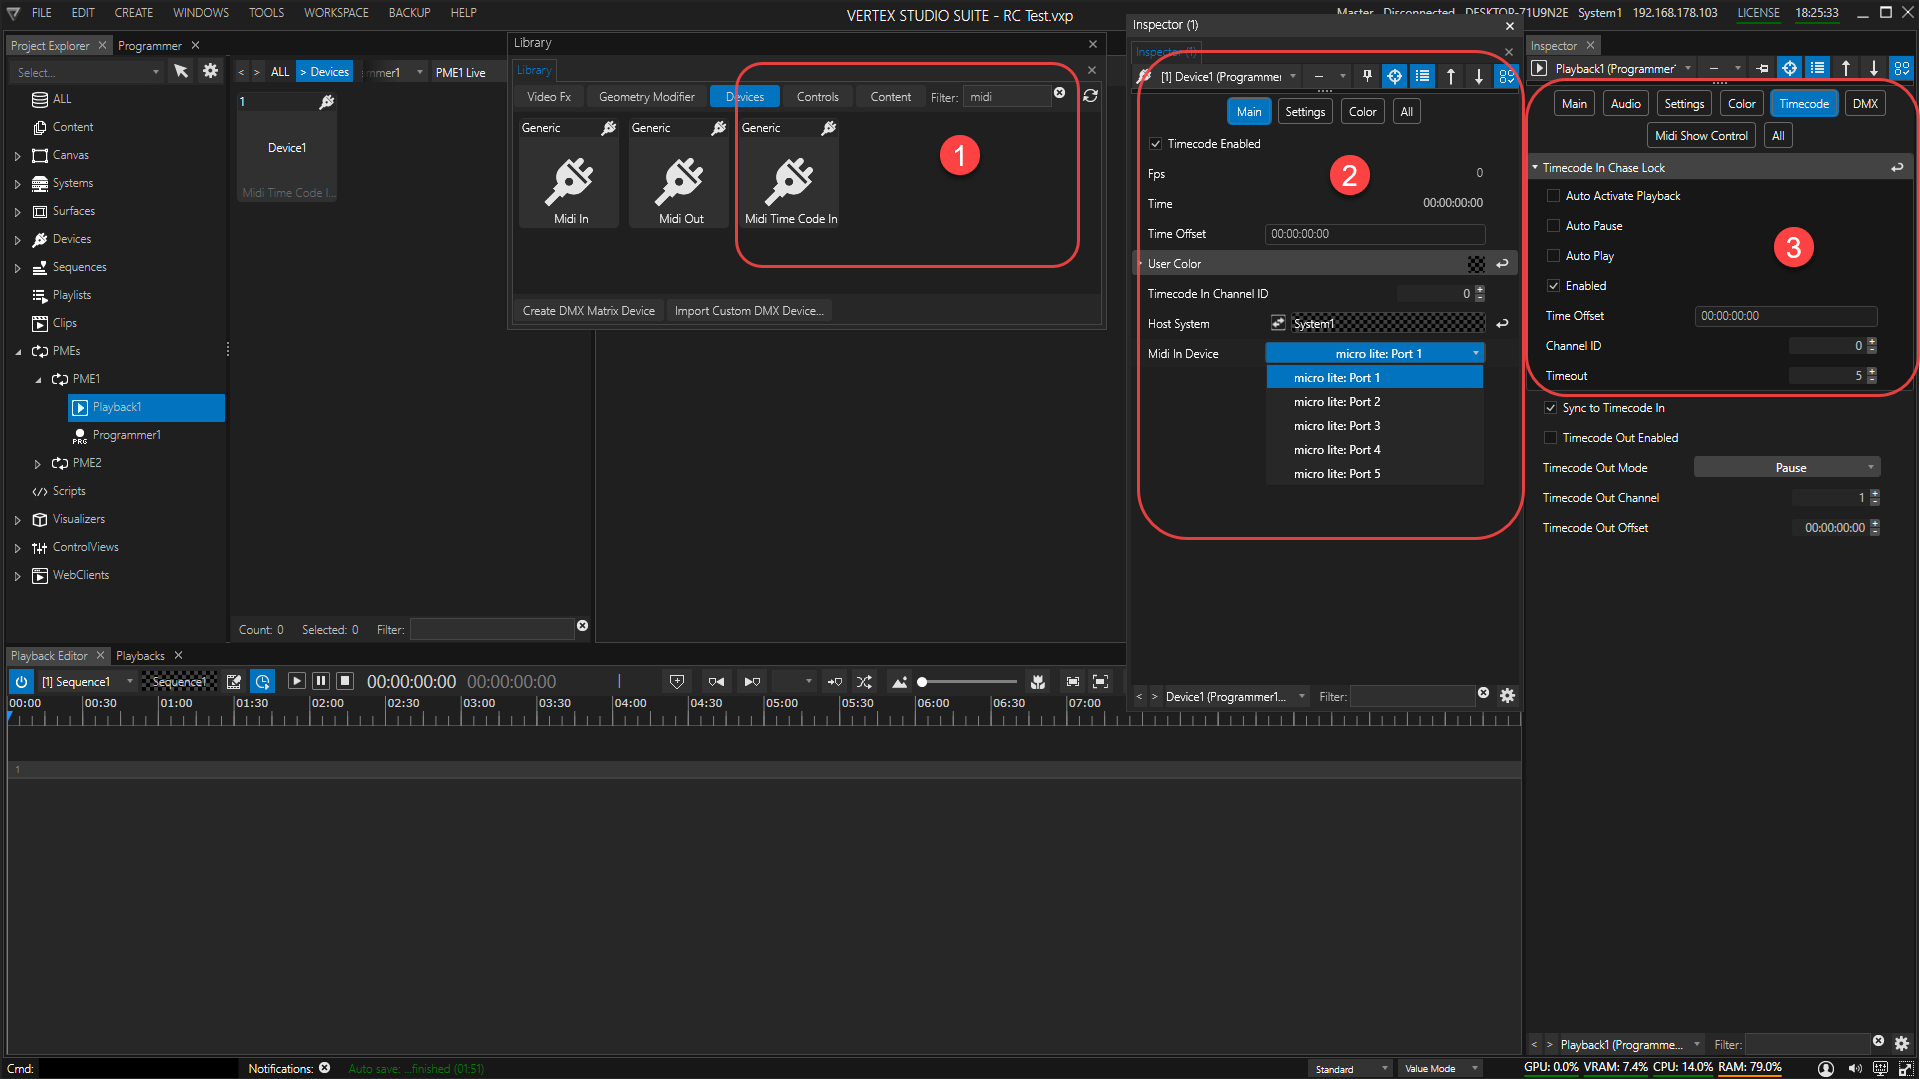
1.In VERTEX, go to Library > Devices, type "MIDI" into the search filter and find a device called MIDI Time Code In and select Add To Project from the context menu.
2.Inspect your MIDI Time Code In - Device, enable the checkbox Timecode Enabled and select your connected MIDI interface (including its correct MIDI port) from the dropdown.
3.Inspect the Playback you want to resolve to external MTC, go to the Timecode tab and open the properties Timecode In Chase Lock, where you check Enabled, Auto Play, Auto Pause. Set the Channel ID.
 Since VERTEX can process multiple inputs of timecode simultaneously, make sure to set the correct Timecode Channel ID. For instance, you can synch Playback1 to LTC coming via SMPTE IO interface on SMPTE channel 0, and have Playback2 synch'ed to MTC coming via a MIDI interface and routed to SMPTE channel 1.
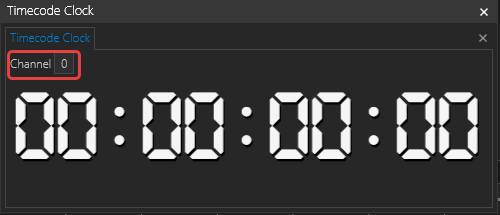
You can monitor incoming timecode with a scalable timecode clock. Go to MAIN MENU > WINDOWS > Timecode Clock and select the Timecode Channel you would like to monitor:
For legacy support and in special cases do the following to synch the entire system to external SMPTE LTC:
1.Configure your SMPTE-IO Interface
Set Interface to In, define a Channel ID
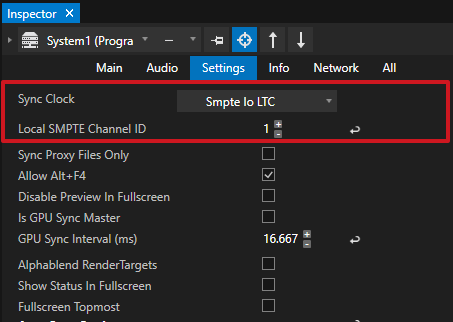
2.Inspect the System connected to SMPTE-IO USB Interface
3.Check if Inspector Property Mode is set to "Advanced"
4.Go to Settings Tab
5.Set Sync Clock to "SMPTE IO LTC"
6.Go to Project Explorer - navigate to PME Section there
7.Select a Playback as Child of PME LIVE and show Properties in Inspector
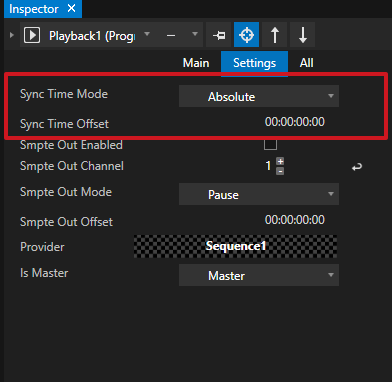
8.Set Sync Time Mode of this Playback to "Absolute"
9.Now this Playback is clocked by the Timecode from SMPTE-IO
10.Repeat steps 5-8 for every other Playback you want to lock to the incoming timecode
 A Playback's Sync Time Mode
The setting to Absolute can come in handy, if the playback needs to be synched to the actual time of the day.
Temporary Pre-Load
If you need to synchronize VERTEX to a discontinuous or intermittent external timecode that leads to playback jumps right into clip containers, keep in mind that the clip container's pre-roll time cannot be executed.
To still ensure that all necessary data is buffered and ready for a smooth playout, create a cue with the script command TempPreLoad before the jump. The clip container will be temporarily pre-loaded.
Example:
1.The external timecode pauses at 00:01:00.00 then continues at 00:01:30.00
2.In VERTEX a clip container is lined up to start at 00:01:30.00
3.Before the pause at 00:01:00.00, you will need to create a cue with the scripted pre-load command:
Playback1.ClipContainer1.TempPreload
4. VERTEX will load all necessary data from ClipContainer1 at 00:01:00.00 and have it ready for immediate playback after the jump.
