•Run Notch content in real time directly inside Vertex using the integrated Notch render engine
•Import .dfx Notch Blocks created in Notch Builder—no external render system required
•Control exposed parameters from the Inspector, automation tools, timelines, and external control/data inputs
Notch Blocks bring real-time generative rendering into Vertex as native assets. After importing a Notch Block (built in Notch Builder), Vertex analyses the file, detects its exposed parameters, and publishes them in the Inspector for structured configuration and control.
Exposed parameters can include strings, numeric values, colors, and textures. They may be defined per Notch Layer or shared across multiple layers—depending on how the parameters were exposed in Notch Builder.
Because the block renders directly within the Vertex engine, it integrates seamlessly with Vertex timelines, animation, and automation logic. Parameters can be adjusted manually, automated using Vertex interactive tools, or driven via external control protocols and live data sources.
This enables procedural graphics, live-feed manipulation, particle systems, and interactive effects to run as part of a unified, scalable real-time workflow within Vertex.
 Notch Playback License
Rendering or importing Notch Blocks in Vertex requires a valid Notch Playback License, purchased separately from Notch (not included with Vertex).
Vertex also requires the CodeMeter Runtime (WIBU Systems) to manage Notch license activation and validation. The license is tied to a physical CodeMeter dongle.
Without a valid license and a properly installed/running CodeMeter Runtime, Notch Blocks cannot be imported or rendered in Vertex. For license options and activation details, see the official Notch licensing documentation.
How to prepare VERTEX
Before launching Vertex
•Insert the Notch CodeMeter dongle into the Vertex system before starting Vertex.
•If Vertex is already running when you connect the dongle, the license will not be recognized.
•If you insert the dongle while Vertex is running, restart Vertex to allow the license to be detected.
Licensing requirements (per system)
•Every system that will render a Notch Block needs its own valid Notch Playback License.
•This includes the Vertex system importing Notch Blocks into the project.
•The importing system needs a valid Notch license so Vertex can analyze the block and read exposed parameters.
•A watermarked Notch trial license is sufficient for importing/analysis.
If no valid license is available
•The embedded Notch engine cannot initialize properly.
•Vertex will not be able to analyze the Notch Block.
•The Notch properties list in the Inspector will remain empty.
Managing Notch Blocks
Import Notch Blocks
Vertex handles Notch Blocks like any other content asset. Upon import of a Notch Block file (.dfxdll), Vertex runs a background analysis to extract a structured list of exposed parameters.
While analysis is in progress, an orange progress bar appears on the content tile. Do not use the Notch Block until the process finishes, since its parameters and runtime configuration will not be available until then.
Notch Block Settings - Content Level
Go to Project Explorer and select the Notch Block content item to inspect its general settings.
When you later create clips from Notch Blocks in a sequence, the clip's inspector will only provide the exposed parameters.
Basic settings of Notch Blocks are available only on content level:
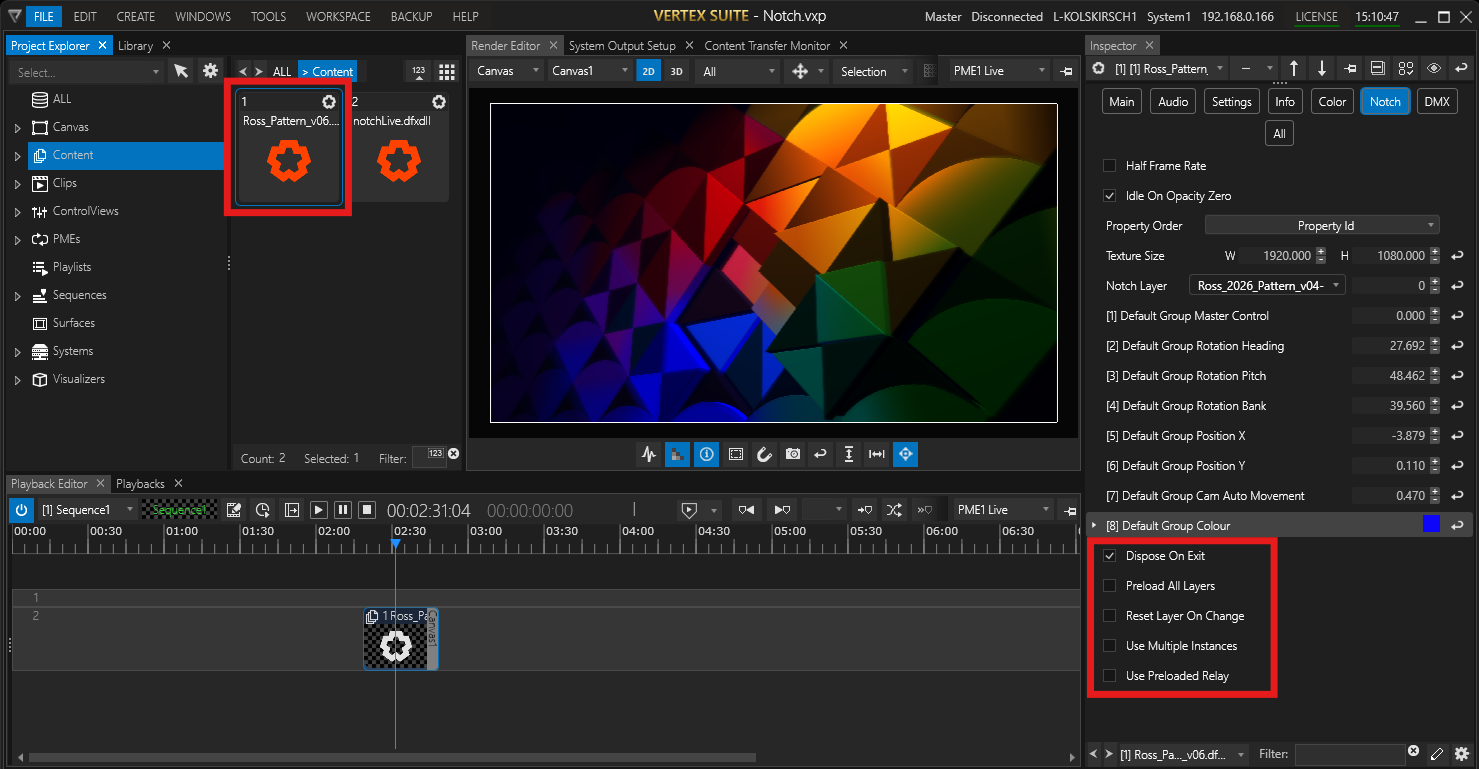
Dispose On Exit |
Vertex normally disposes the Notch render instance on block exit and recreates it when re-triggered. Some corrupted Notch Blocks fail to dispose cleanly, causing an internal exception that can prevent re-initialization. Disabling Dispose On Exit keeps the render instance allocated to avoid disposal/recreate errors and improve stability. |
Preload All Layers |
On first activation, the software loads every layer’s resources by internally cycling through them once, enabling smooth layer switching. Not compatible with Reset Layer On Change. |
Reset Layer On Change |
Disposes GPU resources tied to any inactive layers when the active layer changes, freeing GPU memory. Not compatible with Preload All Layers. |
Use Multiple Instances |
When multiple instances of the same Notch Block are used, enabling this option creates a separate set of resources for each instance. This lets the instances run in parallel, each using its own parameters and textures. Not compatible with Use Preloaded Relay. |
Use Preloaded Relay |
Allows multiple instances of the same Notch Block used in different clips to share a single preloaded set of resources. Enable when the same Notch Block is repeated across several clips (e.g., for structural or operational workflow reasons) and you want to reduce overall system load. Improves performance by avoiding duplicate resource usage. Not compatible with Use Multiple Instances. |
Rendering Notch Blocks in Vertex
To render a Notch Block in Vertex, drag the item from Project Explorer into the Sequence Editor to create a new Clip.
 Important notice (GPU stall)
When a Notch Block loads, the Notch render engine may fully occupy the GPU for several seconds. During this time, the Vertex output may temporarily freeze.
This is expected Notch behavior and is independent of the host render engine.
Parallel render instances and internal copies
Vertex can run up to three render engines on one system, and it duplicates/renames the Notch Block in the following manner:
•Render Editor (UI preview): creates notchPreview.dfxdll in the project cache.
•FullScreen Renderer (live output): creates notchLive.dfxdll in the project cache.
•Streaming (e.g., NDI): the system setting Output Streaming Mode uses the 3rd engine by default, the Background Renderer.
It does not support Notch.
To stream a Notch Block, switch Output Streaming Mode to FullScreen Renderer.
Live editing from Notch Designer
If editing the block over the network at runtime, note that the actively rendered file is the Vertex-renamed copy (notchPreview.dfxdll or notchLive.dfxdll). These copies are required to support multiple simultaneous instances of the same block.
Pre-loading
As with other Vertex clips, you can set the Notch-hosting Clip to Pre-Loaded (Clip Video category). Pre-loading reduces GPU stalls when the playhead enters the clip.
Settings on Clip Level
Select to inspect the Clip hosting a Notch Block to access its properties related to its individual rendering:
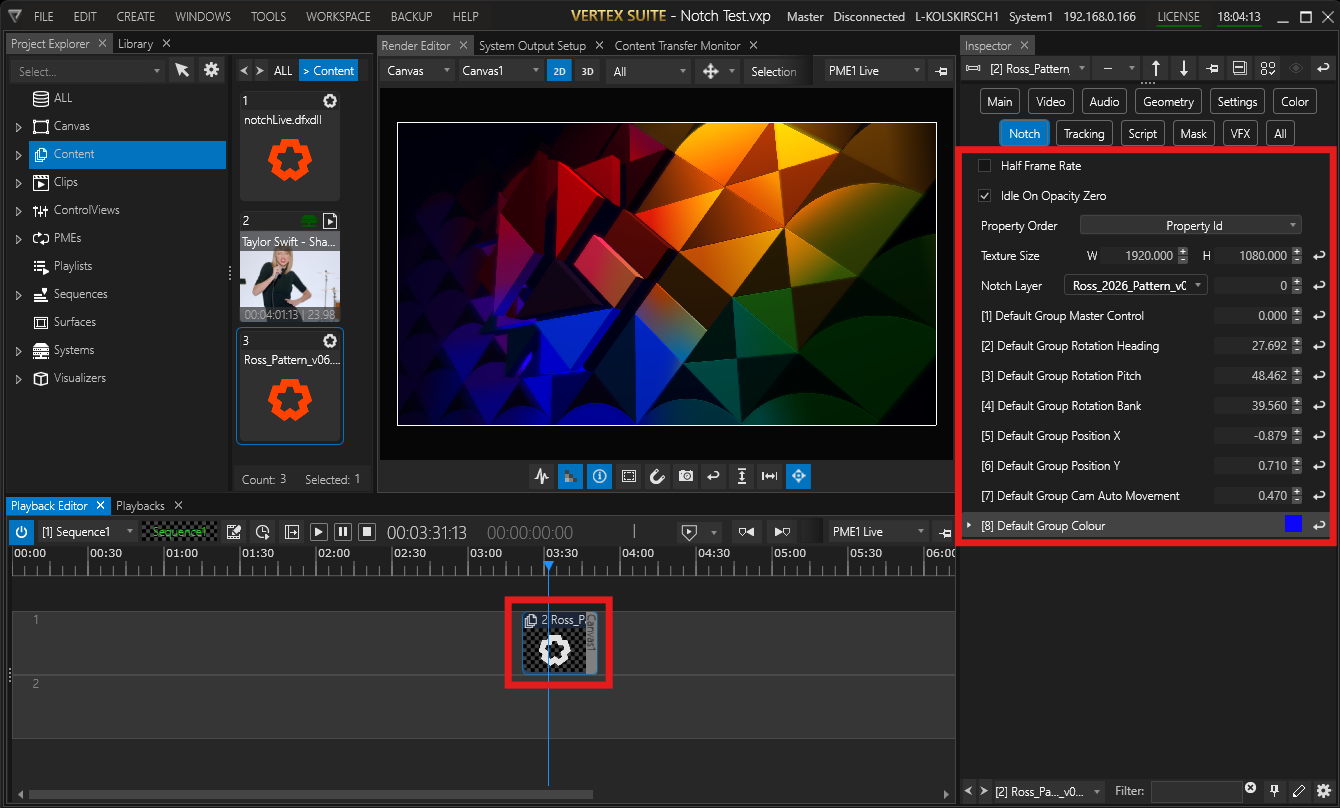
Half Frame Rate |
Reduces the frame rate to 50%. May be used to ease processing load on weaker systems. |
Idle On Opacity Zero |
Active (true) by default to stop rendering of Notch Blocks when clip's opacity is at 0 - for processing efficiency. |
Property Order |
Defines the listing order of exposed Notch parameters – either by Property ID, or by DMX Offset. |
Texture Size |
Sets the rendered size of the Notch Block. You may want to align it with the size of the Canvas (the Clip's target). |
Notch Layer |
If the Notch Block contains multiple layers, choose which layer to render using either the drop-down menu (showing layer names) or by entering the layer ID (starting at 0). |
Exposed Parameters |
The parameter types listed may vary as they are set by the Notch Block and its layers. Some layers might have access to global exposed parameters while others have its own parameters. The list auto-adjusts based on layer selection. |
Video Source
Some Notch Blocks are designed to process or manipulate external textures. When a Notch Block supports this, its exposed parameters may include one or more Video Source controls:
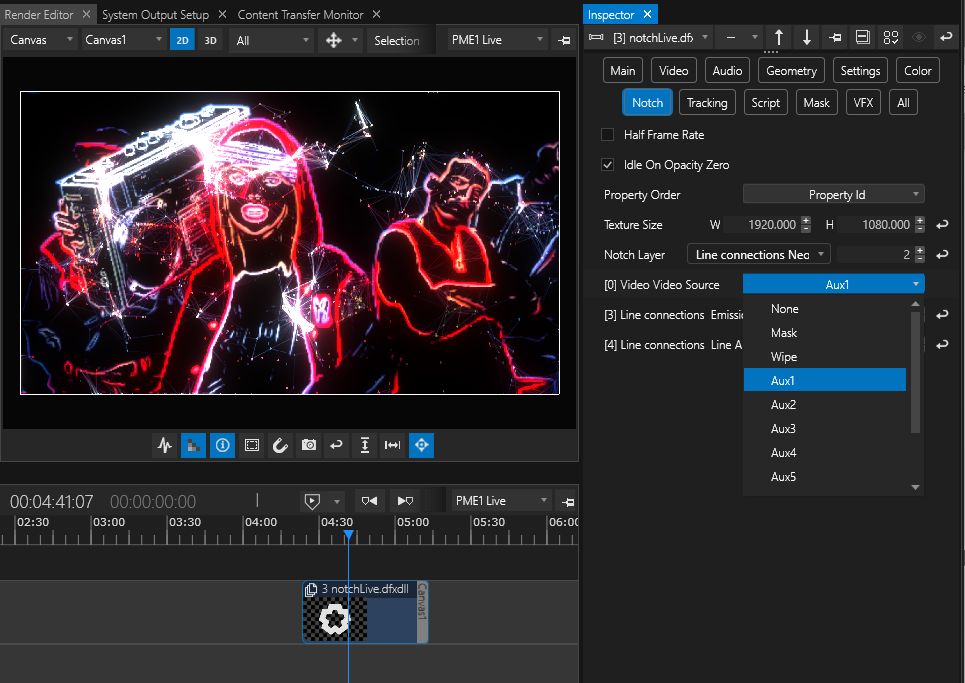
Vertex allows you to assign up to ten textures to each Clip Container, which can then be routed into the Notch Block using a drop-down selection. These include:
•Mask Texture
•Wipe Texture
•Aux Textures 1–8
The Aux Textures are configured under the inspector's VFX tab when Advanced Mode is enabled.
Assigned textures can be standard media assets (such as videos or images) or live input sources (including HDMI, SDI, or NDI). Vertex passes the selected texture to the Notch Block for real-time processing via the integrated Notch render engine.
Notch Block Timing
Depending on how the Notch Block is authored, you may need to monitor the Clip Container Times properties and Playback Sync Mode.
Vertex forwards the clip's playback timecode to the Notch Block. Based on the block’s internal logic, this timecode may be ignored or may be required to drive animations and other time-based behavior. If the block uses incoming timecode, correct playback requires adjustment of the clip's Playback Sync Mode depending on the intended behavior.
When video content is sent to a Notch Block via an Aux channel, manually set the Clip Container Times (Video tab) to match the exact video duration. Adjust Length, In, and Out points so the full video signal is available to the Notch Block.
Notch Block Animation, Control, and Scripting
Exposed Notch Block parameters behave like any other Vertex clip properties:
•Animate with keyframes in sequences
•Assign to a Control View for manual control
•Map via the MIDI Map Editor
•Use in Node Systems
•Drive via scripting for advanced workflows
This fully integrates Notch Block parameters into the Vertex control architecture.
Notch Block in Console Layers
Controllable parameters exposed by a Notch Block are appended to the fixture’s DMX profile at the end of the fixture definition.
Set the maximum number of Notch parameters available per Console Layer using Notch Parameter Count.