•By adding keyframes to a Clip Container you can animate changes in property values and parameters at specific points in time.
•VERTEX calculates a curve from keyframe to keyframe and interpolates the data. You can choose the type of curve from linear, bezier and on/off switch.
•Keyframes are hosted by clip containers. Their position and time settings are relative and locked to their clip container: Moving a clip container, moves all keyframes together along.
Open The Keyframe Editor In The Playback Editor
ACCESSING THE KEYFRAME EDITOR OF A CLIP CONTAINER:
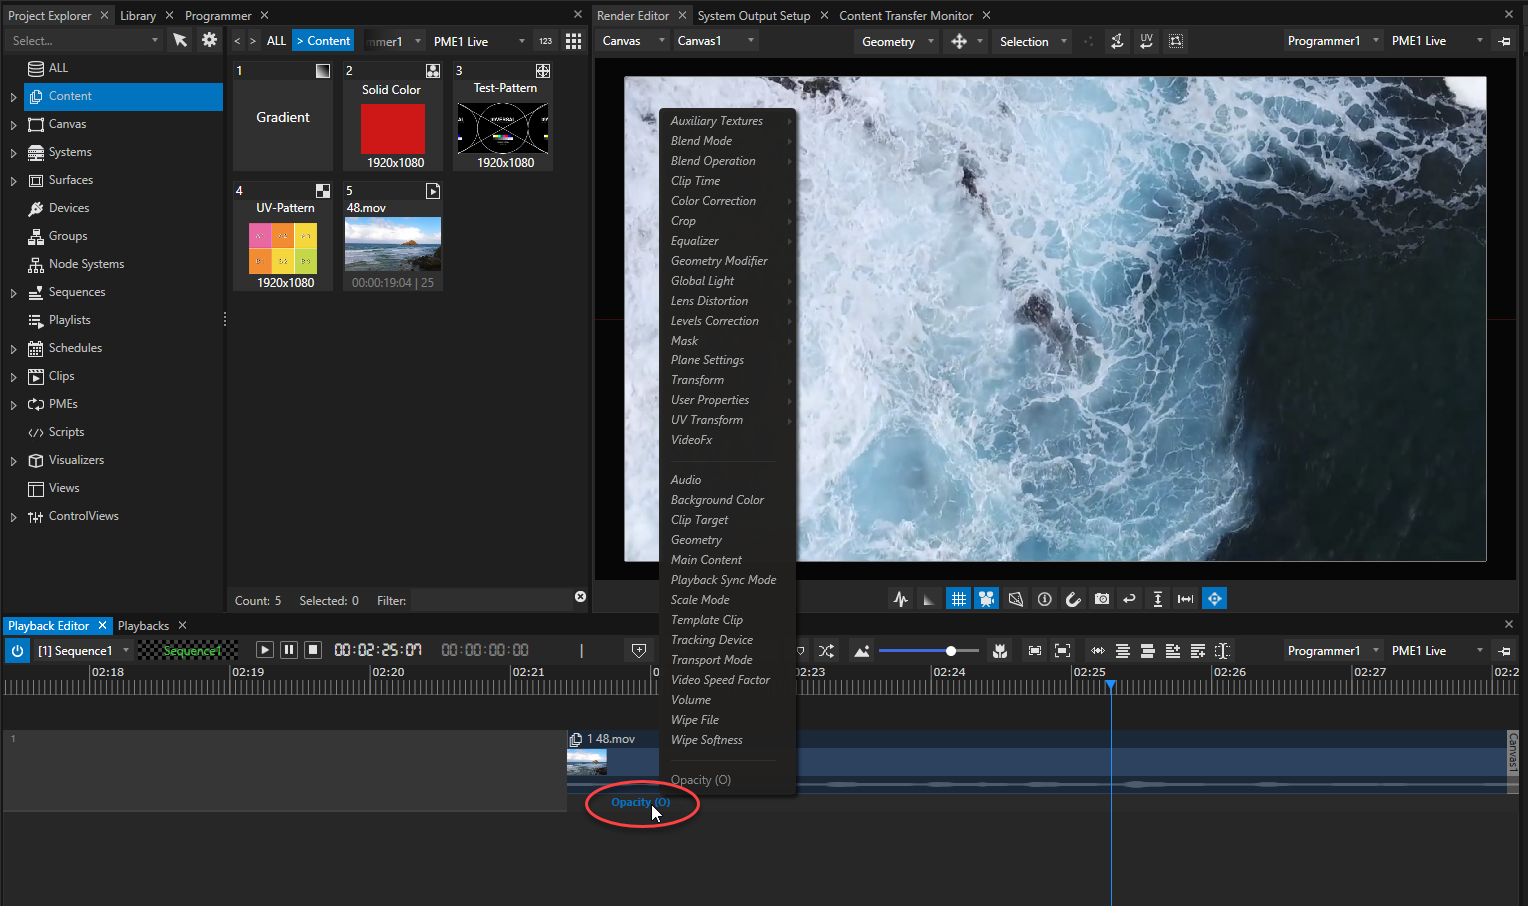
•Double-click on a clip container to show/ hide its keyframe editor. It will appear below the clip container.
•The default property displayed in the new editor is Opacity (O).
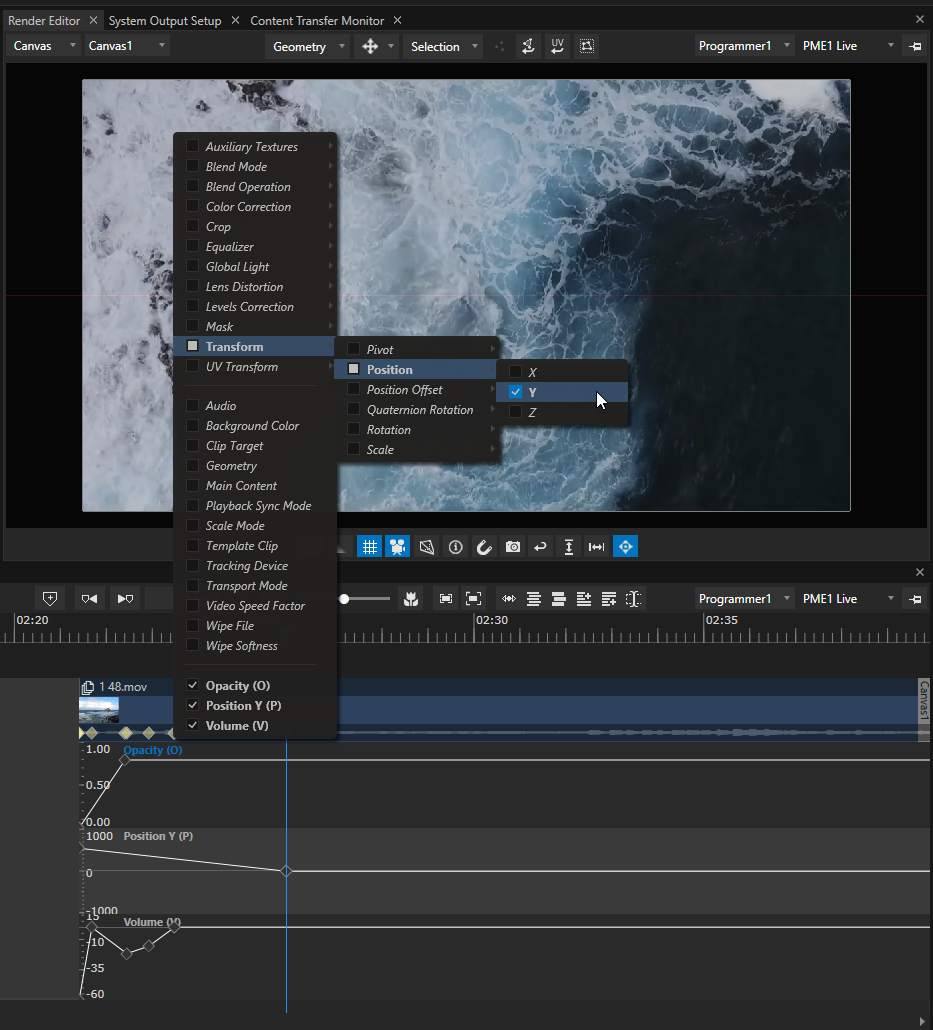
• CTRL+ click on the property name for a multiple selection. All selected properties will be shown in their own editor lanes.
•Double-click next to the property name or anywhere in the lane to expand/ collapse the keyframe editor. You can also do this from the context menu (right-click).
ADDING KEYFRAMES is easy:
• Just press K in a property's editor lane and a keyframe will be added at the playhead's position.
or
•CTRL-click in the lane on the position where you want to add the keyframe. Is the editor lane expanded, you can even add the keyframe with its desired parameter value.
•Depending on your choice of Add First Keyframe Mode in the Sequence Settings, a keyframe will be generated at the beginning of your ClipContainer and the values between Keyframes will be interpolated.
•Navigate between keyframes with the shortcut Shift + right or left ARROW KEY.
•Double-click on a keyframe to directly edit the keyframe's parameter value. A small value window pops up next to the keyframe.
•Zoom in and out on vertical axis of the keyframe editor by holding down CTRL and using your mouse wheel.
•Select one or more keyframes to copy / paste them. They will be inserted at playhead position. This also works for pasting keyframes from one to another clip container.
 In value mode, after first keyframe has been set for a clip container, every value change in the inspector will automatically generate a new keyframe for the current property at the playhead's position. This can be done while playback is running and is a powerful tool to program animations and property changes on the fly.
Curve Types
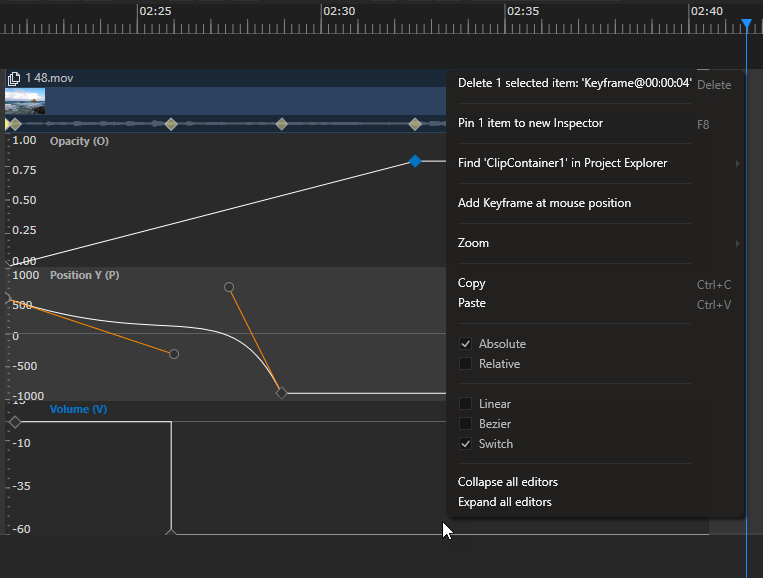
There are three types of curves that interpolate the values between keyframes:
•Linear - just a straight line
•Bezier - a curve that can be shaped by two control points
•Switch - just binary on/ off behavior
You can set these types either in the inspector or in the context menu (right-click on a keyframe).


