•Compositions are another fast-lane feature for repetitive tasks
•Bundle multiple Destinations into one Composition
•Create a template layout for multiple content Destinations along with their respective Canvas & Output Locations, instead of tediously handling each clip separately.
•Compositions will appear as Clip Containers when dragged onto the timeline, where their slots can be filled with content.
 Benefits of this workflow:
This is a perfect solution for multiple repetitive content displays during your show, such as a brand logo appearing multiple times simultaneously on different outputs. Instead of cramming your timeline full of individual clip containers for this taks, everything is neatly folded into a Composition.
Bundling Destinations into Compositions
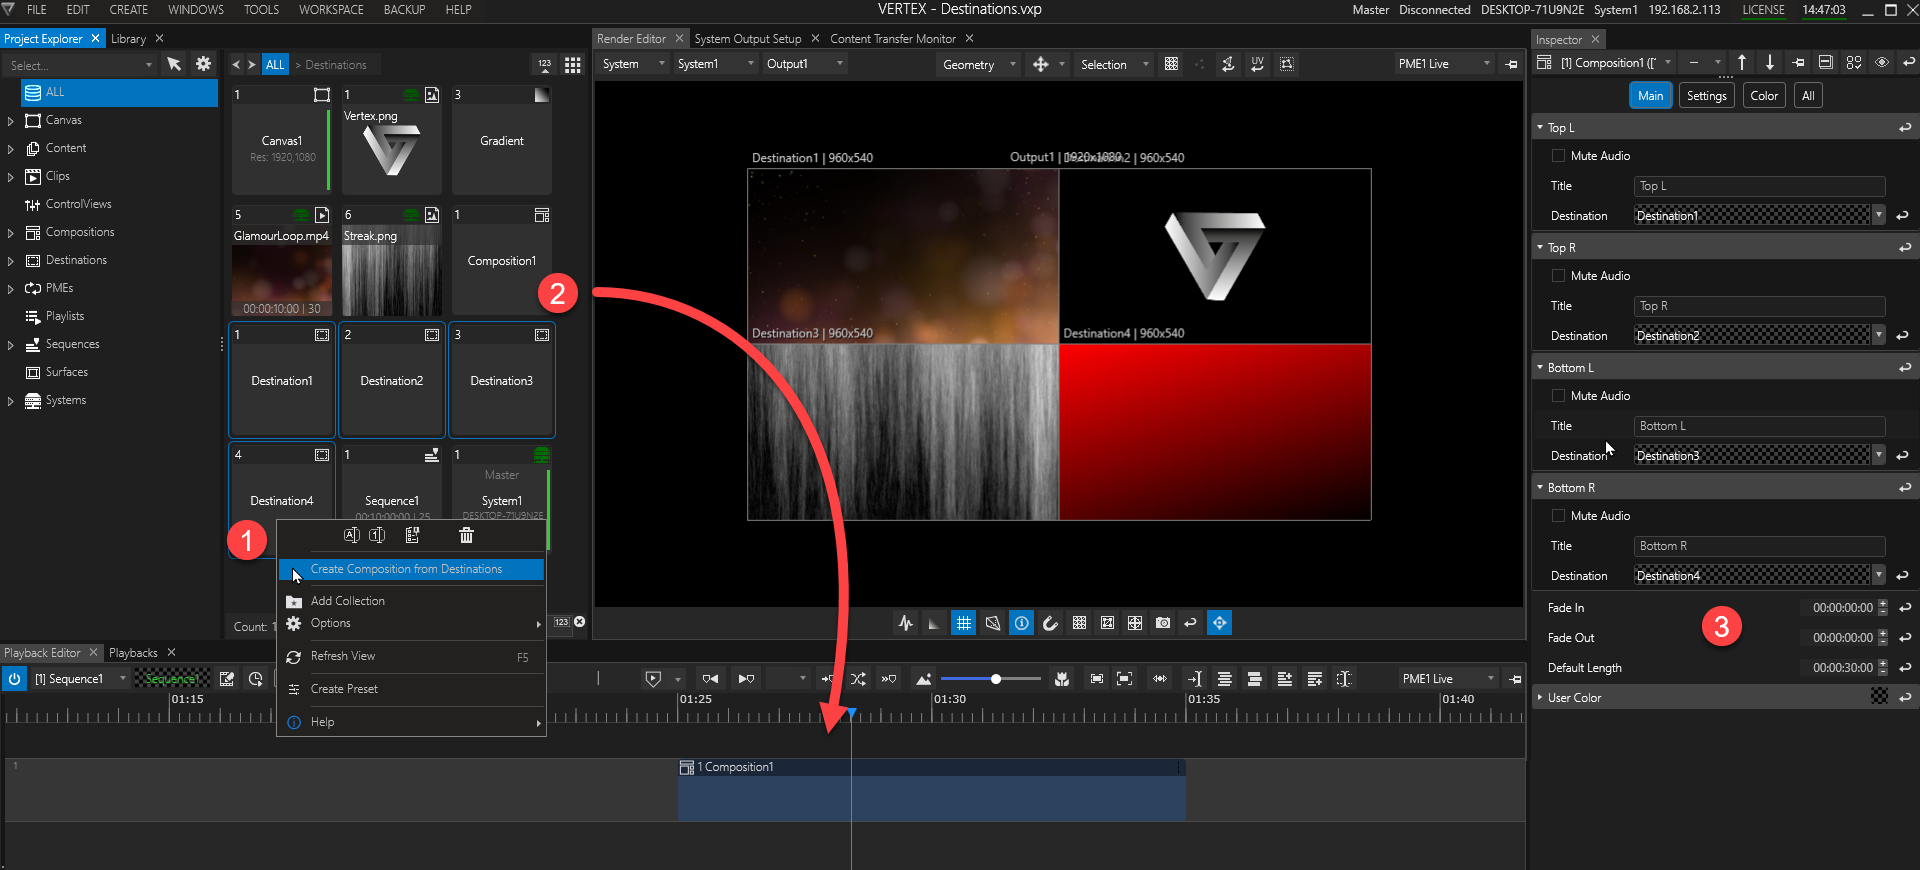
1.Select one or more Destinations, access the context menu with a right-click and choose Create Composition from Destinations.
2.A Composition is created and appears as a new object in Project Explorer. Drag and drop it onto your timeline. This creates a Clip Container from your composition.
3.Selecting the Composition in Project Explorer will focus it into the Inspector window where you can:
- find the number of Slots per Destination according to your selection
- give each Slot a Title for orientation purpose
- set a Destination for each Slot
- set default fade times and clip length
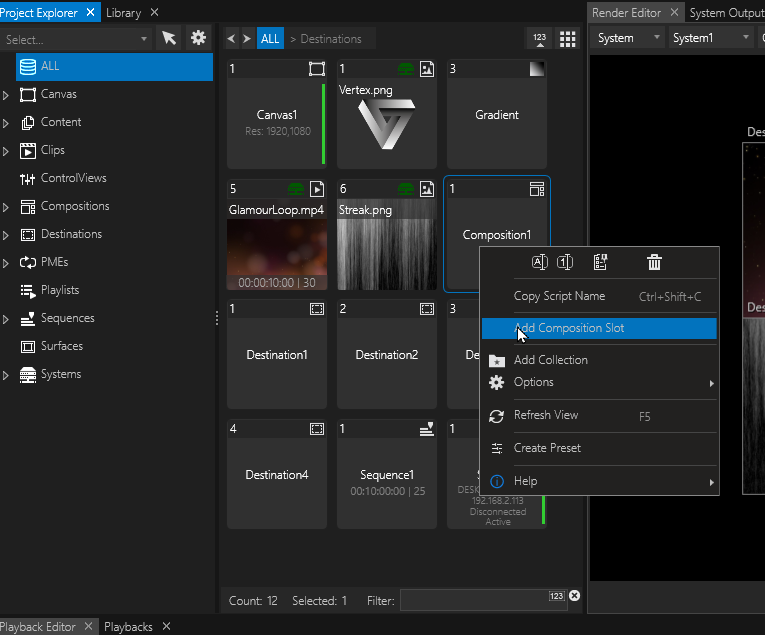
Adding blank Compositions
•Go to MAIN MENU > CREATE > COMPOSITION
•By default, every blank Composition is created with just one Slot. Add more Slots via the context menu (right-click on Composition object in Project Explorer)
Adding Content
Once the Composition has been dropped onto the timeline,
content items can be added per drag and drop and will be filling the Slots incrementally in the same order of the dropping action:
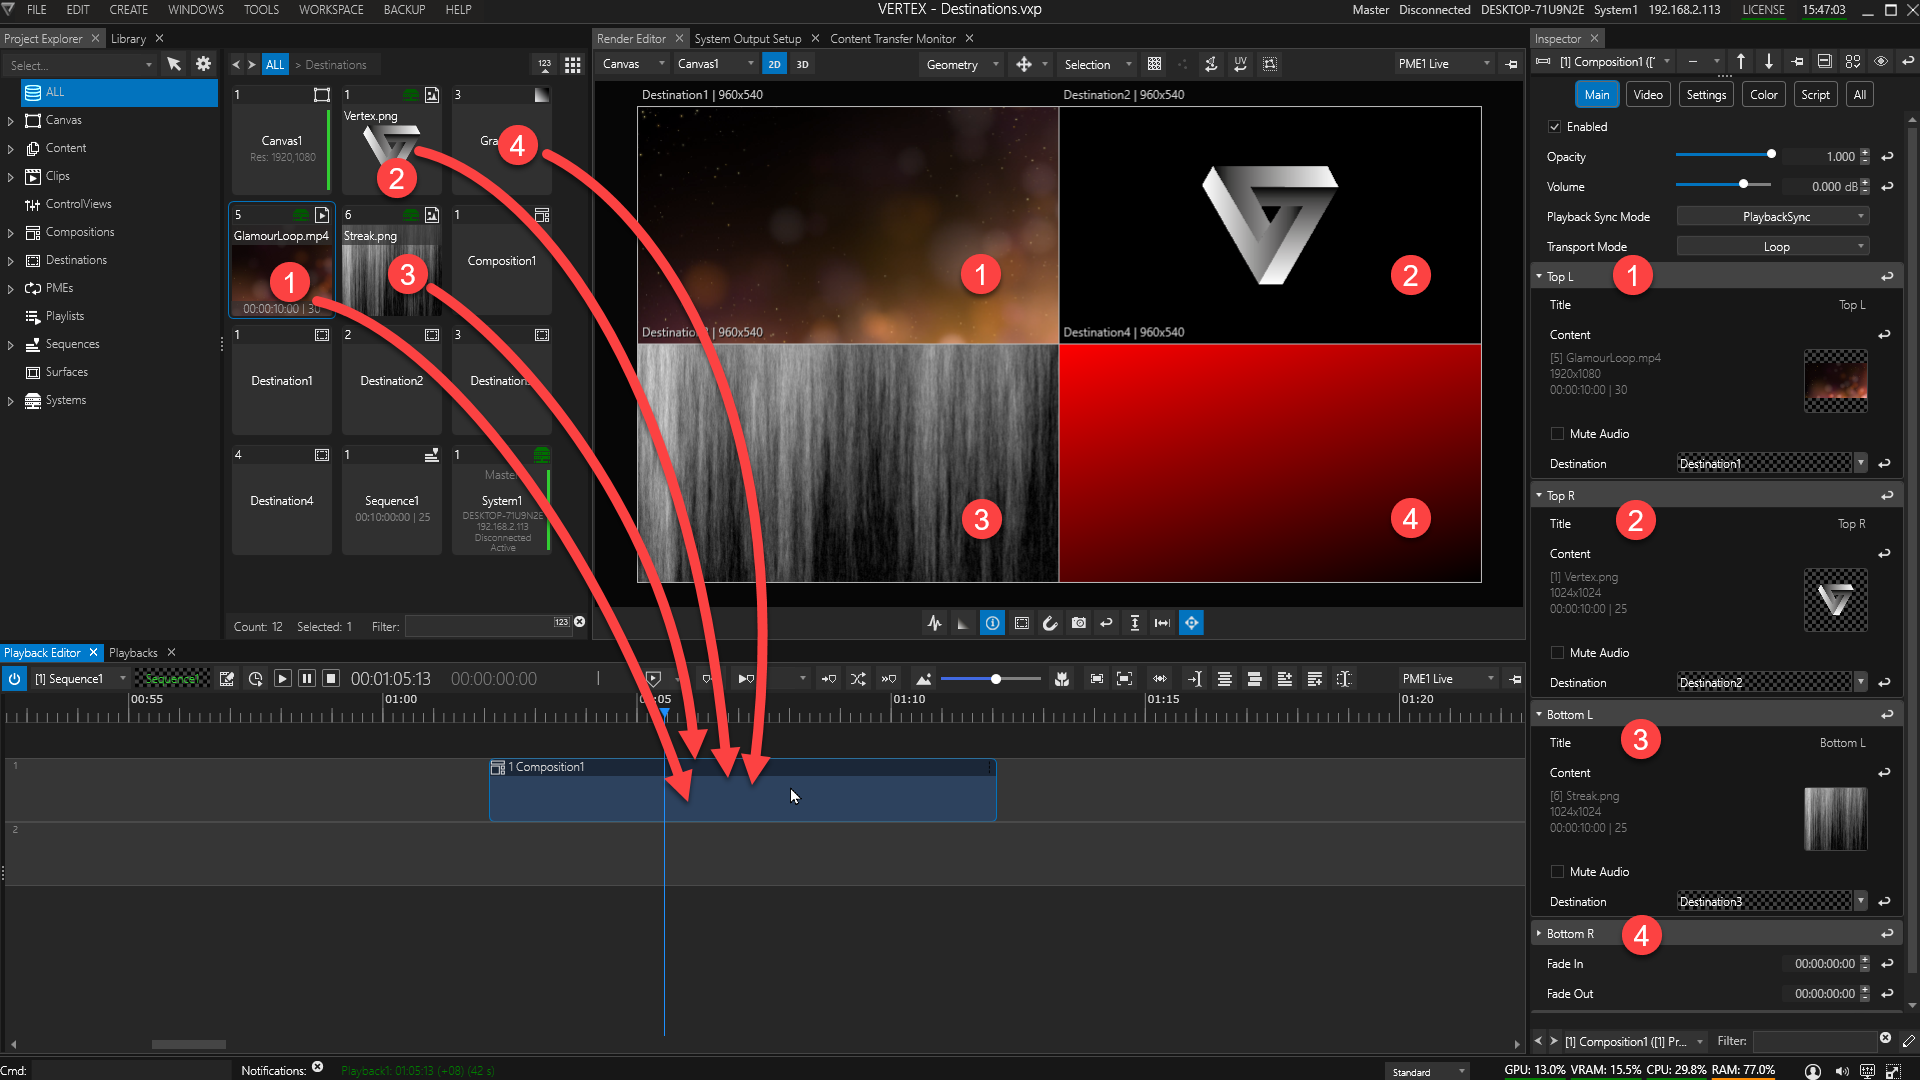
•The above screenshot shows 4 Destinations positioned as a quad-split layout and titled accordingly as Slots in the Composition.
4 content items are dragged to the Composition's Clip Container. They fill each Slot in the same order as dropped (compare the numbers in the picture above).
•Selecting the Composition's Clip Container focuses it in the Inspector where
- each Slot's content can be set,
- each Slot's audio can be muted individually,
as well as basic Clip Container Settings: Opacity, Volume, Playback Sync Mode, Transport Mode and Fade Times.
Changing Assigned Content
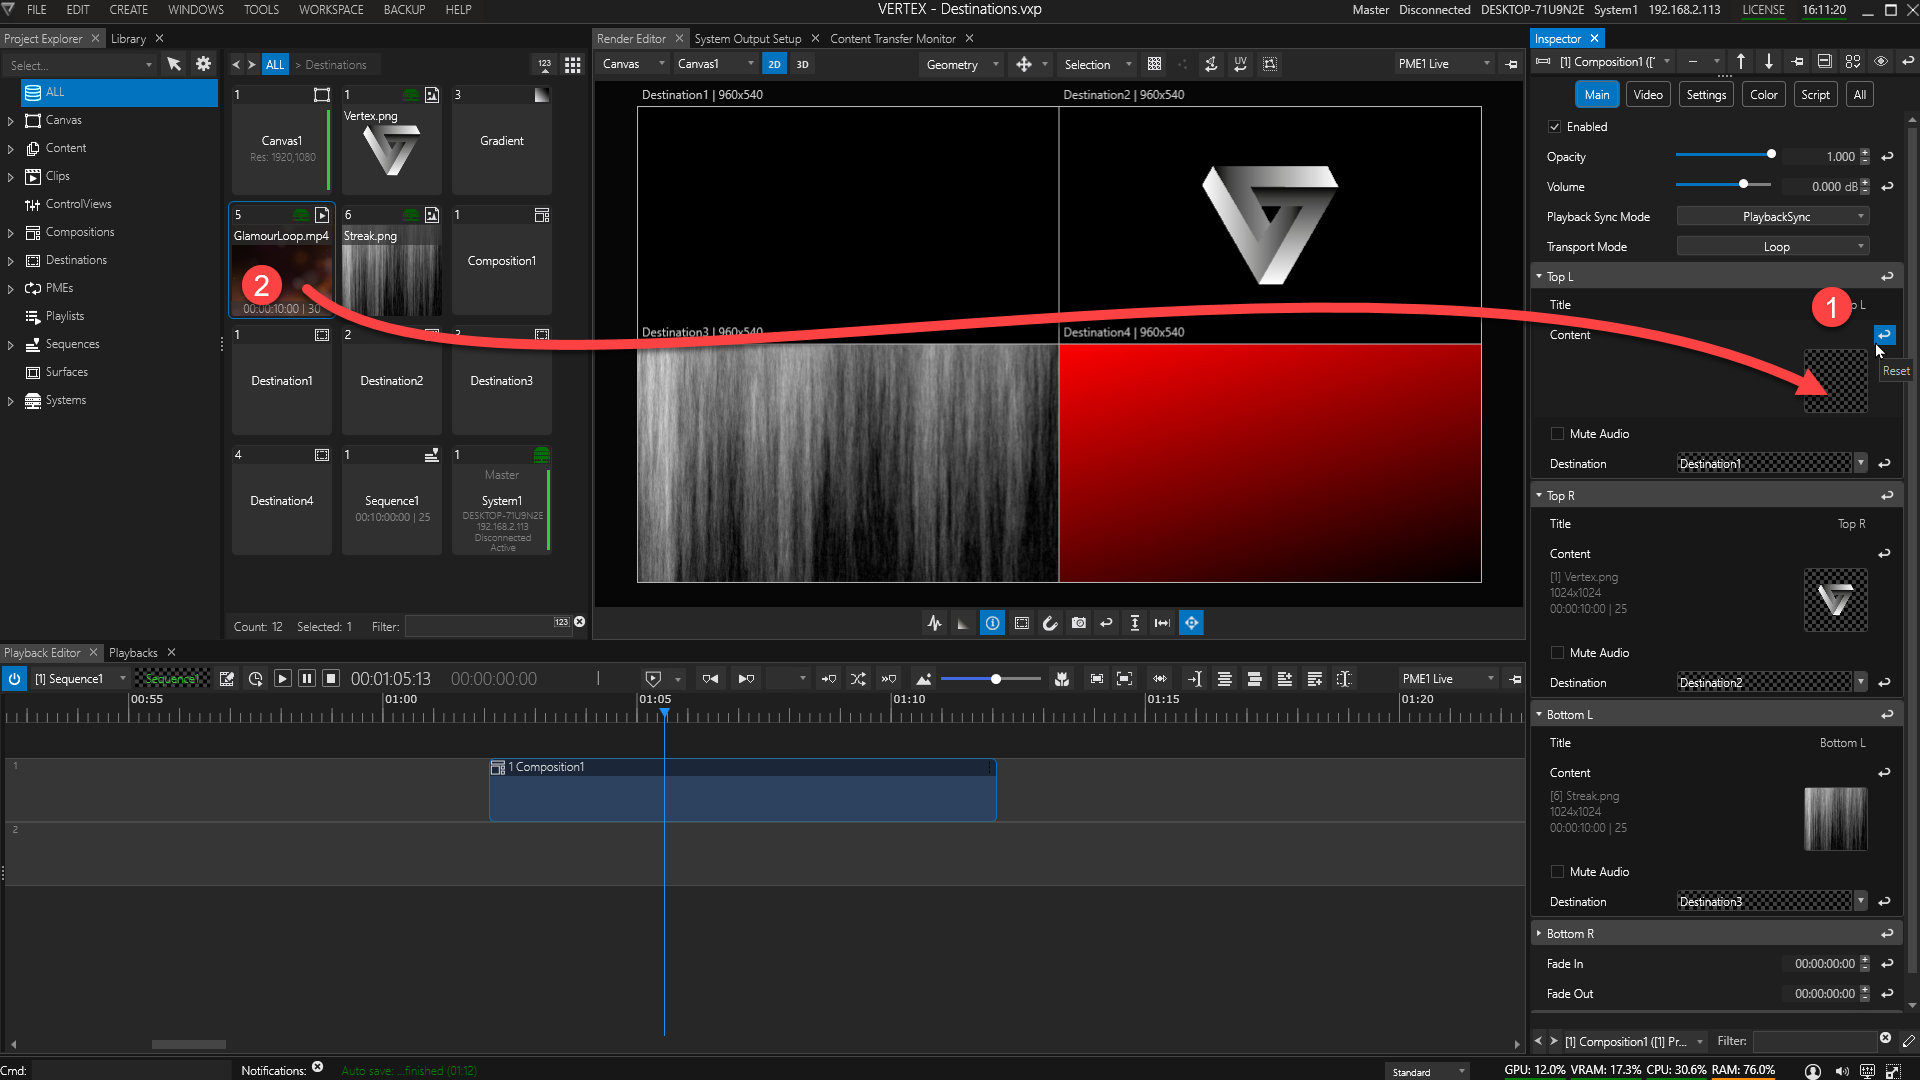
1. Reset a Slot's Content assignment with a click on the Reset button.
2.Drag & drop your alternative choice of content from Project Explorer onto the target field in the Inspector.
Compositions as Default Track Targets
Assigning a Composition as a default target for a sequence track is a time-saving way of mapping content on the fly.
Any content dropped onto the track with a Default Composition will instantly become part of the Composition set.
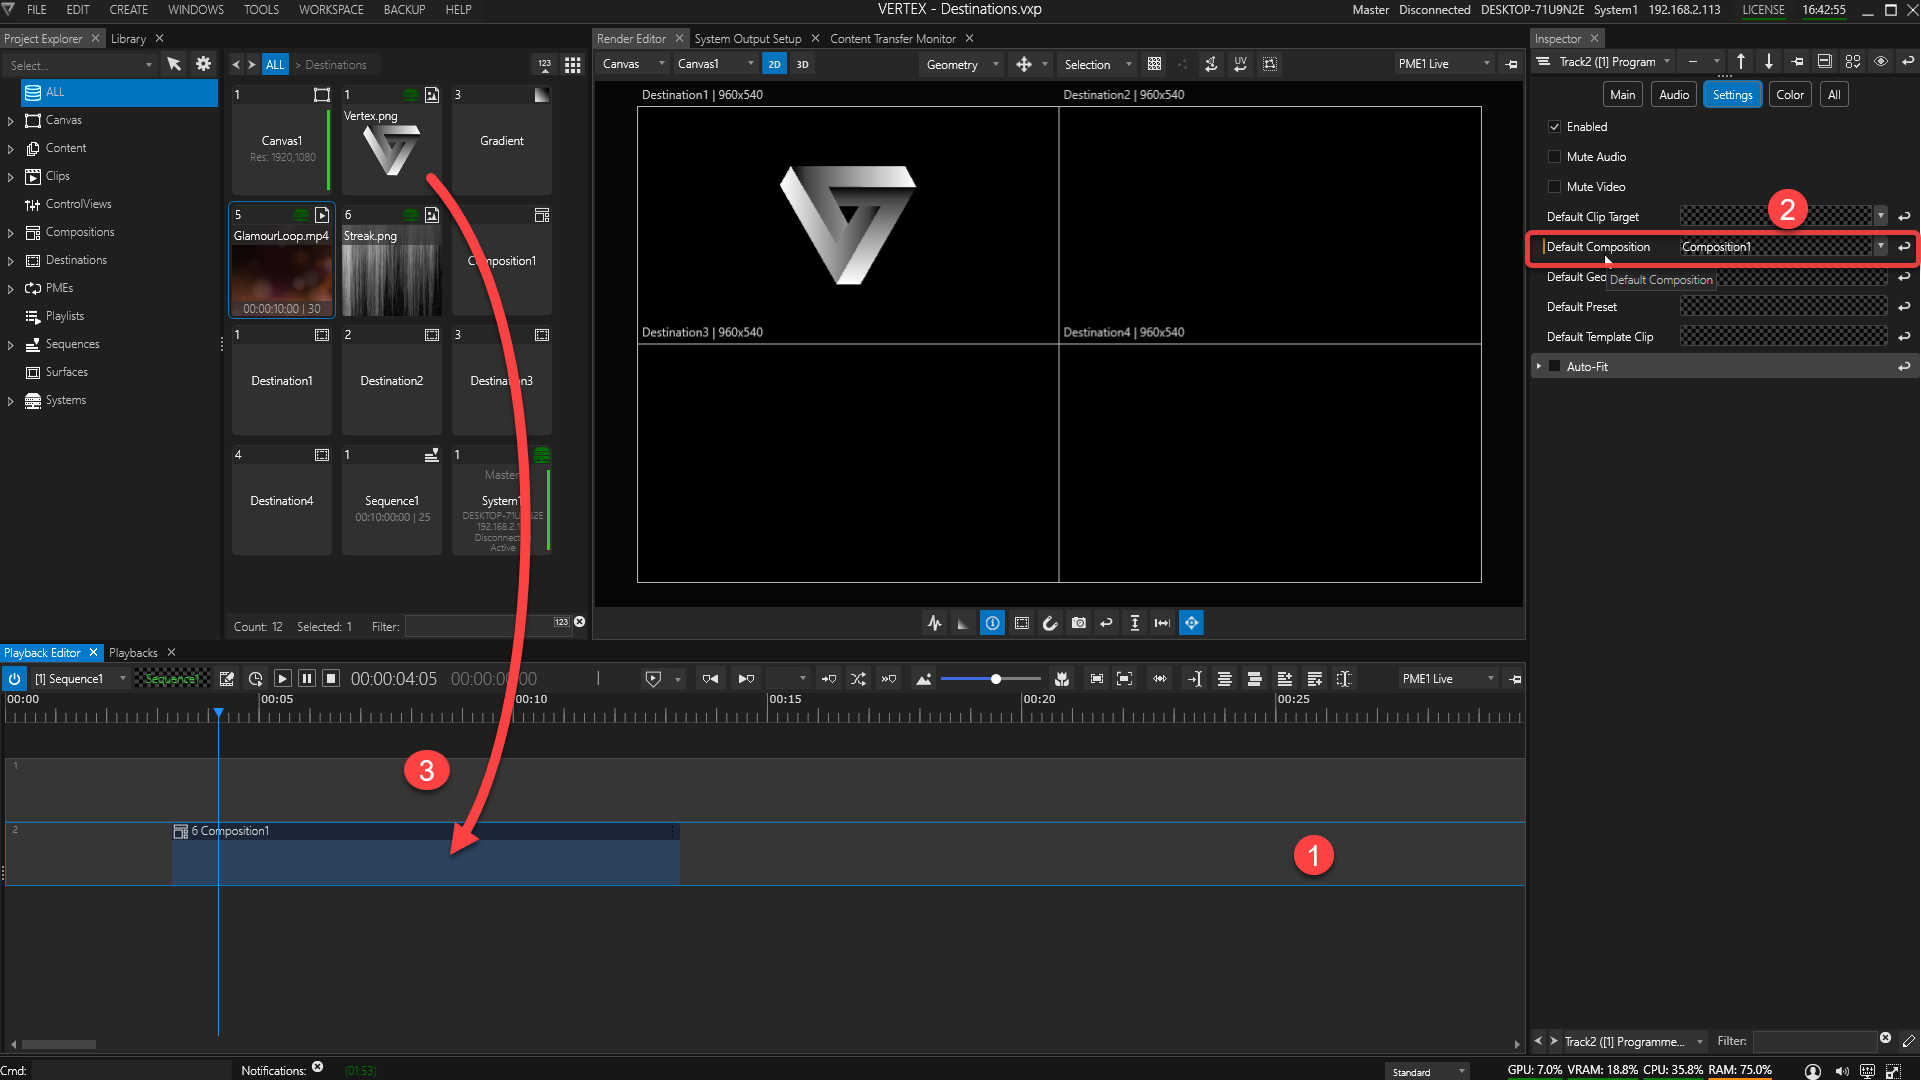
1.click onto Track2, select & inspect
2.choose a Composition from the drop-down menu or drag & drop it from Project Explorer onto the Inspector's target field.
3.drag a content item directly onto Track2
- instead of creating the usual Clip Container, the content item is directly transformed into Slot1 of the Composition.
- repeat this process to fill up your other Slots