•Because the compositing space of a Canvas is processed independently from your Output(s), a Surface is the link between the two.
•In order to play out content, Surfaces need to be added to a Canvas and assigned to an Output - either per drag-and-drop or from a context menu.
•Surface settings include Canvas Offset (position of Surface on Canvas) and Canvas Viewpoint, as well as settings for output positioning.
•Multiple Surfaces can be assigned to the same Output in split configurations.
Surface links Canvas to Output
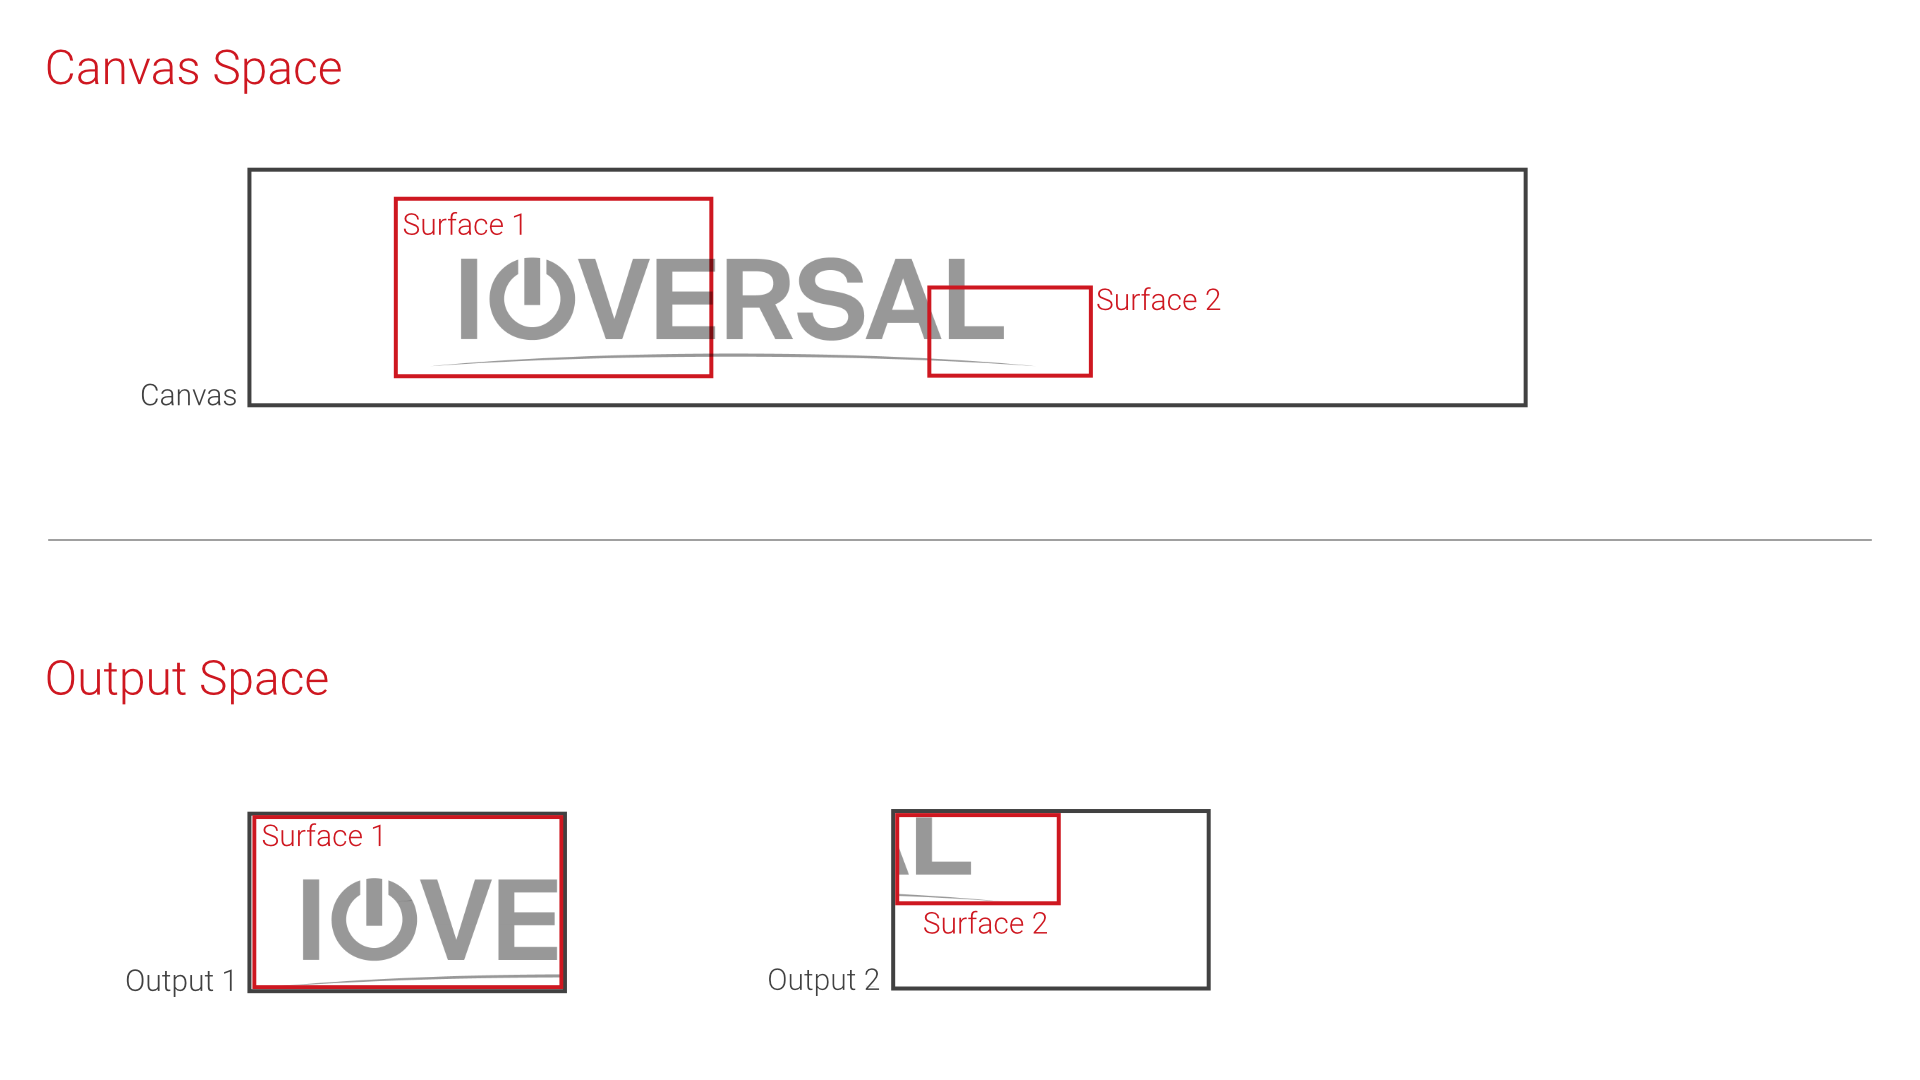
A Surface acts as a bridge between Canvas Space and Output Space. Like a camera frame capturing a 2-dimensional Render Texture which is provided for the Output.
Because a Surface links both spaces, there are transformational properties in a Surface's Inspector that work for Canvas and Output separately.
Please also read the introduction to Canvas, Surface and Output.
Add / Remove a Surface
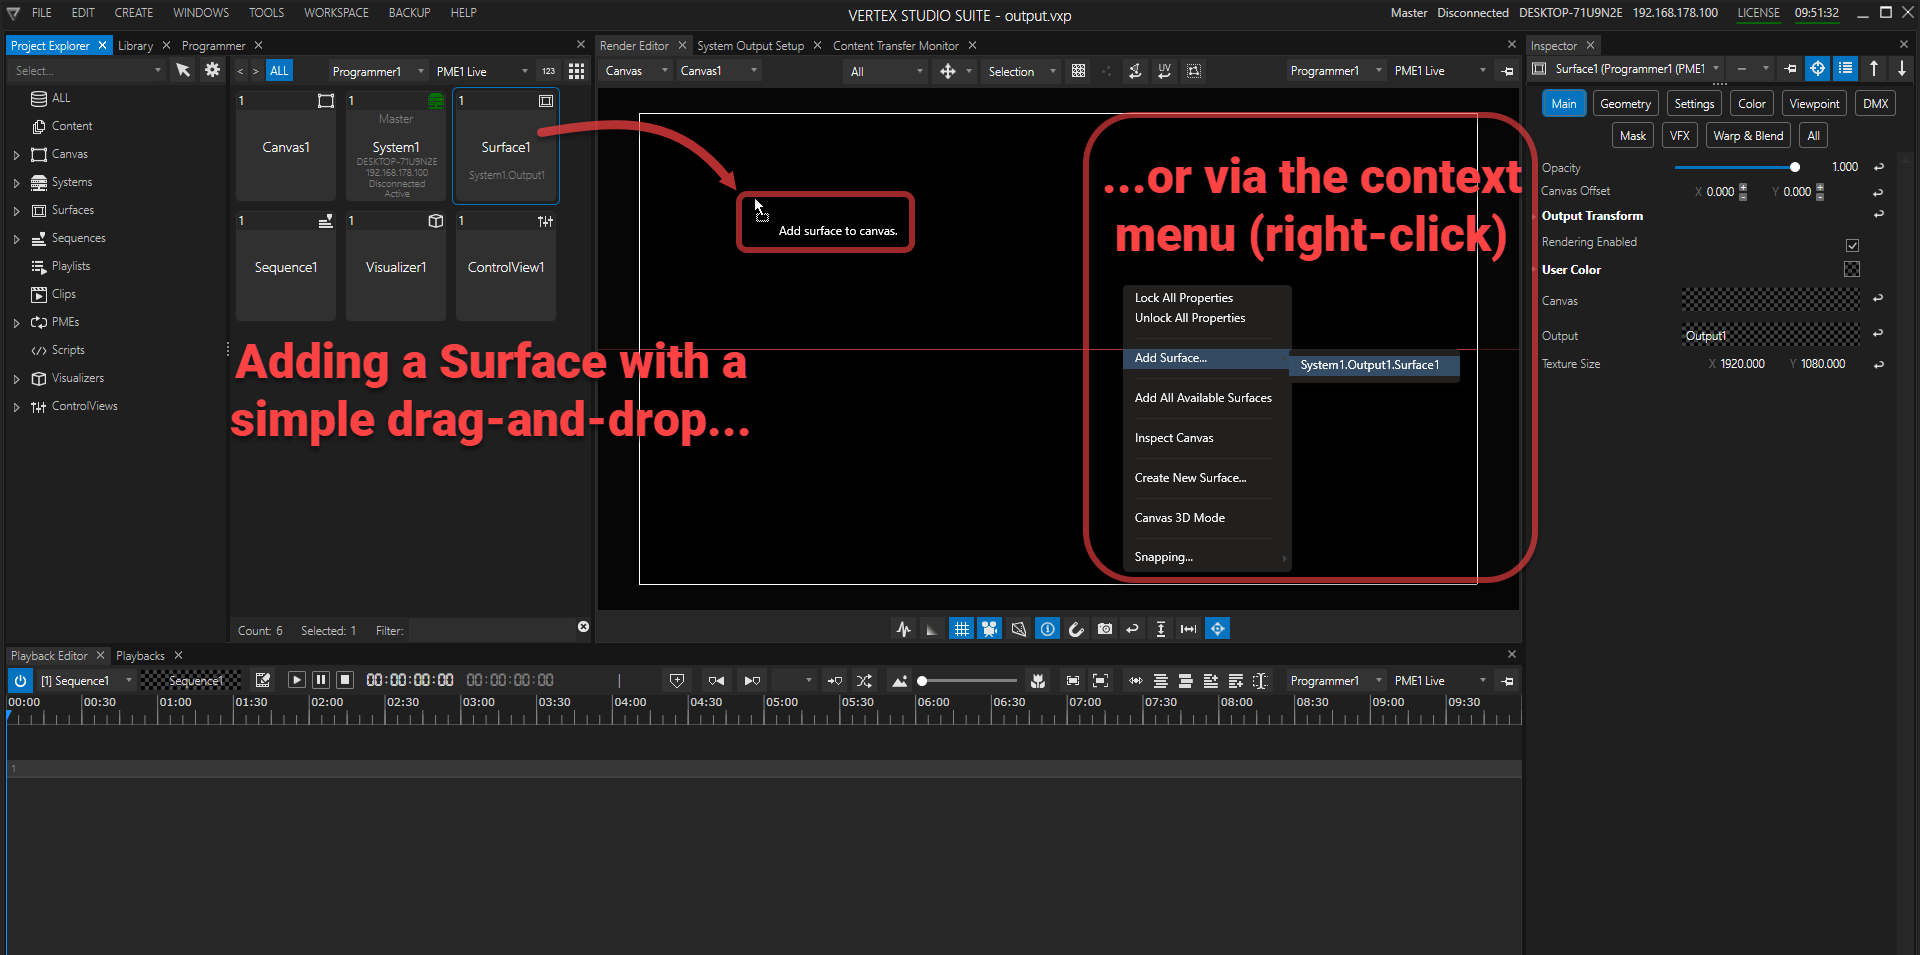
There are two different options for adding a surface to a canvas
1.Per drag-and-drop from Project Explorer into Render Editor
2.or via the context menu (right-click in Render Editor) with the option of adding only one specific surface or all available surfaces at once.
Removing a Surface from a Canvas
•Access the REMOVE SURFACE command via the context menu of a surface in the Render Editor.
Choose between removing only one specific surface or remove all surfaces from canvas.
Settings for a Surface
Surface Size
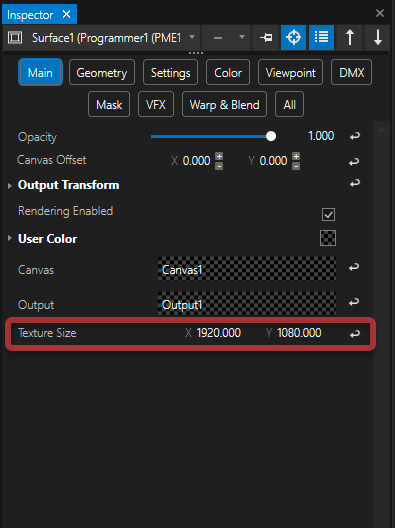
The Texture Size defines the size of the Surface.
By default the texture size for new Surfaces is 1920 x 1080 Pixel
 When adding a new system with outputs, VERTEX automatically creates a Surface for each new output.
In this case the Texture Size of the Surface matches the pixel size of the Output.
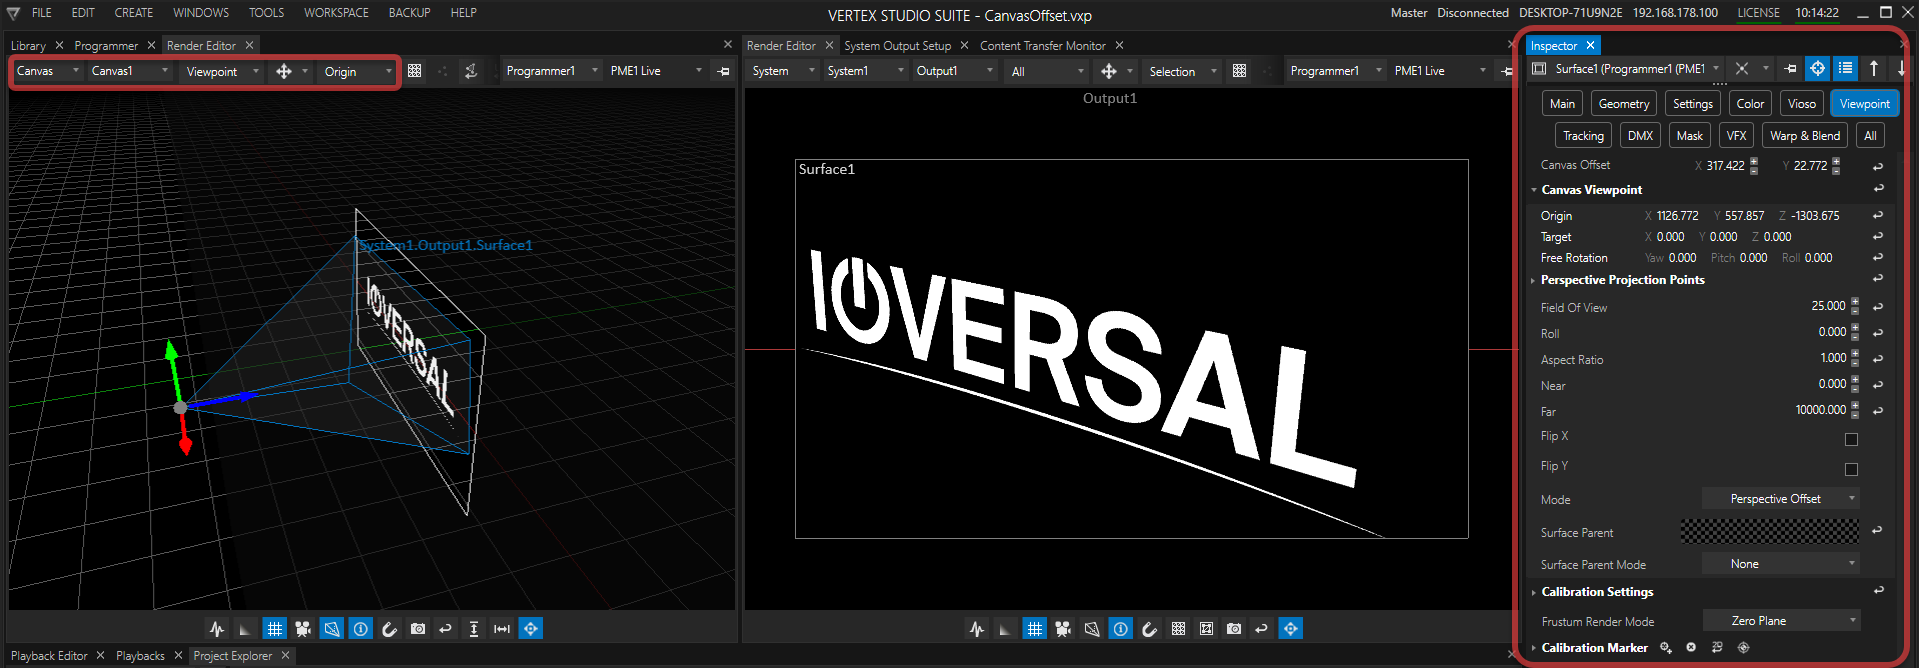
Surface Position and Viewpoint on Canvas
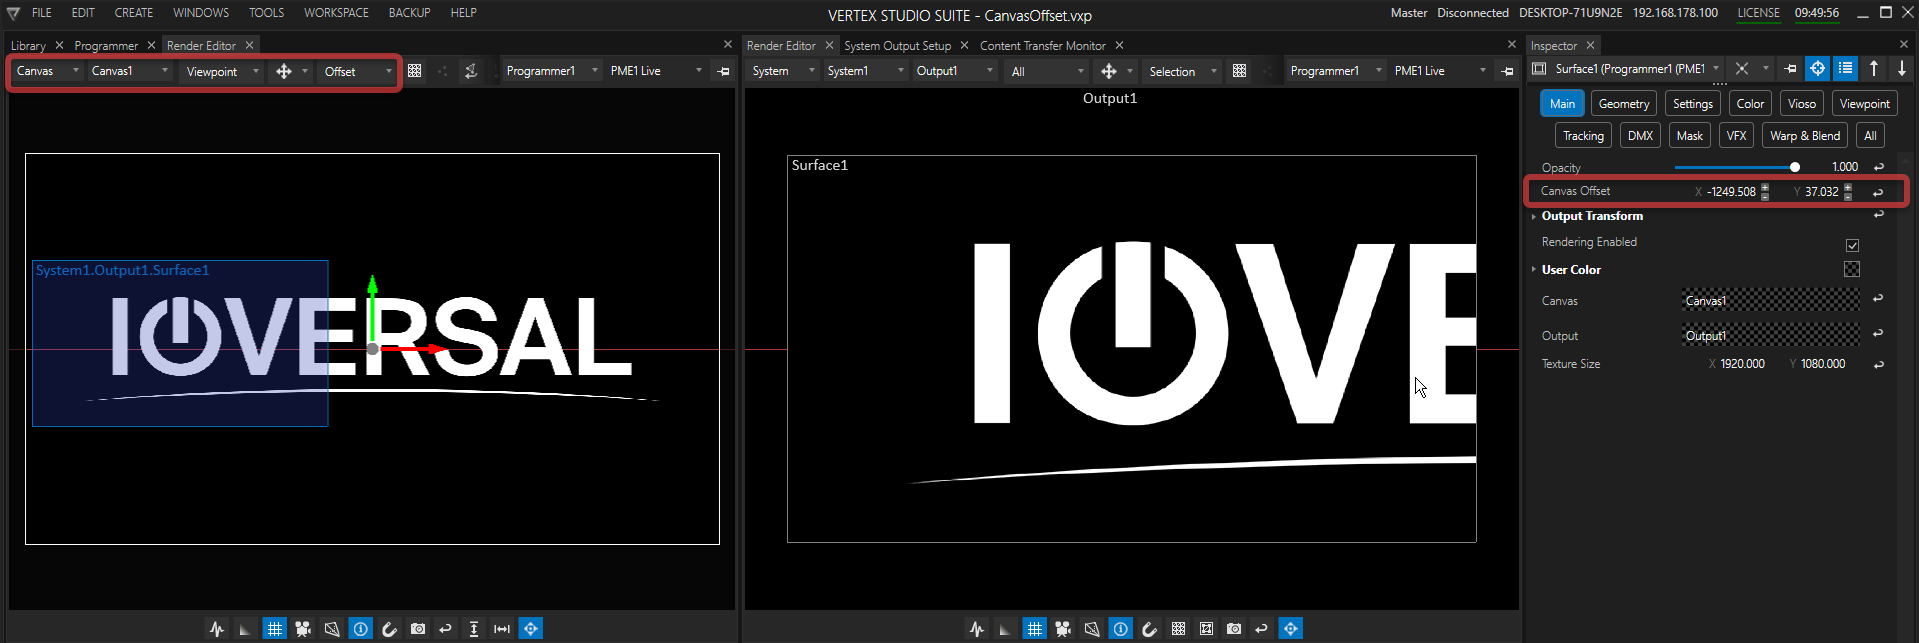
The position of the Surface on a Canvas is called Canvas Offset.
The values for X and Y offset the frame of the Surface from its default position. Use them to reposition the Surface to its desired spot.
Switch to Canvas View in the Render Editor to see what you set:

Surface Position in Canvas View Output View
Canvas Viewpoint
The Viewpoint Tab of a Surface's Inspector contains various settings to define and manipulate the Surface's viewing angle onto the Canvas for specific 3D views.
In most cases the default settings should work. VERTEX automatically calculates the viewpoint origin based on Texture Size and Canvas Size.
Output Position
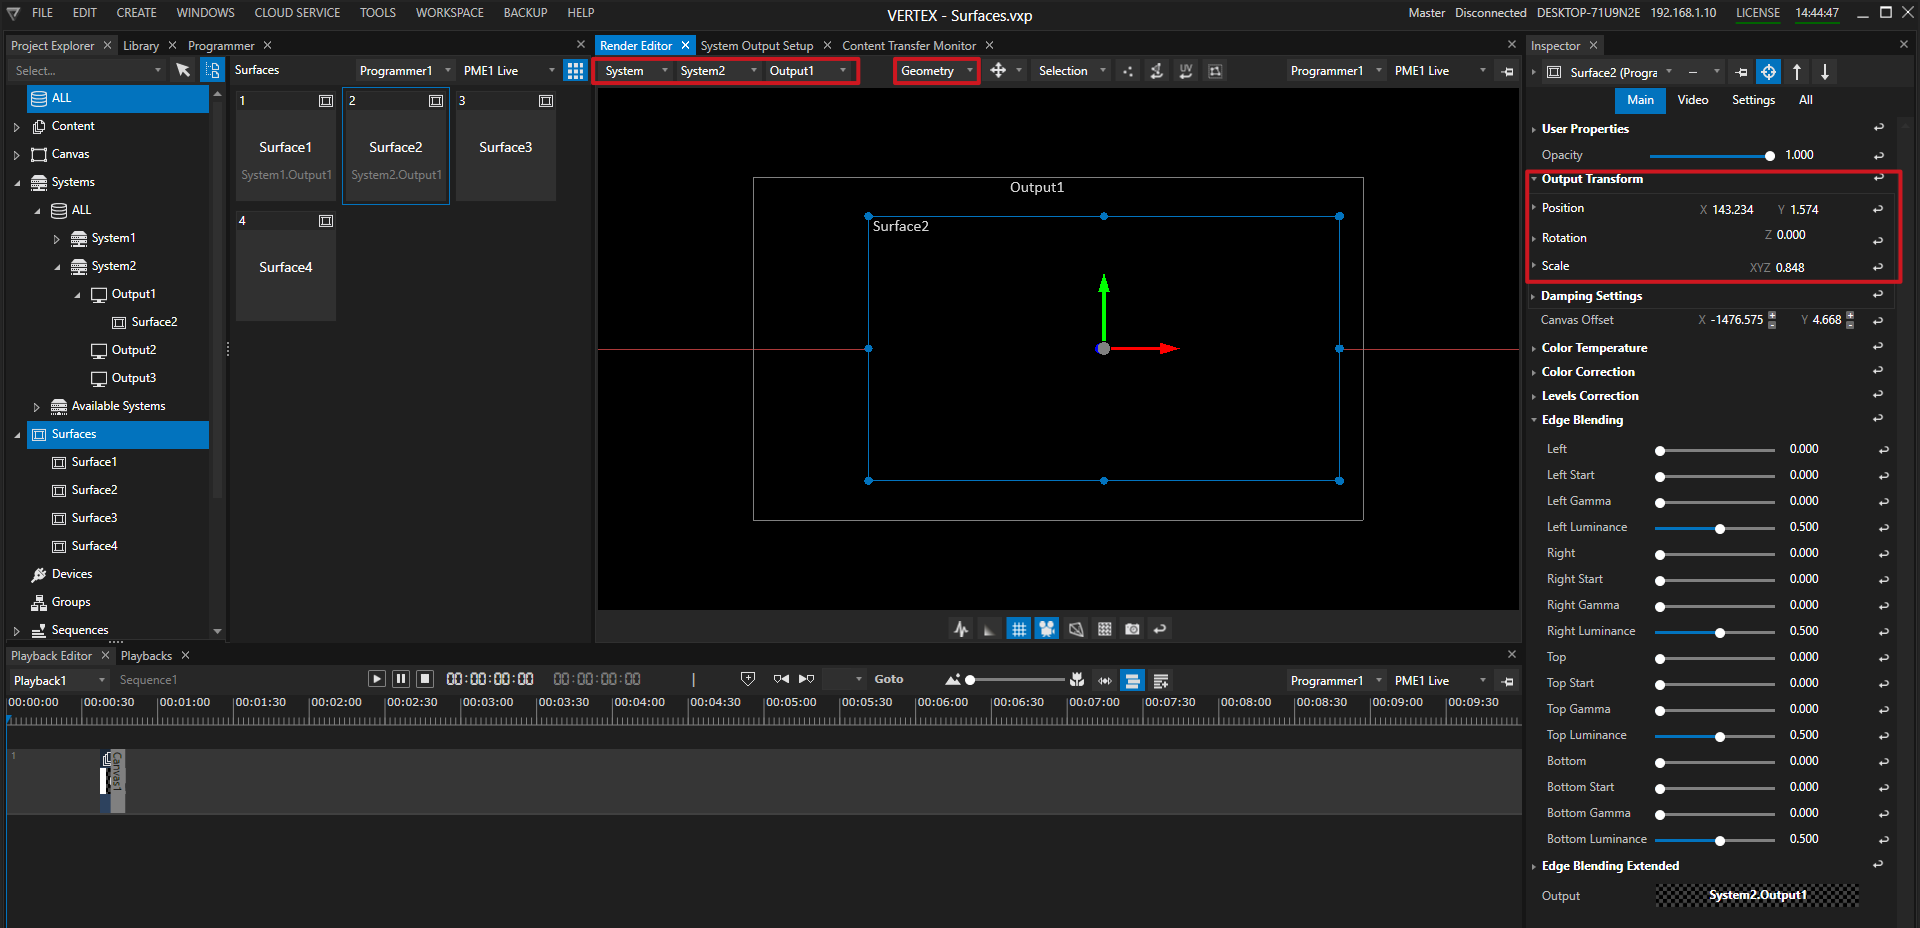
The Output Transform Settings adjust the position of the Surface in its output .
•Select view System in the Render Editor and select the Output that is assigned to the Surface
•Switch to Geometry Selection to select your Surface
•Transform your Surface by setting the values in the Inspector or move the Surface with your mouse in the Render Editor.
Geometry Modifier and Warp Files
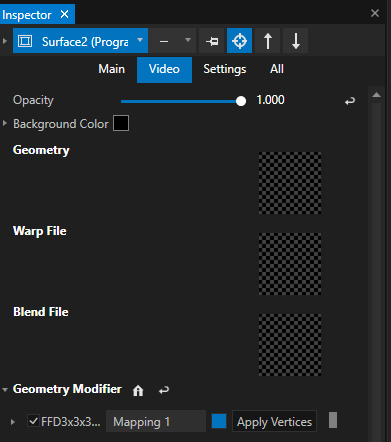
Each Surface has Property fields for
•A 3d Geometry that can assigned by drag and drop from Project Explorer
•A Warp file
•A Blend file
•Geometry Modifiers to do a Warping
Edge Blending

Each Surface has Edge Blending Parameters to set up an Edge Blending
Assign Surface to an Output / Remove Surface from an Output
Output Reference
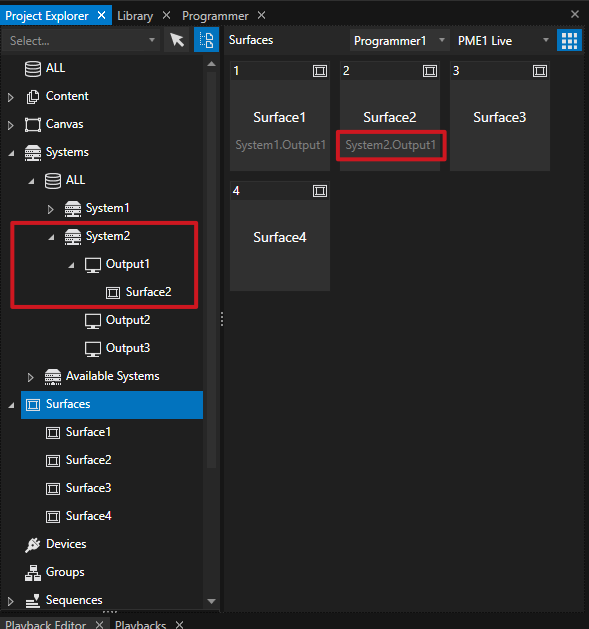
The output reference for each Surface assigned to an Output is shown in various places:
•the Surface tile in the Project Explorer
•top-left corner of the Render Editor (i.e. System2.Output1.Surface2)
•in the Inspector of a Surface under the tabs Main and Settings.
Assign Surface to an Output
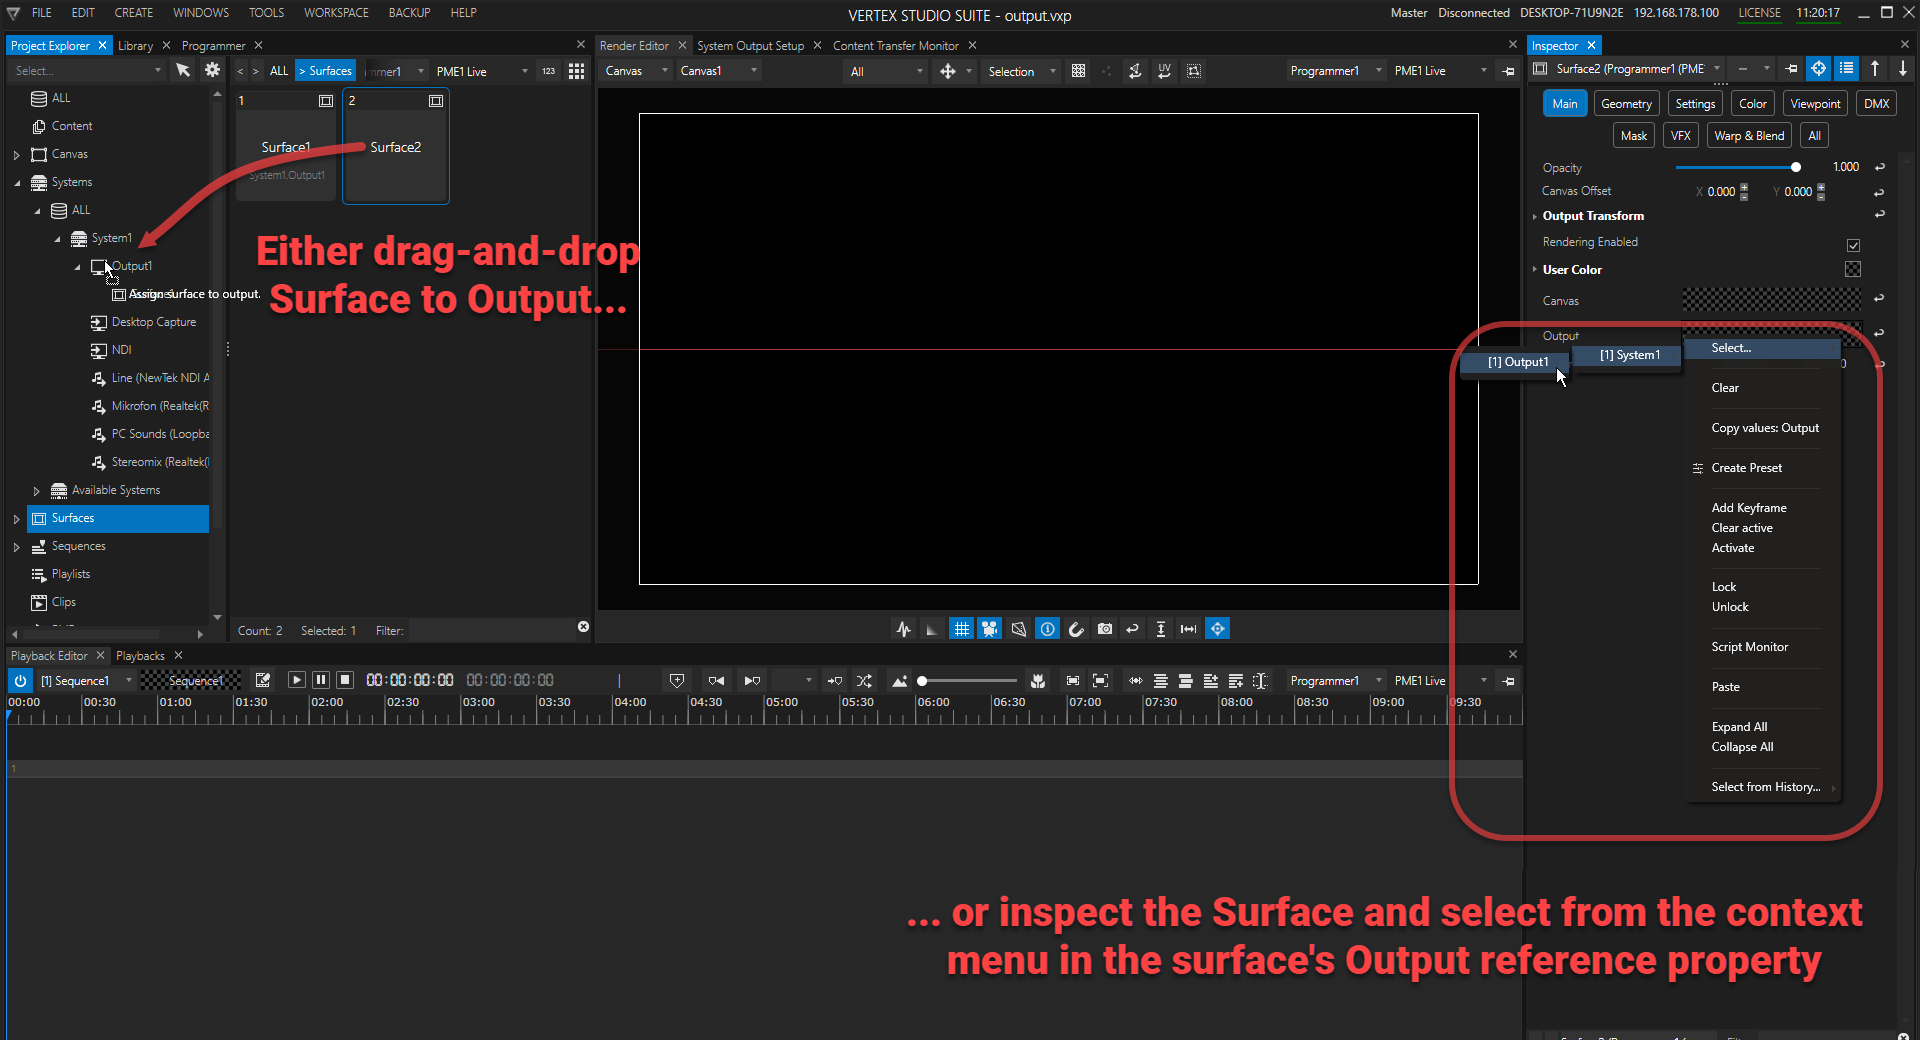
There are 3 ways to assign an already existing Surface to an Output:
1.Drag-and drop the Surface tile from Project Explorer to a system's output in the tree-view
2.or drag and drop the Output from the tree-view of Project Explorer to the Surface's Output reference property in the Inspector,
2.or access the context menu (right-click) in the Surface's Output reference property in the Inspector and select your desired output from there.
When starting a new project or add a System as session member to your project, for every output a Surface is automatically created.
This surface already is assigned to the corresponding output.
If no Surface exist or if you want to add more than one Surface to an output:
Select your output from Project Explorer or System Output Setup and access the context menu.
The texture sizes are automatically set for each new Surface.

Create a Spout Output from VERTEX:
Any Surface in VERTEX can render its texture as a Spout Output. Inspect the Surface, go to Settings tab (in advanced mode) and enable Spout Output.
Spout is an open source video texture sharing framework for Microsoft Windows.
 With Spout it is possible to share video or graphics textures in realtime between windows applications on the same System.
Spout is supported and integrated by a lot of creative applications.
All information including a Spout test sender and receiver could be downloaded on the Spout Website
Remove Surface from an Output
There are 3 ways to remove a Surface from an Output:
•Go to Project Explorer and navigate to your Surface, access the context menu and select Remove Output Reference.
•OR
•Delete the Surface as Child Element from an Output.
•Surface Inspector: Main Tab, go to Output Reference and select "Clear" from the context menu (right-click).