Projection workflows usually require warping the projected output to perfectly match the plane projected upon.
In VERTEX, all blending and warping operations take place on Surface level.
Go to Library > Geometry Modifier and choose your required warping modifier:
•Keystone: Adjusts the overall projection shape to correct perspective distortion, typically by repositioning the output’s corners. Use it when a projector is not perpendicular to a flat surface and the image appears trapezoidal.
•FFD (Free-Form Deformation): Warps the output using a control-point grid. Moving a control point deforms the surrounding area smoothly, making FFD suitable for curved, irregular, or complex projection surfaces.
•Vertices: Moreover, users can apply warping directly to individual vertices. It provides precise, local control over the projection mesh, but generally requires more point-by-point adjustment than FFD.
Workflow
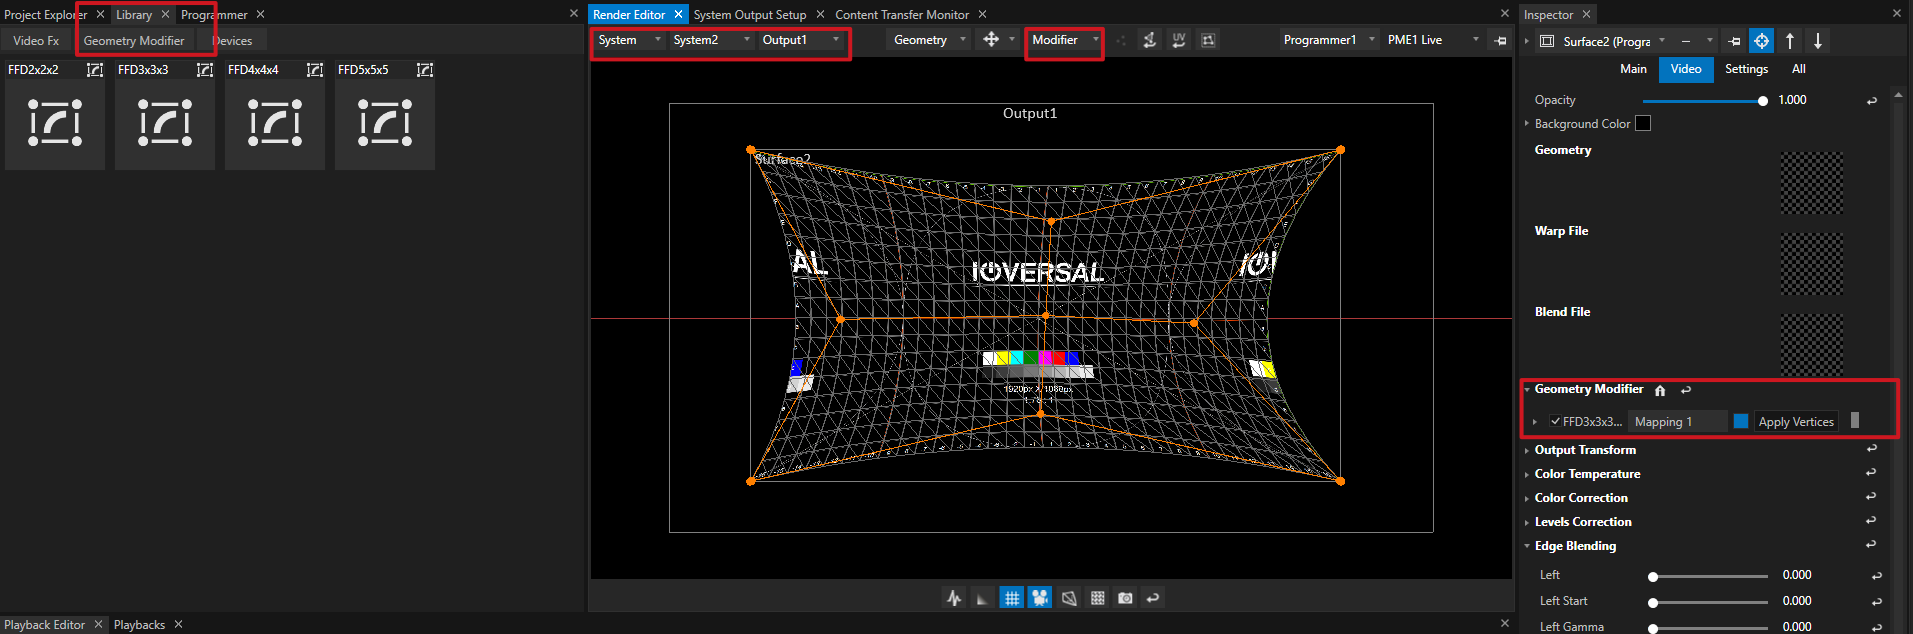
1.Go to Render Editor > System view and select the rendering system and the projector output.
2.Inspect the corresponding Surface by selecting it either from the Render Editor (context menu) or the Project Explorer.
3.Drag a Geometry Modifier from Library to the Surface - either to the Render Editor or to the q stack in the surface's inspector.
4.Set the Render Editor's selection mode to Geometry, Move, Modifier.
5.Select a modifier's control point and re-position it to warp your Surface. Use keyboard shortcuts for an efficient editing process.
6.Enable / disable the modifier. This might come in handy when working with multiple stacked modifiers.
7.Use this selection toggle when working with stacked modifiers. Blue indicates which layer is activated for editing in the Render Editor.
 Warping can also be applied to a Clip Container, in case the transforming geometry is only necessary for its particular duration and location.
Partial Warping
Sometimes a projection only requires partial warping. In other cases, different sections of your Surface may need to be warped separately by stacked modifiers to achieve precise results in every detail.
This workflow has basically 3 steps:
1.In the Render Editor, switch selection mode to Vertices. Notice how the Vertices grid looks much brighter than the Modifier grid.
2.Lasso-select an area of your Surface. The selected vertices will be highlighted blue.
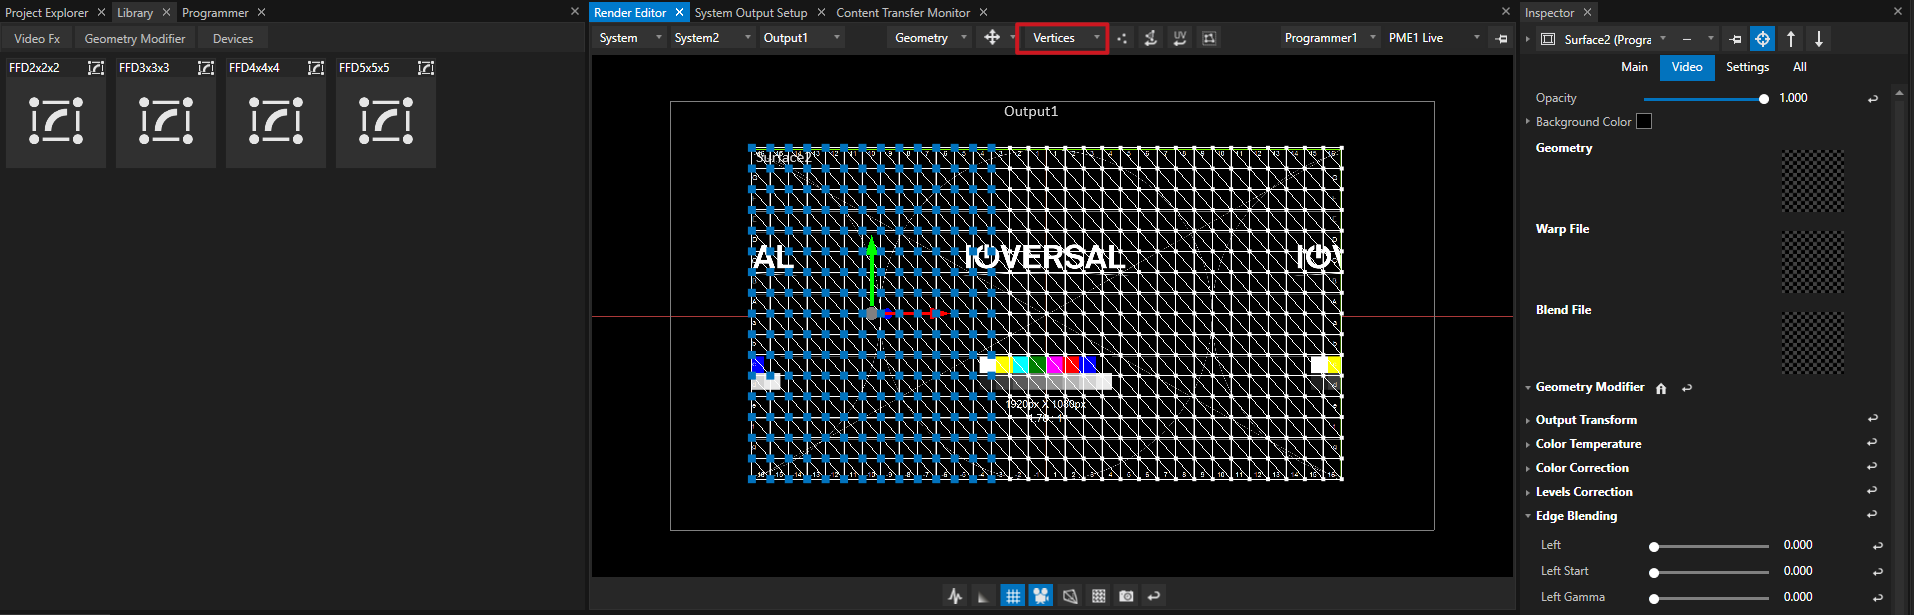
3.Add a Geometry Modifier from Library to the selected vertices, or apply an existing modifier by clicking Apply Vertices in the Inspector.
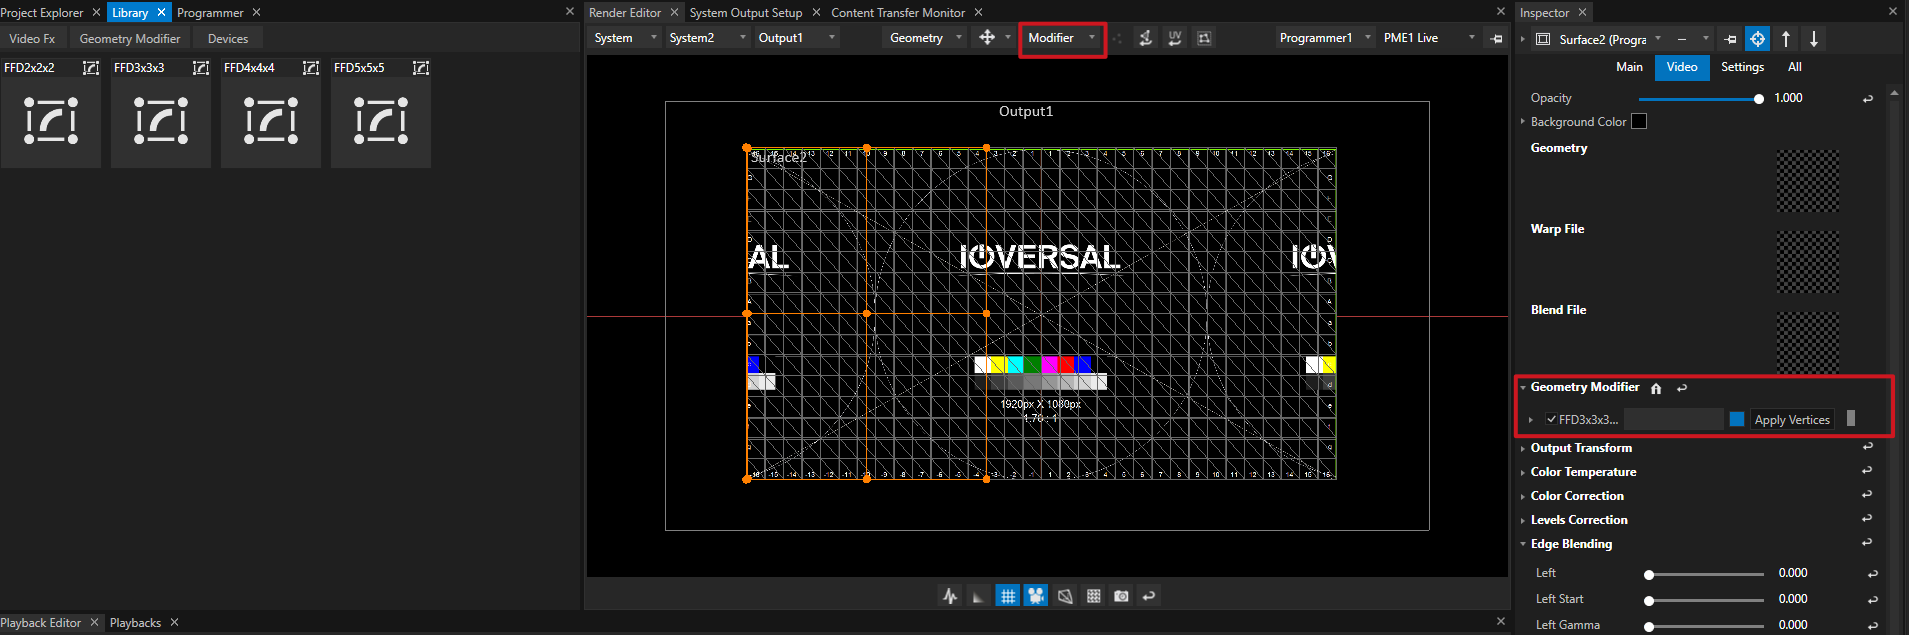
Repeat the steps above if your warping requires multiple modifiers in separate ares.
Editing shortcuts in the Render Editor:
•Transform selected control point: SHIFT + arrow keys
•Change selection to the next adjacent control point: arrow keys
•Multi-select control points: CTRL + arrow keys
Once the warping of a projection is complete, it is a good idea to create a calibration file for later use in case of accidental projector shifts. If you consider Surface Re-Calibration, it's good practice to leave safe zones for re-adjustment.