Sometimes handling multiple outputs with varying resolutions and pixel densities can be quite challenging. VERTEX can translate the actual physical dimensions of all outputs from meters into pixels.
Your content will be lined up neatly irregardless of pixel size, density or aspect ratio.
KEY FEATURES:
•Both Canvas and Surface can be set up in relation to the actual dimensions of your physical outputs.
•Use Canvas Dimensions when creating a new Surface to help aligning outputs with varying pixel resolutions and pixel densities.
•Auto Update Size is resizing the pixel resolution of Canvas and Surface if needed.
WORKFLOW & SETTINGS
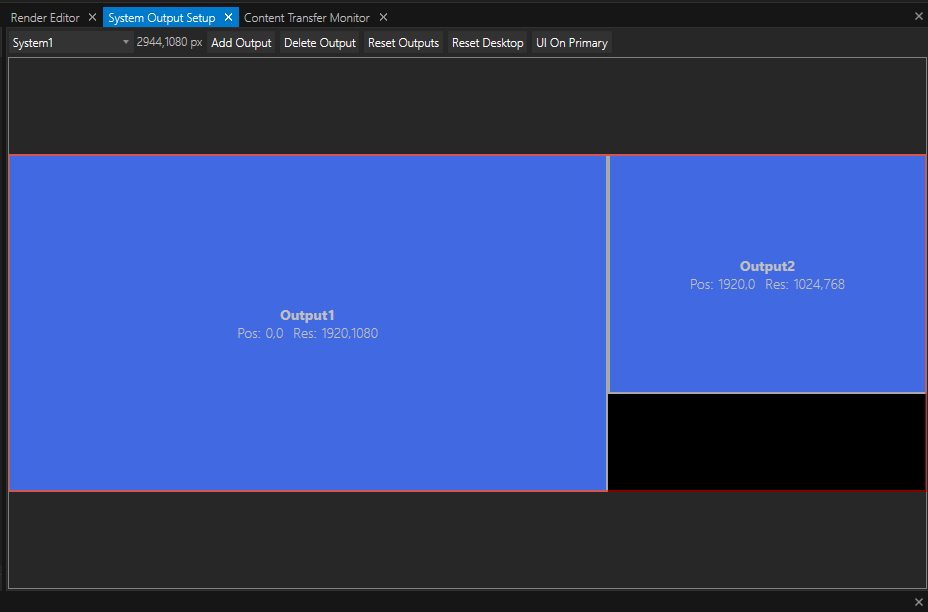
When your outputs have different resolutions and aspect ratios, your System Output Setup might look like this:
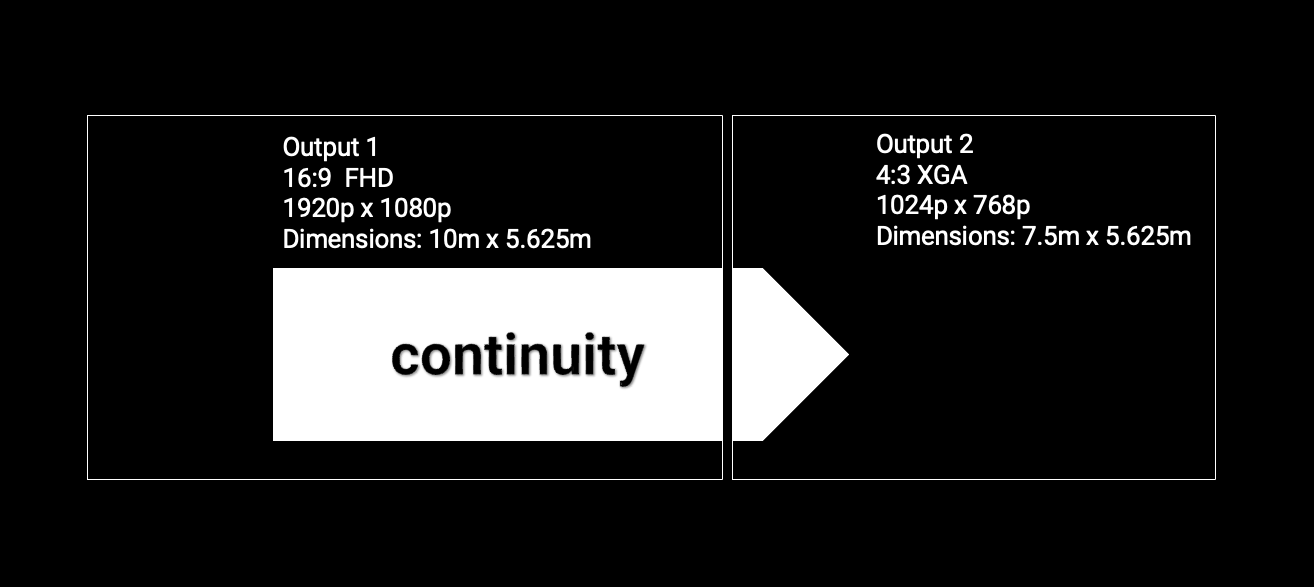
The physical outputs in your production however have got the same height and yet you want continuity in your displayed content:
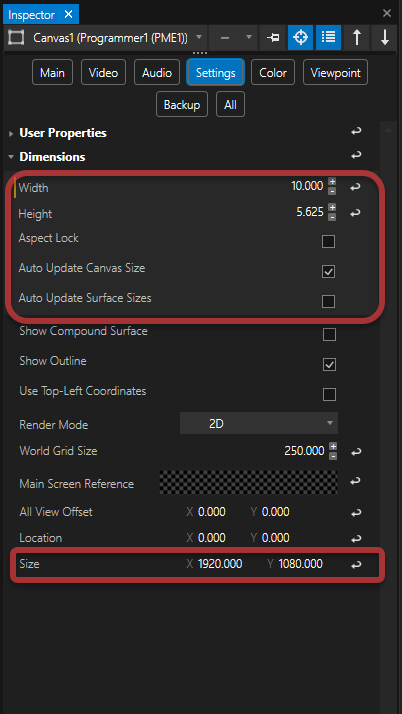
You can start by resizing your Canvas to fit dimensions of your total outputs. Inspect your Canvas and go to the Settings tab:
Width & Height |
Enter Canvas Dimensions in metric units. If the total dimensions of your eventual outputs exceed the default value, you can adjust the dimensions according to your needs. Just pretend your virtual Canvas was a piece of physical hardware. |
|
Aspect Lock |
Locks the aspect ratio of the Canvas' Dimensions. If enabled, changing Width will result in changing Height in the same ratio. |
|
Auto Update Canvas Size |
If enabled, any change in the Canvas' Dimensions will automatically update the Canvas' Size (in pixels - values at the bottom of the Inspector window). |
|
Auto Update Surface Size |
If enabled, any change in the Canvas' Dimensions will automatically update the pixel size of any Surface assigned to this Canvas. |
As mentioned above, the combined width of all outputs adds up to 17.5 meters. Make sure that Auto Update Canvas Size is enabled and enter a width of 17.5 meters.
The new values for your virtual Dimensions will automatically re-scale the pixel size of your canvas accordingly.
Next, go to the Render Editor window in Canvas view and open the context menu with a right-click on the Canvas. Choose Create New Surface... and the Add Surface dialogue pops up:
System Output |
Assign your new surface directly to one of your outputs. |
|
Pixel Size |
Set the size of your new surface in pixel. In most cases this will be the same size as the chosen output's resolution, but of course it is possible to diverge from those standard values. |
|
Canvas Location |
Values entered here will set a Canvas Offset in the Surface Settings and thus automatically position the new surface onto canvas. Units are pixels in width and height. |
|
Output Location |
Any values entered here will set the Output Transform Position of the new surface. This can be useful if the new surface shall only cover the chosen output partially, like in quad-split setups. Units are pixels in width and height. |
|
Use Canvas Dimensions |
Enable to scale the pixel density of the new surface directly to the canvas dimensions. |
|
Dimensions |
Sets width and height in metric units for the new surface and thus scales the pixel density to an actual physical size in the real world. Values entered here only have an effect if Use Canvas Dimensions is enabled. |
Add two surfaces according to your outputs' resolutions and dimensions. In this example, enter for Surface1:
System1.Output1
1920 , 1080
-720 , 0
0 , 0
true
10 , 5.625
And for Surface2:
System1.Output2
1024 , 768
683 , 0
0 , 0
true
7.5 , 5.625
Don't worry, if you don't know the values of the surface's location right away. You may adjust offset and output position either in the render editor or inspector window at a later stage.
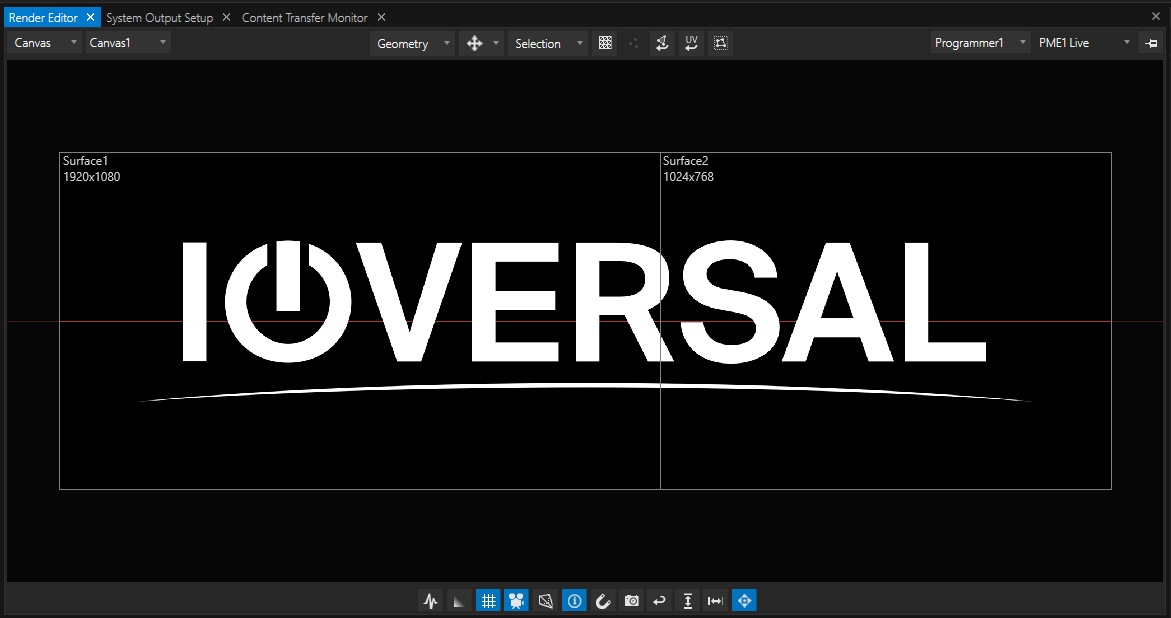
Once this is set up, your render editor's Canvas View will look like this:
Compare this neat and aligned view with the system output view or the first picture in this chapter where the pixel densities are not scaled to dimensions and you will forget that you silently cursed when you had to convert measurements from imperial to metric units during this workflow.


