As Vertex is designed to be hardware independent the software comes with reasonable variety of settings to tweak its behavior and thus matching your specific hardware’s performance to the needs of your individual projects.
The initial values of the settings have been chosen to establish a reliable playback on an average scaled hardware whilst playing back average sized content in an average amount. Due to the nature of averages, you might feel the need of improving the behavior of Vertex to either slowing it down to handle a higher quantity of media on a slower system or to unleash your high performance hardware.
 Note:
Note:
Switch the inspector mode to Advanced in the drop-down located in the status bar to access the properties listed below.

PERFORMANCE OPTIMIZATIONS:
Single GPU
•Make sure you have the same monitor sync frequencies and refresh rates on each output of a system.
•Try using the same resolution on each output of a system.
•Ideally use one system as a master and another system exclusively dedicated to playout in fullscreen mode without the UI. Same applies for audio playout.
Multi GPU
•When mixing UI and fullscreen outputs try using two GPUs - one for the UI and one for fullscreen rendering.
•When using multiple GPUs ensure that the UI and fullscreen GPU are setup correctly -> System context menu
•Check mosaic setup to ensure the same resolutions and frequencies (EDIDs) for your multi GPU usage.
General
•Try change the clip containers' settings to Render In View Only. This will ensure that content will not be rendered for those surfaces and respective outputs where it is not placed and visible. By rendering only the content in view of a surface you can free up valuable processing resources.
•Freeze the property updates of a surface or static non animated clip containers. This will reduce the amount of property updates per rendered frame. In doing so the properties are only updated when the playhead enters a clip.
•Avoid too many surfaces - up to 8 work fine. If you need more, then freezing the properties might be required to reduce the rendering workload.
•Render a surface in an output directly by switching the surface render mode to output in the inspector settings of the surface - careful though, as this may lead to undesired side effects when rendering multiple surfaces into the same output as overlapping content may be the result.
•Render content directly to an output by setting the clip target of a clip container to the designated output. By doing so, you can bypass canvas-surface workflow, if necessary.
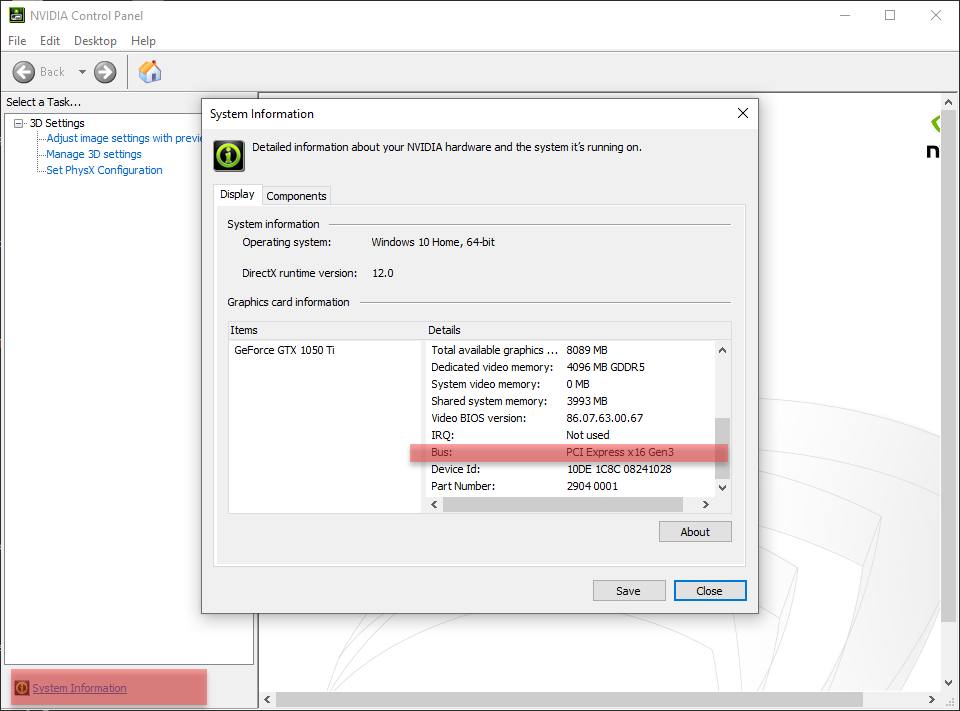
•When using GPUs on a PCIe bus, make sure the card slots are no less than 16 lanes wide (x16):
Use Resource Pooling & Video Pooling only on high-performance systems.
Resource Pooling bundles resources on the GPU as needed. Video Pooling leaves all necessary video codecs and players open in a cache to be used by similar ClipContainers. These two properties can be found through the search filter in the System Settings. They are a prerequisite for the Instant Play feature of content items.
FAQ
I’m having multiple GPUs installed in my system. How to select my preferred GPU for full screen rendering?
Right-click your system in the Project Explorer and select “Set Preferred GPU Adapter” from the context menu. Choose the GPU from the drop-down list. The selected adapter will get stored in your systems registry on a global level.
The content seems to be transferred to my Windows hard drive. I need Vertex to transfer the content to my dedicated content hard drive with larger capacity and higher speed.
How do I tell Vertex my content drives path?
Vertex will store all projects and its assets at the path that has been defined as “Default Project Path” during the installation of Vertex. If later you need to change this, select your System from Project Explorer and search for “Path” by using the filter in the inspector window. Change either the “Default Project Path” or your project specific “Local Project Path” in order to change the drive or directory of transferred content.
Note: you might stumble upon the system property “Content Drive”. This value is only used for the calculation of “Free Content Space” (System Info).
When manually seeking or spontaneously jumping to a cue in my sequence with a large number of tracks and clips, I see the clips being created sequentially with a short time delay. How to manually influence this interval?
Select your System from your Project Explorer and navigate to “Settings” in the inspector window. Adjust the “Render Element Create Interval” (Default: 40ms) in order to speed-up or slow down this process.
Why do I occasionally see jerks/shudder in my playback, that look like missing frames or tiny jumps?
Especially when dealing with different framerates (content framerates vs. sequence framerate vs. output framerate), small glitches in playback might become visible when frames are missing or need to be dropped in order to stay in sync.
Activate the parameter “Frame Blending” (default: false) for contents that require smoother rendering. Consequently, frames will get interpolated. However, we do not recommend activating frame blending for any content in general, as this will have an impact on the performance of systems with a heavy load.
My ASIO audio playback is occasionally cracking during playback. How do I solve this?
It’s highly recommended to use a dedicated hardware for audio playback. Ensure the system connected to your audio interface is not rendering any video output, handling DMX data nor is used as sync master of your session.
The use of virtual ASIO devices such as Dante Virtual Soundcard is fully supported by Vertex. Please keep in mind these virtual devices are utilizing your systems CPU for their tasks while Vertex might claim the same resources. The same applies to USB connected audio interfaces.
We recommend using dedicated Yamaha or Focusrite PCIe cards as they come with a Datan chip onboard that is providing dedicated performance.
General advice:
• Make sure you’ve set your “Asio Output Channel Count” (Default: 0) to the amount of audio channels used in your project. You can find this parameter in your project settings.
• We also recommend setting your ASIO drivers’ buffer to above 1024 samples.
My composition's background becomes visible for a few frames when seeking/ jumping into different clips or using GotoCue/GotoTime as my system is creating the new clips too slow. How to tweak this behavior?
In an ideal scenario the playhead is either running into your clips that have their PreRoll parameter set according to the content size (default: 2 sec), or the clips that you are jumping to are set to “Pre-Loaded” (default: false).
If both options can’t be guaranteed there are further ways to enable a seamless jump:
• Temporarily pre-load your clips in case you know where to jump in advance. Trigger this script (e.g. via cue script code, ControlView button etc.) to pre-load any clips at a certain cue or time:
• Playback1.TempPreloadCue [CueID]
• Playback1.TempPreloadTime [Timecode]
The clips will get unloaded automatically once jumped into them.
• define a “Clip Hold Time”. Your clip will still be rendered for the specified time after the playhead left the clip. Meanwhile the next clip can be loaded (either in foreground or background, depending on time and Z-hierarchy), while the previous clip is still present.
The Clip Hold Time can be defined for the whole sequence as “Default Clip Hold Time” (default: 50ms), or on single clip basis: Activate “Enable Hold Mode” (default: false) and specify the “Release Hold Time” (default: 1 sec) and – if desired – a “Hold Fade Time” (default: 13 frames). Once the clip specific Hold Mode is enabled, this value will overwrite the sequence's “Default Clip Hold Time”.
My playback is out of sync. How do I re-sync my playback automatically?
Vertex is constantly improving its abilities to automatically synchronize the playback of multiple clips on multiple outputs and multiple systems. If you are experiencing playback out of sync, a very quick manual PAUSE/PLAY command will most likely solve your synchronization issue.
Tip: In most cases, out-of-sync playback is caused by the lack of your clips' pre-load time. E.g., skipping to a position in your sequence with clips that are not preloaded and instantly hitting PLAY will force all clips to start playing without being loaded. To counteract such events each sequence has its “Load Goto Play Cue Wait Time” property (default: 1 sec). When using the script “GotoCue Play”, this property defines a buffer in time for VERTEX to anticipate clips that are not set to pre-loaded or haven’t been temporarily preloaded.
My hardware’s performance is absolutely not matching the content’s requirements. Is there any chance – at least for pre-programming or rehearsal scenarios – to enable a fluid playback of the content?
There are multiple options available, depending on your timeframe and emergency severity:
• transcode your content by using our build-in content transcoder to generate HAP files easily. Right-Click your content and select “Transcode” from the context menu.
• reduce your surface's resolution by using the surface property “Down Scale Factor” (Default: 1).
• reduce your individual contents framerate by using the content property “Custom Video FPS” (Default: 0).
I’ve set up my systems accordingly and applied all Windows and NVIDIA tweaks (all outputs w/ same framerate, mosaic, etc.) to get the best performance out of my hardware. But still Vertex is showing issues in playback behavior. What can I do?
Some general adjustments can be made to ensure a higher performance:
• set system property “Disable Preview in Fullscreen” (default: false) to TRUE to disable the UI’s Render Editor Window in order to save resources.
• set system property “Render LocalSystem Only” (default: false) to ensure the particular system is only rendering its specific surfaces.
• Reduce your systems “Render Window Size” to the resolution that is actually required and limit your GPUs output quantity accordingly. Disable outputs that are not in use.