•Whereas color correction fixes issues in your source material, color grading would be the next step in giving your project a unified look in a certain style.
•If you choose to add color grading to your project, it generally should be applied after color correction.
•Color grading can also be applied from the Video FX Library.
Color Grading with LUTs
•LUT stands for Look-Up Table - a table of numerical values that transforms an image's contrast and color. LUTs are commonly used by filmmakers and video editors to efficiently control the aesthetic or look of their footage.
•Color grading with LUTs can be applied to individual clip containers as well as to entire surfaces at the output end of your rendering pipeline.
•VERTEX supports 3D LUTs in the file format .cube and custom horizontal PNG strips.
How to apply a LUT to a clip container:
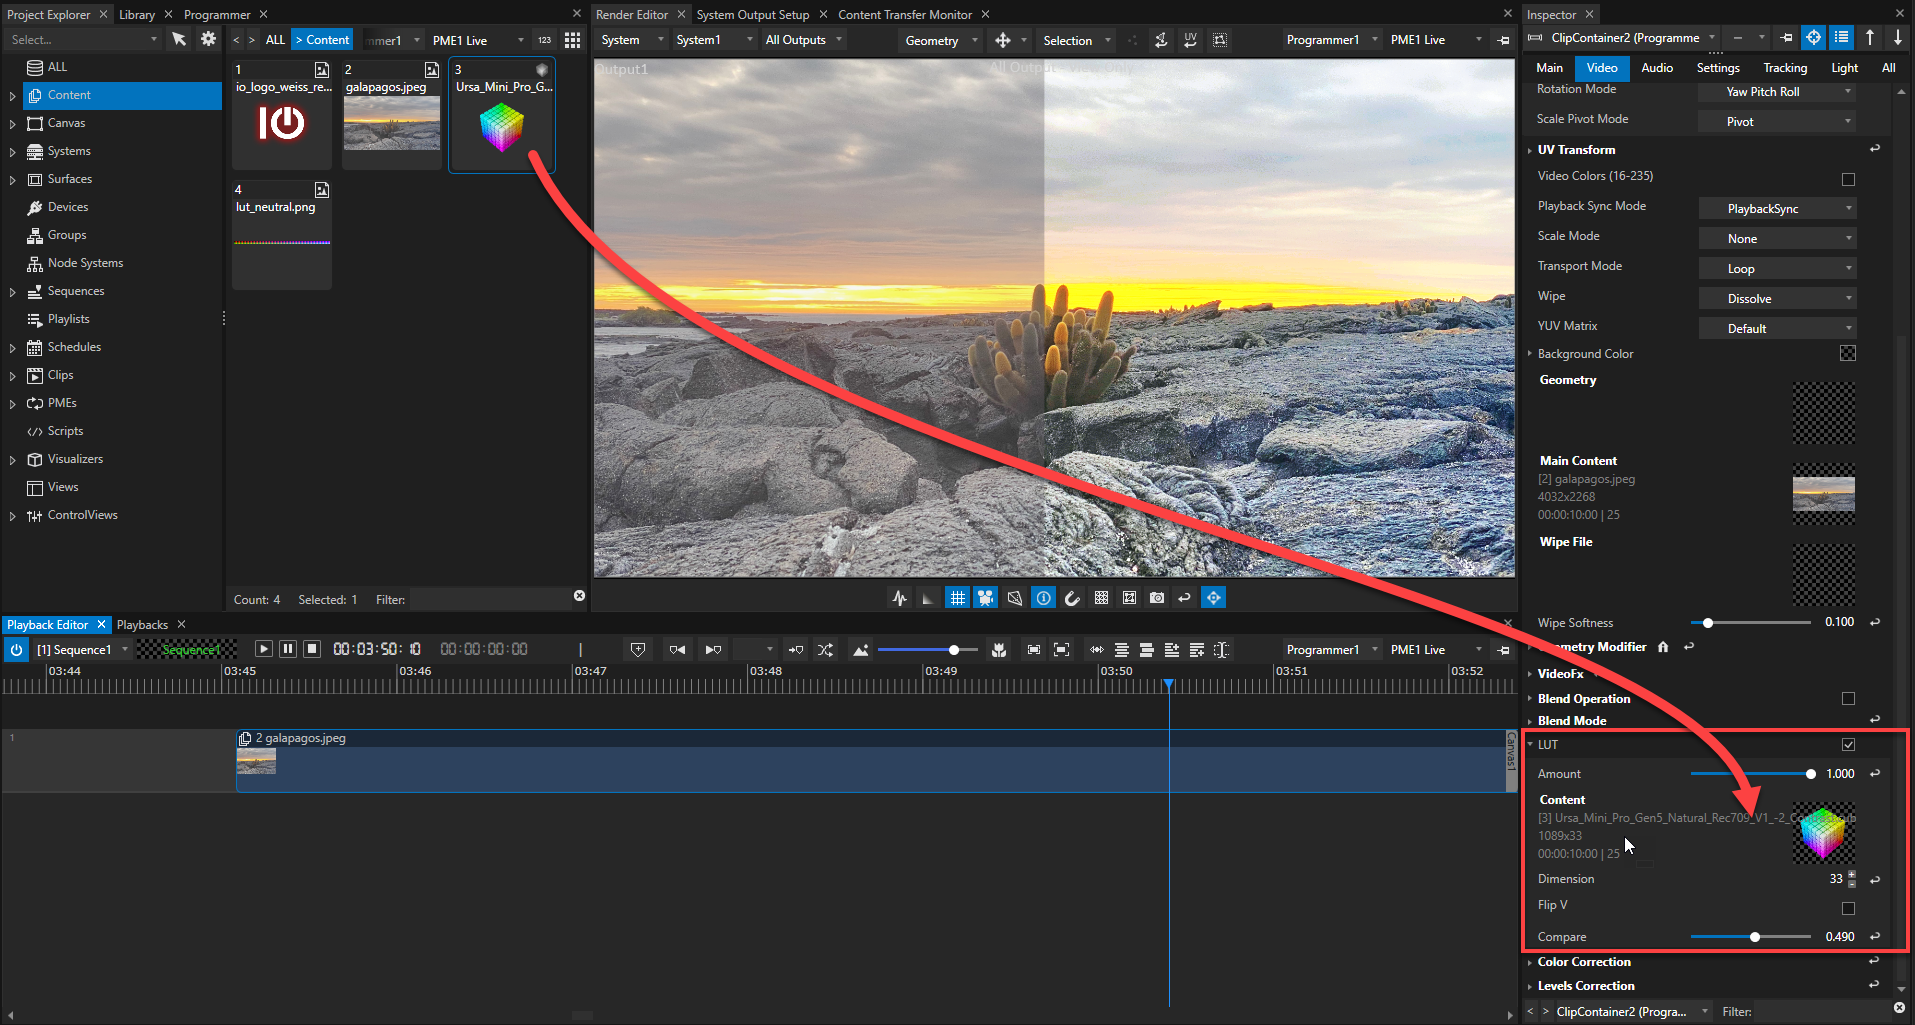
•Import the LUT into the content folder of your project explorer (right-click context menu, or MAIN MENU -> FILE -> File... or press CTRL+I).
•Select the clip container you want to apply the LUT to and go to the Video tab in the inspector.
•Drag the LUT from the project explorer into the inspector and drop it into the field labeled Content in the LUT settings.
•If the colors show abnormal results try flipping the LUT vertically (Flip V setting).
•Control the blend between the original and the graded colors with the Amount fader.
•Use the Compare fader to split the image into original and graded to compare your results.
•Alternatively, use the LUT enable check box.
•The Dimensions setting allows for values up to 128 when adding a horizontal PNG strip instead of a .cube file.
Color Grading On Surface Level
•On the top level of VERTEX's rendering engine you can change the color parameters for the entire surface/ output.
•First, change the view mode in your render editor from Canvas to System, DMX Mapping or Surface Map ; the render editor won't show you any results in Canvas View if your color editing took place on the surface level.
•Select a surface in your project explorer and go to the Video tab in the inspector.
•Here you can either do color corrections or apply LUTs for the entire surface as described previously.
•Furthermore you can pick a color temperature and adjust its intensity for the surface/output.

Color Grading Editor
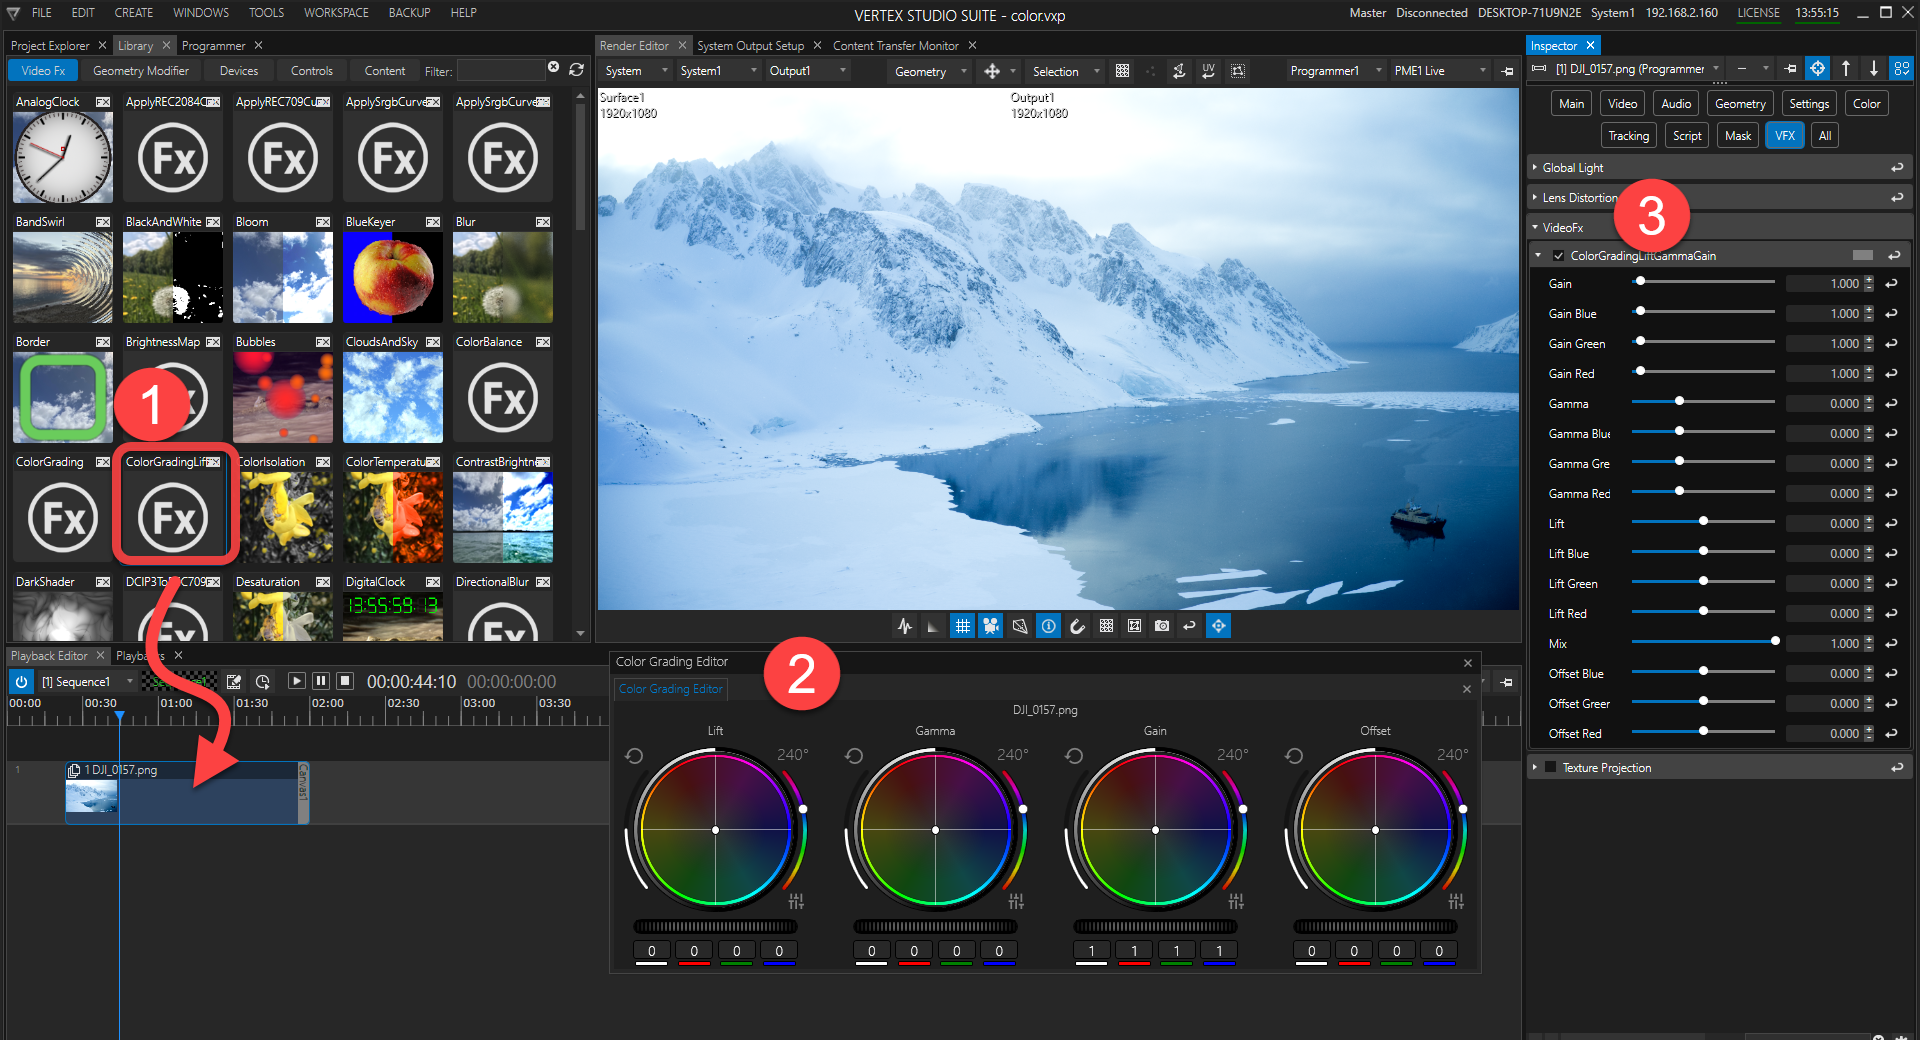
1.Go to Library > Video FX > ColorGradingLift and assign it to a Surface or ClipContainer per drag & drop.
2.Go to Main Menu > Windows > Tools > Color Grading Editor to open the floating & dockable editor tab.
Once the editor tab is opened, select the Clip Container or Surface in order to activate it in the editor.
3.Color grading settings adjusted in the editor can also be accessed in the inspector.