VERTEX's timer function allows the display of running and remaining time, as well as triggering 4 separate scripts by countdown:
•at the start of a timer
•once the timer is finished
•if the timer is set to restart the countdown in a loop
•for when the timer is stopped
An example for a possible application would be a museum setup, where visitors pass a triggering device that starts the timer prompting a cue or playback. Or a Clip Container's end script can trigger the start of a timer to tell the audience the time remaining until the next show during an intermission.
How It Works
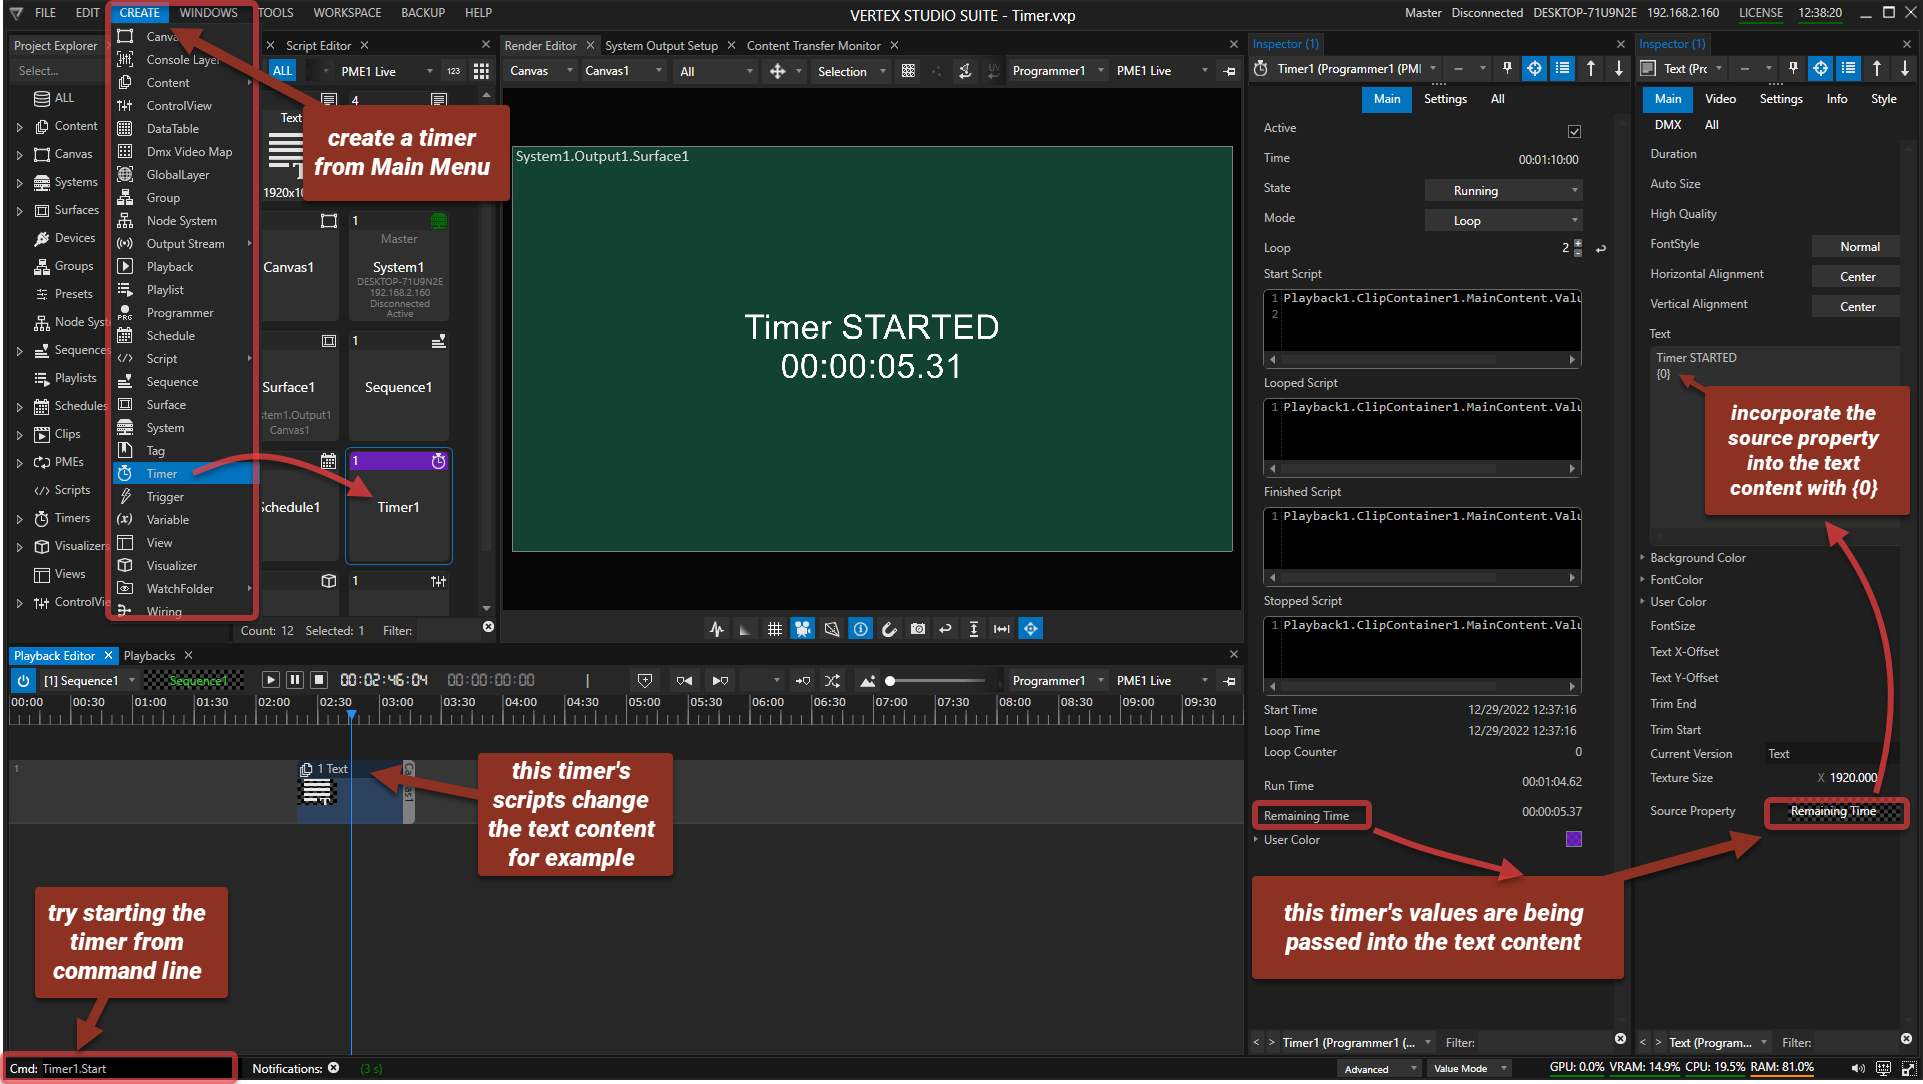
The example above explained:
•A timer is being created by going to MAIN MENU > CREATE > TIMER.
•Pin the timer to a new Inspector via the context menu (right click on the timer tile in Project Explorer).
•Create a text content (either MAIN MENU > CREATE > CONTENT or context menu on Content in Project Explorer).
•Go to the timer's Inspector, drag Run Time or Remaining Time and drop it into the text content's Inspecor Source Property field.
•Drag & Drop the text content into the Sequence and the timer will now be displayed as text content. If you wish to write additional text, it will override the source property display. Incorporate the value back into the text body by adding "{0}" .
•Create more text content to display all timer states from Started (running) to Stopped.
•Each timer-script in this example changes the text content of ClipContainer1 so that the displayed text will reflect the changed timer status (started, finished, etc.):
Start Script: Playback1.ClipContainer1.MainContent.Value = Content1 - text content says TIMER STARTED plus time display.
Finished Script: Playback1.ClipContainer1.MainContent.Value = Content2 - different text content says TIMER FINISHED plus time display.
•Start the timer with the command line: Timer1.Start or use this script command elsewhere- i.e. in a Control View Editor on a button.
Settings
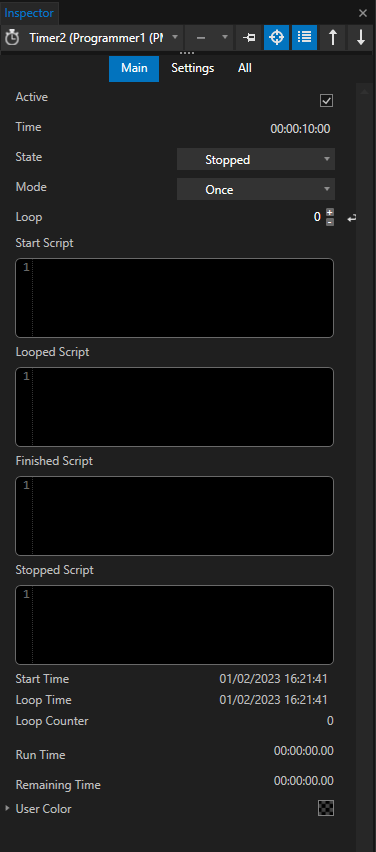
In the timer's Inspector, the following settings are available:
Active check box |
enables / disables the timer. |
Time |
sets the duration of the countdown with a double-click on the digits. |
State |
drop-down menu automatically updates the current status of the timer and allows for manual changes as well. Possible timer states are: Running, Paused, Finished and Stopped. Changes in a timer's status will execute the timer's scripts. |
Mode |
has got two possible settings: Once (default) and Loop. If set to Loop, the timer will start again after it has finished counting down. Loop sets the number of times the cycle restarts. |
Start Script |
is executed at the start of the timer. |
Looped Script |
is executed at the beginning of each loop cycle. |
Finished Script |
is executed once the countdown is finished. |
Stopped |
is executed when the timer is stopped. |
Start Time |
captures date and time when the timer was last started. |
Loop Time |
captures date and time when the last loop cycle was started. |
Loop Counter |
counts the number of loop cycles executed. |
Run Time / Remaining Time |
captures the current running /remaining time which can be exported as a value in scripts or be simply displayed in text content. |
User Color |
customizes the timer tile's color. |

