•VERTEX offers a quick and efficient way to store multiple inspector settings as a whole in presets.
•Presets can be assigned to multiple project items with one click - a real time-saver when preparing lots of content for your show.
•At the time of VERTEX R3 in 2022, all properties that are controllable by animation keyframes can be stored as a preset.
Creating a Preset
Let's say, you have an image on your canvas in a certain position that you would really like to use more often. To to store its Transform properties in a preset, just follow the next four steps:
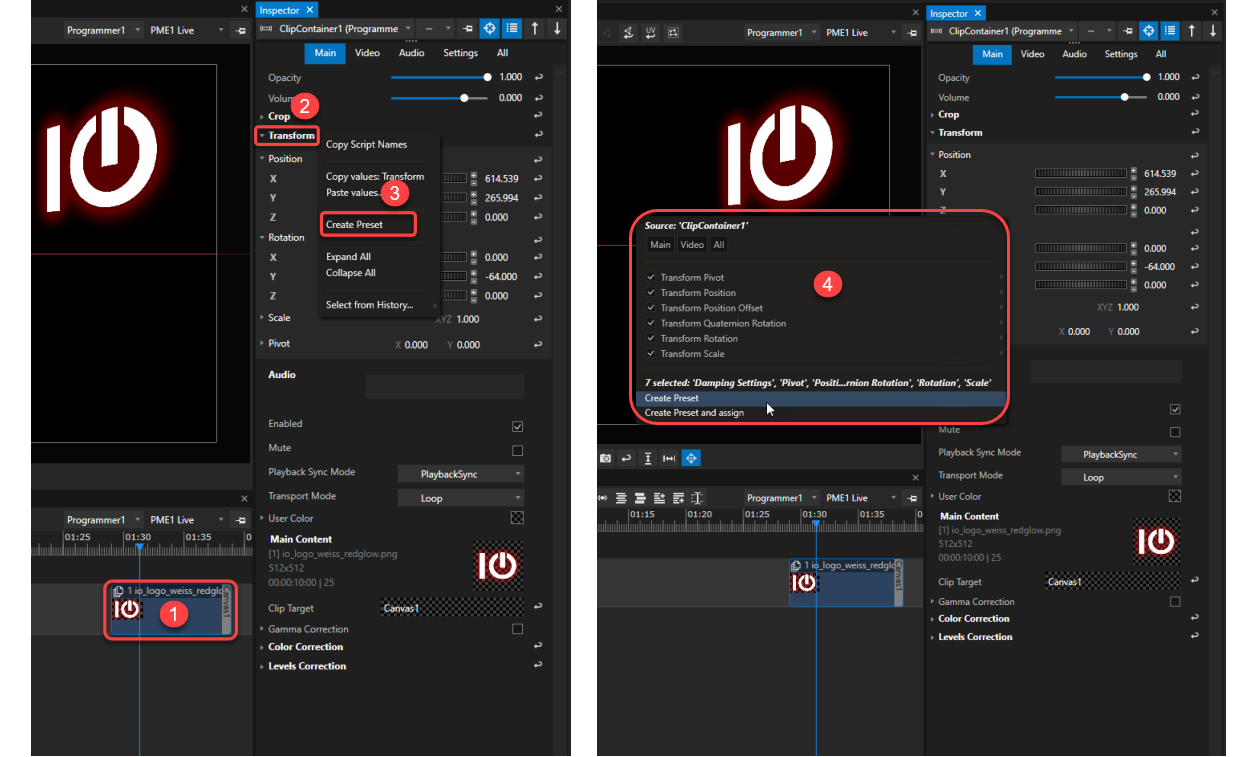
1.Select the item and access its properties in the inspector.
2.Right-click on the Transform properties to open the context menu and...
3....select Create Preset
4.A new dialogue window will ask you to select what particular properties you want to include in your new preset.

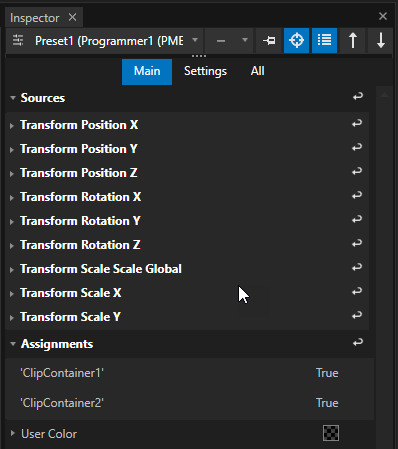
A new preset has been created. If you select it in the project explorer, the inspector window will show all the source properties that have been stored in the new preset.
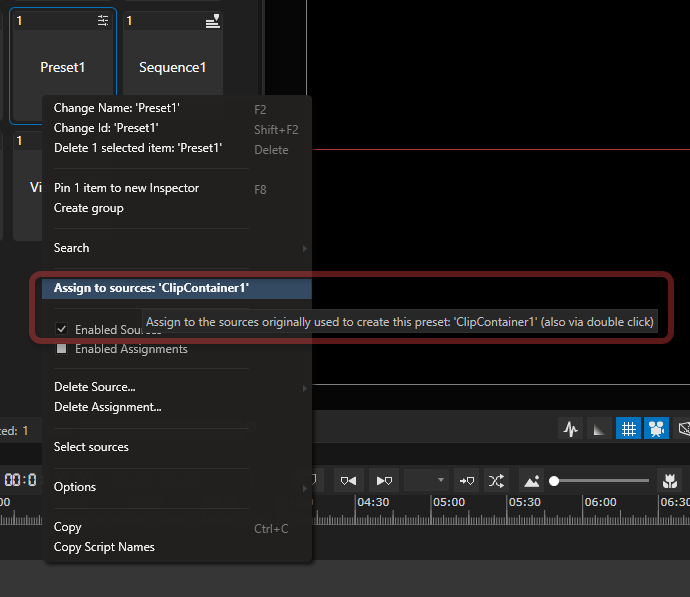
Assigning Source & Destination
Now you have created a new preset from the transform properties of clip container 1.
If you change those properties in the clip container for some reason and need to go back to what you stored as a preset, you can assign the preset back to its source:
Either by double clicking on the preset or via the right-click context menu:
There's also a third option to assign the preset. Just drag it from the project explorer and drop it into the clip container you want to assign it to.
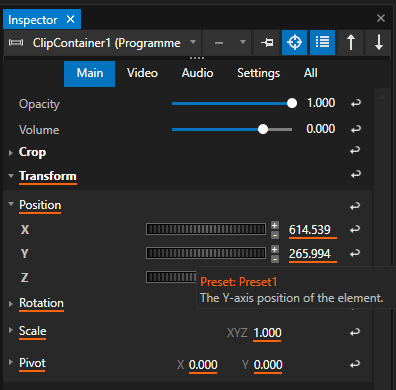
At any rate, if you take a look at the inspector window, you will notice how the Transform properties of Clip Container 1 are now underlined in orange.
This is to indicate that the property values now come from a preset and no longer from the operator in Value Mode.
Assigning the preset to a different clip container works like the same way mentioned above:
Select the clip container in your sequence and access the preset's context menu with a right-click where you choose Assign to selection:
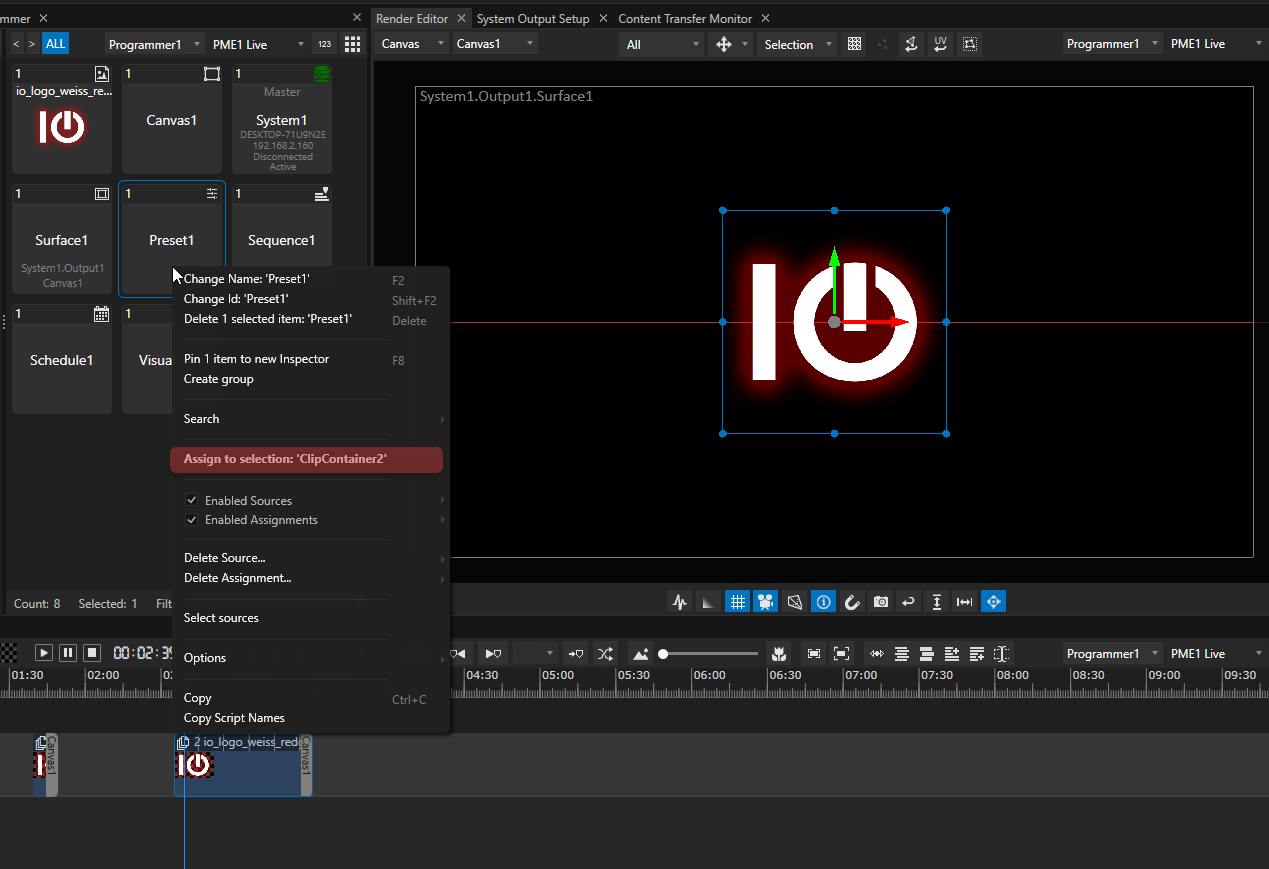
Notice how the preset's Assignments list in the inspector has grown by one item.
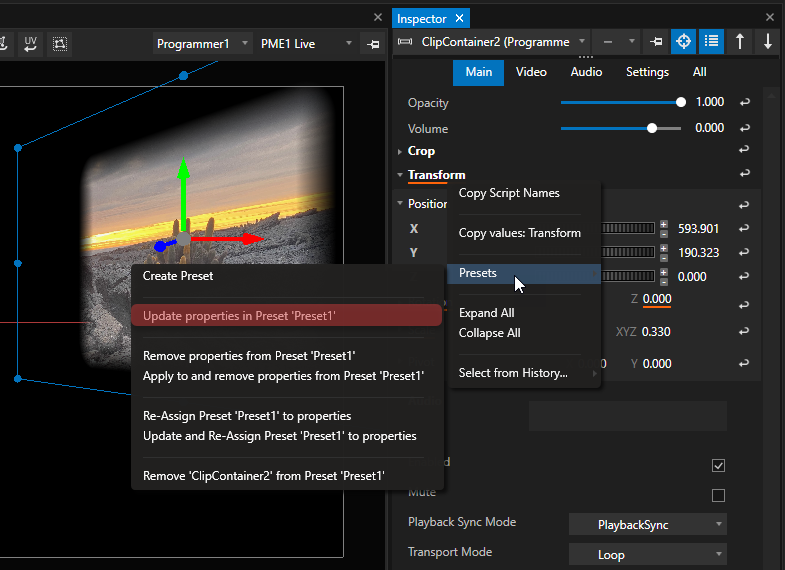
Updating a Preset
If you need to change the property values stored in a preset, simply access the Presets context menu in the inspector by right-clicking on the values that have been changed and choose Update properties in Preset from there:
Group Presets
A preset can not only store properties for one single item, but also for multiple items in a group:
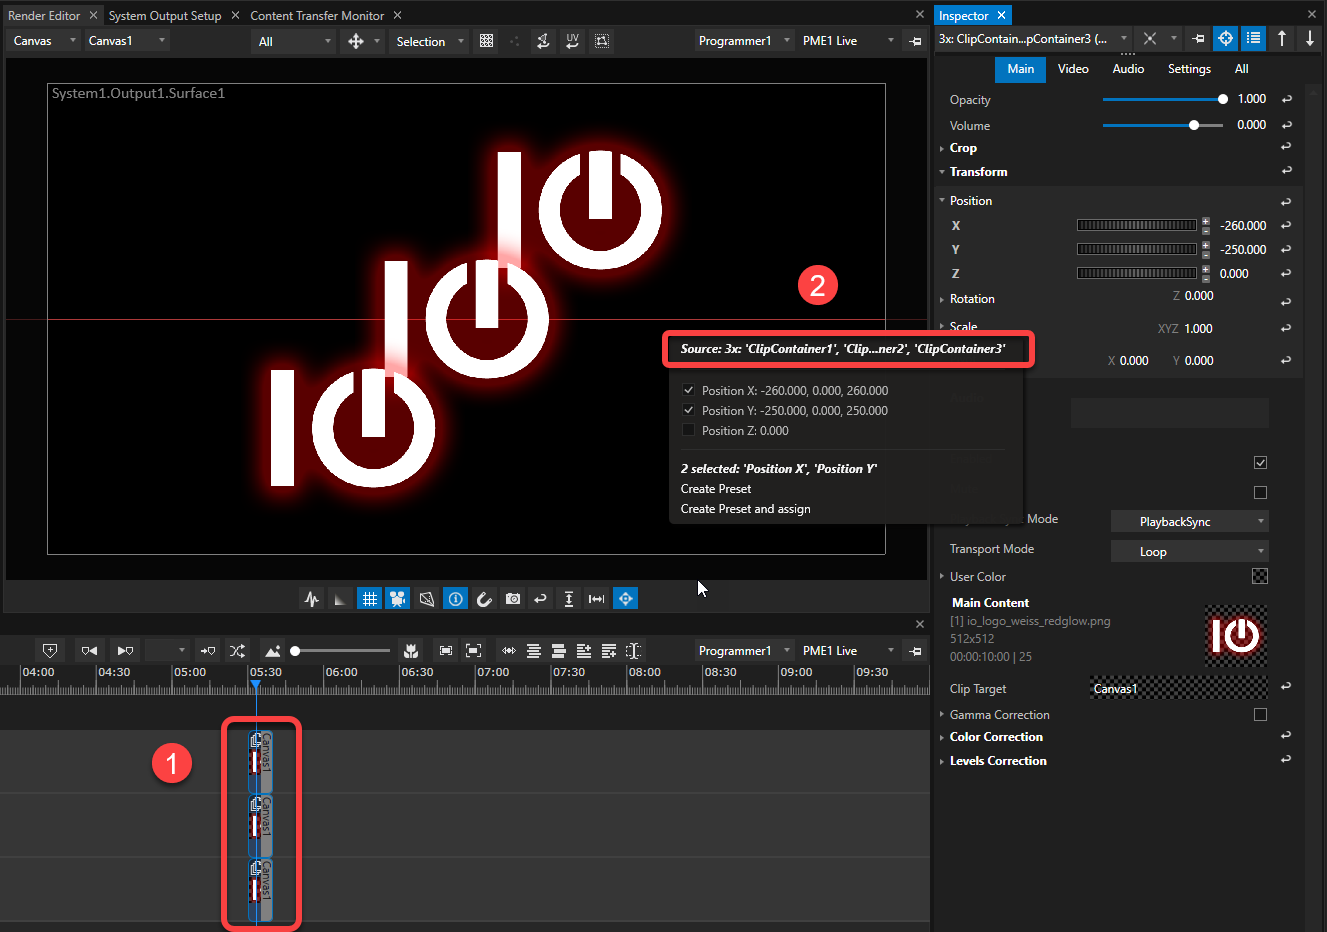
1) To create a group preset first select a group of items (clip containers, DMX devices etc.)
2) Access the context menu of a property in the inspector. The preset source will now name a group of items (3 clip containers in the example above).
Position and offset of this group can now be assigned to any other group of items. Keep in mind, that if the assigned group is larger than the source, VERTEX will automatically stop interpolating at the last or highest value.